


文章目录
展开分布式监控介绍
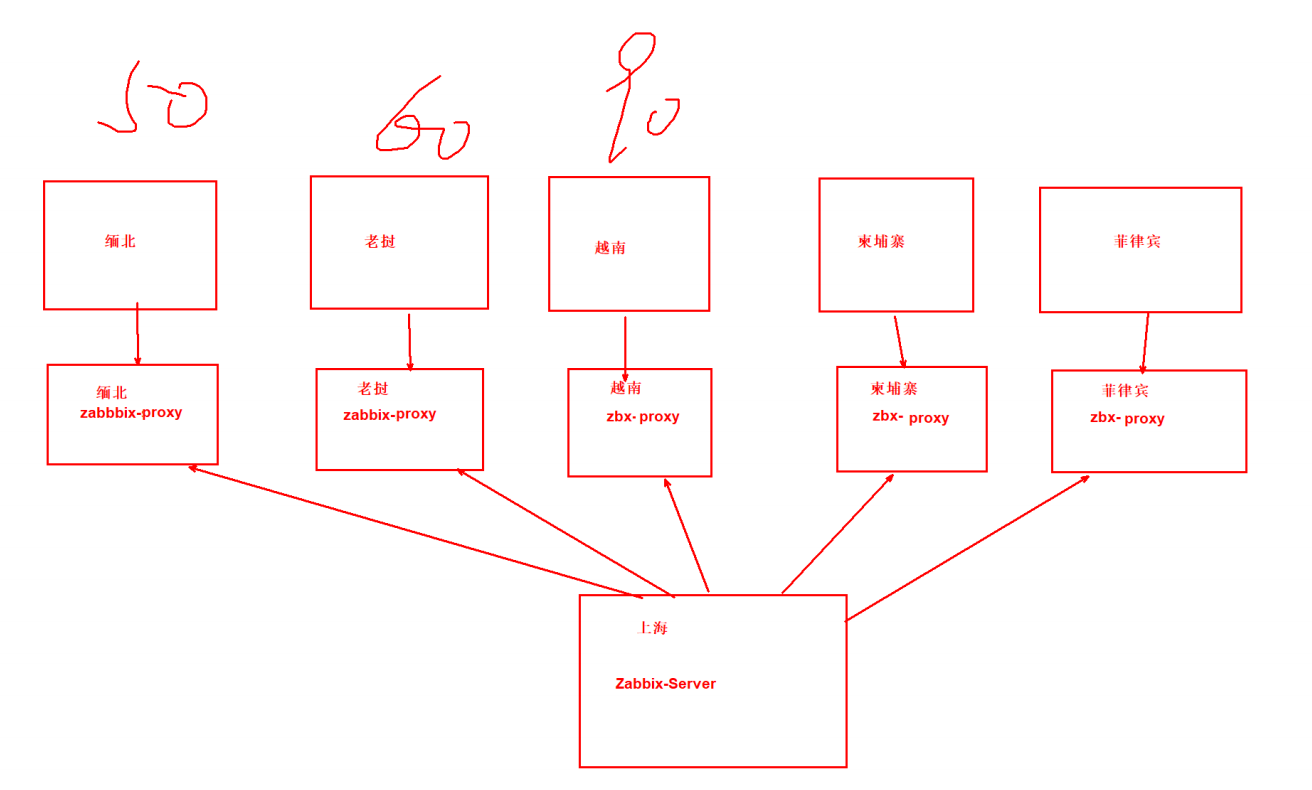
- 服务器有上万台,一台zabbix server
- 机房:缅北、老挝、越南、柬埔寨、菲律宾、阿富汗、伊拉克
专线
交换机打通内网
zabbix server → zabbix proxy →zabbix agent
分布式监控
proxy特征
| proxy | |
|---|---|
| 轻量级(Lightweight) | Yes |
| 图形界面(GUI) | No |
| 独立工作(Works independently) | Yes |
| 易于维护(Easy maintenance) | Yes |
| 自动生成数据库(Automatic DB creation) | Yes |
| 本地管理(Local administration) | No |
| 准备嵌入式硬件(Ready for embedded hardware) | Yes |
| 单向TCP连接(One way TCP connections) | Yes |
| 集中配置(Centralised configuration) | Yes |
| 生成通知(Generates notifications) | No |
zabbix porxy代理概述
zabbix proxy可以代替zabbix server收集性能和可用性数据,然后把数据汇报给zabbix server,并且在一定程度上分担了zabbix server的压力.
此外,当所有agents和proxies报告给一个Zabbix server并且所有数据都集中收集时,使用proxy是实现集中式和分布式监控的最简单方法。
zabbix proxy使用场景:
-
监控远程区域设备
-
监控本地网络不稳定区域
-
当zabbix 监控上干设备时,使用它来减轻server的压力
-
简化分布式监控的维护
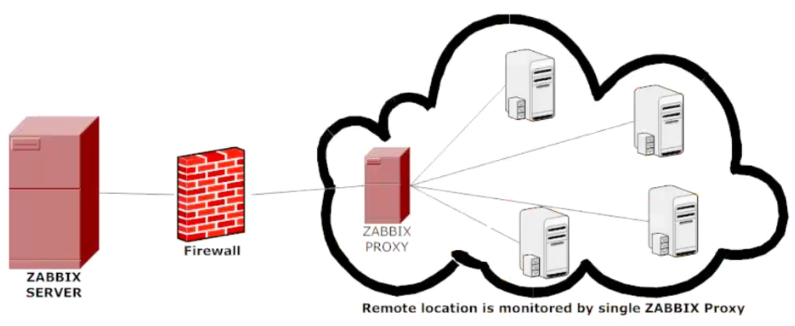
zabbix proxy 仅仅需要一条tcp连接到zabbix server,所以防火墙上仅仅需要加上一条规则即可。
proxy收集到数据之后,首先将数据缓存在本地,然后在一定得时间之后传递给zabbix server,这样就不会因为服务器的任何临时通信问题而丢失数据。这个时间由proxy配置文件中参数ProxyLocalBuffer和ProxyOfflineBuffer决定。
注意:
1.zabbix proxy数据库必须和server分开,否则数据会被破坏。
2.从Zabbix server数据库直接更新最新配置的proxy可能会比Zabbix server新,而Zabbix server的配置由于CacheUpdateFrequency的原因而无法快速更新。因此,proxy收集发送Zabbix server数据可能会被忽略。
zabbix proxy代理功能
zabbix proxy是一个数据收集器,它不计算触发器、不处理事件、不发送报警。有关proxy功能的概述,如下表:
| 功能 | proxy支持(yes/no) |
|---|---|
| 项目(Items) | |
| Zabbix agent checks | Yes |
| Zabbix agent checks (active) | Yes |
| Simple checks | Yes |
| Trapper items | Yes |
| SNMP checks | Yes |
| SNMP traps | Yes |
| IPMI checks | Yes |
| JMX checks | Yes |
| 日志文件监控(Log file monitoring) | Yes |
| 内部检查(Internal checks) | Yes |
| SSH checks | Yes |
| Telnet checks | Yes |
| 外部检查(External checks) | Yes |
| 内置web监控(Built-in web monitoring) | Yes |
| 网络发现(Network discovery) | Yes |
| 自动发现(Low-level discovery) | Yes |
| 触发器计算(Calculating triggers) | No |
| 处理事件(Processing events) | No |
| 发送报警(Sending alerts) | No |
| 远程命令(Remote commands) | No |
使用agent active模式,一定要记住在agent的配置文件参数ServerActive 加上proxy的IP地址。
部署zabbix-proxy
环境准备
| 主机名 | WanIP | LanIP | 角色 | 安装应用 |
|---|---|---|---|---|
| zabbix-server | 10.0.0.71 | 172.16.1.71 | zabbix-server | zabbix-server、zabbix-agent、zabbix-get |
| db01 | 10.0.0.51 | 172.16.1.51 | 数据库 | MySQL |
| lb01 | 10.0.0.5 | 172.16.1.5 | zabbix-proxy(缅北) | zabbix-proxy、MySQL |
| lb02 | 10.0.0.6 | 172.16.1.6 | zabbix-proxy(老挝) | zabbix-proxy、MySQL |
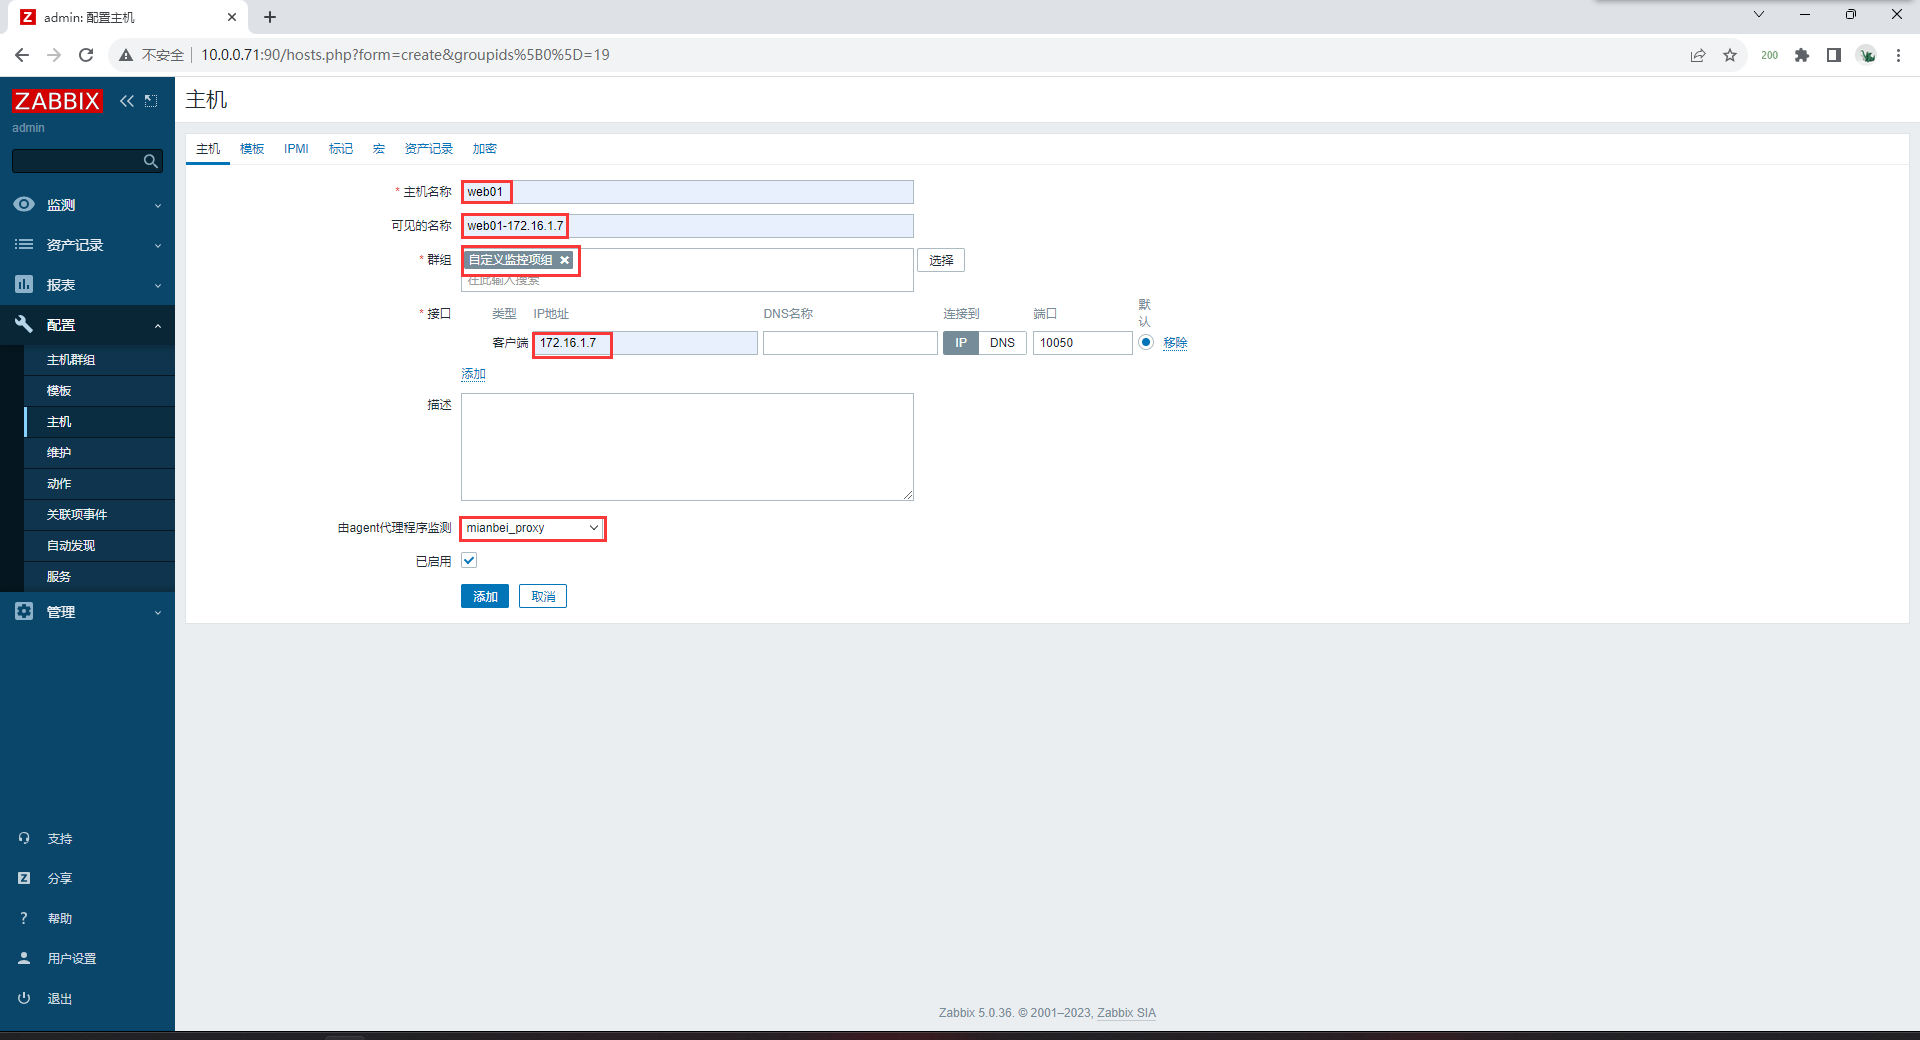
| web01 | 10.0.0.7 | 172.16.1.7 | zabbix-agent(缅北) | zabbix-agent |
| web02 | 10.0.0.8 | 172.16.1.8 | zabbix-agent(老挝) | zabbix-agent |
## 安装proxy
缅北proxy
[root@lb01 ~]# yum install -y https://mirrors.tuna.tsinghua.edu.cn/zabbix/zabbix/5.0/rhel/7/x86_64/zabbix-proxy-mysql-5.0.36-1.el7.x86_64.rpm
老挝proxy
[root@lb02 ~]# yum install -y https://mirrors.tuna.tsinghua.edu.cn/zabbix/zabbix/5.0/rhel/7/x86_64/zabbix-proxy-mysql-5.0.36-1.el7.x86_64.rpm
## 建库
mysql> create database mianbei_proxy charset utf8;
mysql> create database laowo_proxy charset utf8;
## 建用户
mysql> grant all on mianbei_proxy.* to mianbei@'172.16.1.%' identified by '123';
mysql> grant all on laowo_proxy.* to laowo@'172.16.1.%' identified by '123';
## 安装mysql客户端
[root@lb01 ~]# yum install -y mariadb
## 导入数据
[root@lb01 ~]# zcat /usr/share/doc/zabbix-proxy-mysql-5.0.36/schema.sql.gz |mysql -umianbei -p123 -h172.16.1.51 mianbei_proxy
[root@lb02 ~]# zcat /usr/share/doc/zabbix-proxy-mysql-5.0.36/schema.sql.gz |mysql -ulaowo -p123 -h172.16.1.51 laowo_proxy
## 检查数据
mysql> show databases;
+--------------------+
| Database |
+--------------------+
| information_schema |
| binlog |
| laowo_proxy |
| mianbei_proxy |
| mysql |
| performance_schema |
| sys |
| zabbix |
| zabbix3 |
+--------------------+
## 修改配置文件
[root@lb01 ~]# vim /etc/zabbix/zabbix_proxy.conf
Server=172.16.1.71
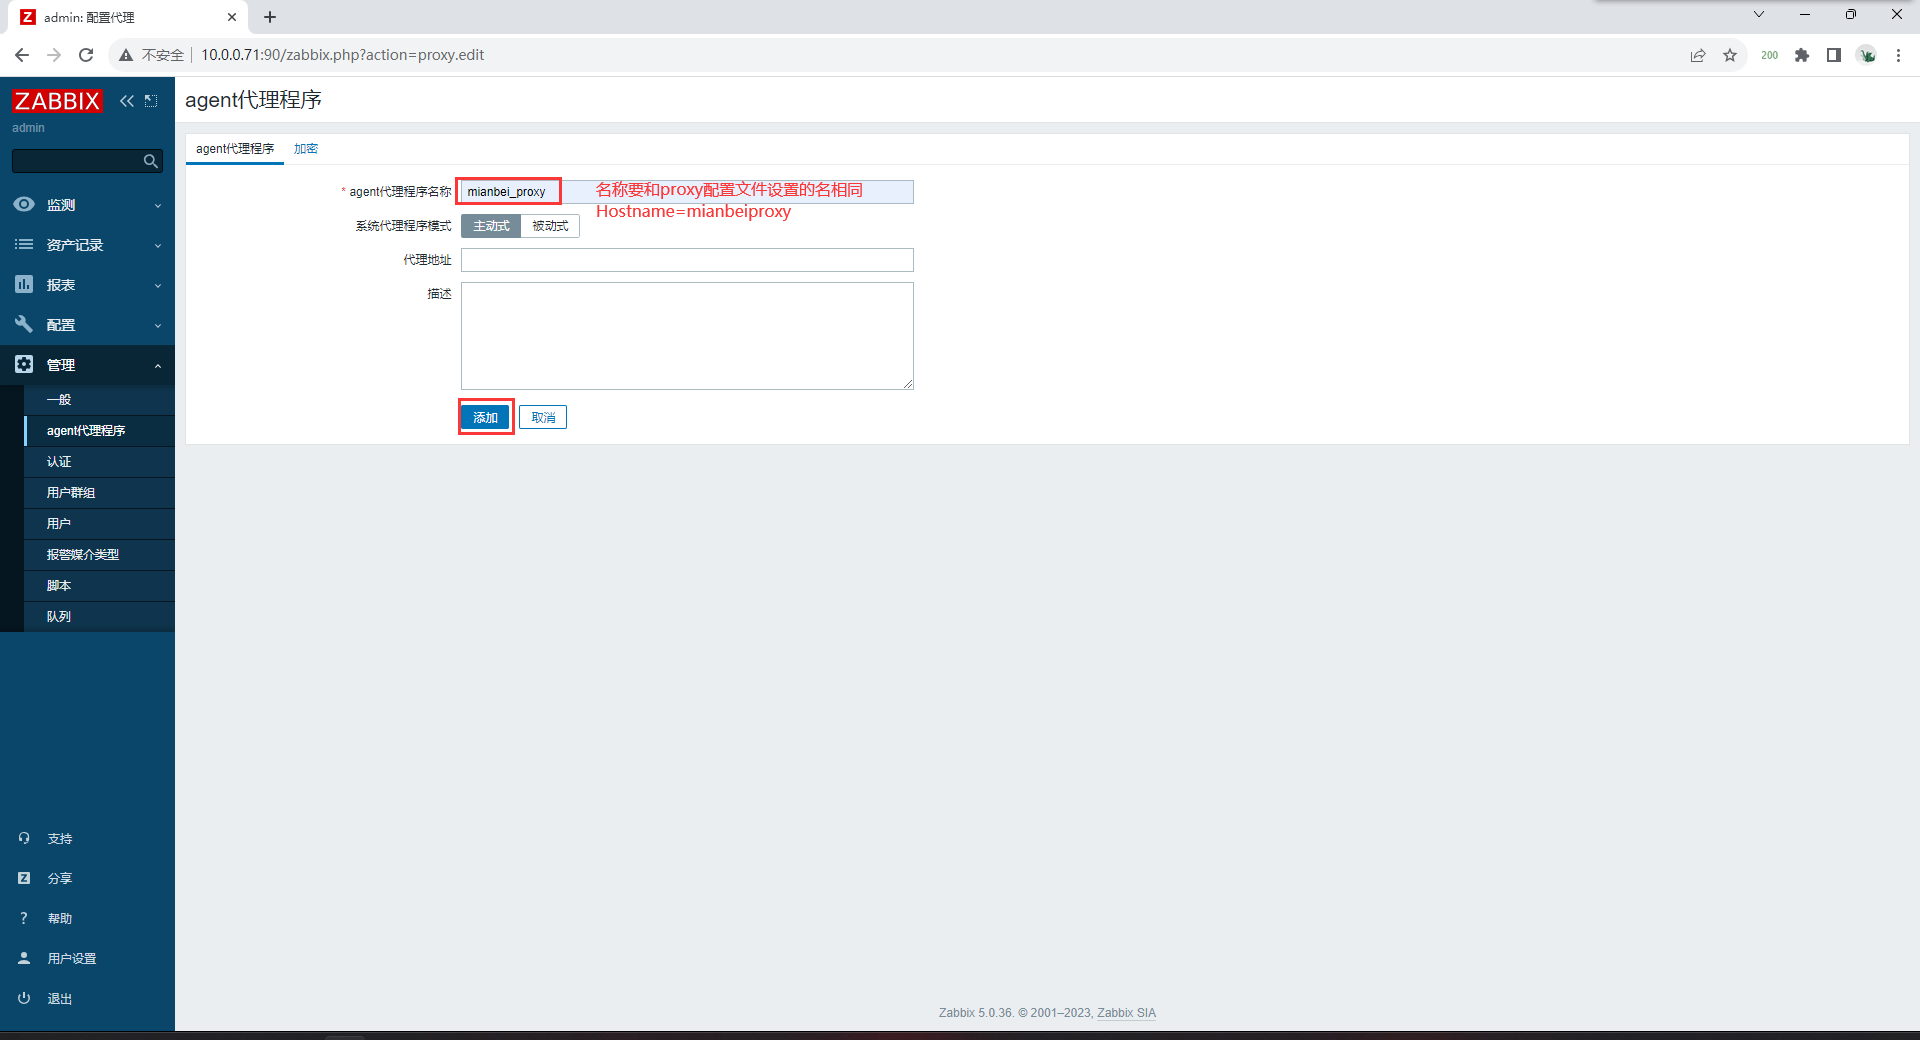
Hostname=mianbei_porxy
DBHost=172.16.1.51
DBName=mianbei_proxy
DBUser=mianbei
DBPassword=123
[root@lb02 ~]# vim /etc/zabbix/zabbix_proxy.conf
Server=172.16.1.71
Hostname=laowo_porxy
DBHost=172.16.1.51
DBName=laowo_proxy
DBUser=laowo
DBPassword=123
## 启动并加入开机自启
[root@lb01 ~]# systemctl start zabbix-proxy
[root@lb01 ~]# systemctl enable zabbix-proxy安装agent
## 安装
### 缅北agent
[root@web01 ~]# rpm -ivh https://mirrors.tuna.tsinghua.edu.cn/zabbix/zabbix/5.0/rhel/7/x86_64/zabbix-agent-5.0.36-1.el7.x86_64.rpm
### 老挝agent
[root@web02 ~]# rpm -ivh https://mirrors.tuna.tsinghua.edu.cn/zabbix/zabbix/5.0/rhel/7/x86_64/zabbix-agent-5.0.36-1.el7.x86_64.rpm
## 修改配置文件
[root@web01 ~]# vim /etc/zabbix/zabbix_agentd.conf
Server=172.16.1.5
ServerActive=172.16.1.5
Hostname=web01
[root@web02 ~]# vim /etc/zabbix/zabbix_agentd.conf
Server=172.16.1.6
ServerActive=172.16.1.6
Hostname=web02
## 启动加入开机自启
[root@web01 ~]# systemctl start zabbix-agent
[root@web01 ~]# systemctl enable zabbix-agent
[root@web02 ~]# systemctl start zabbix-agent
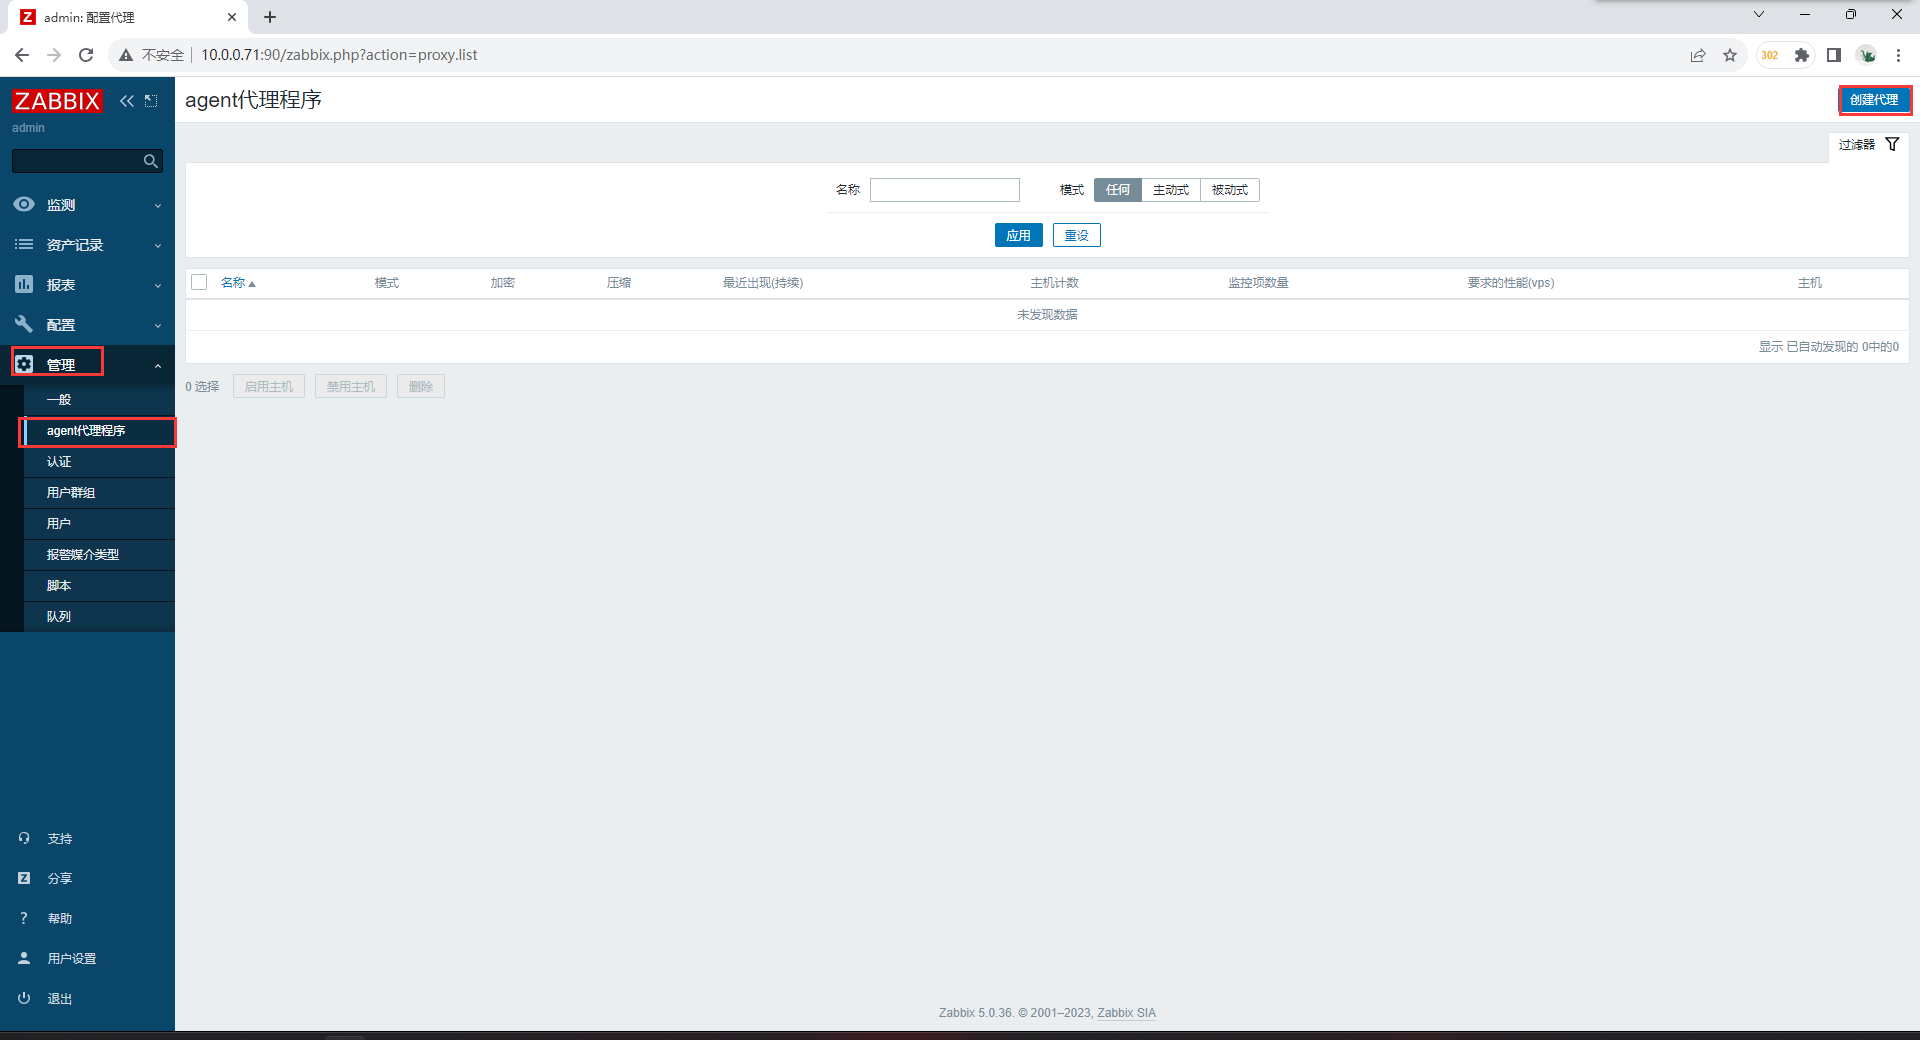
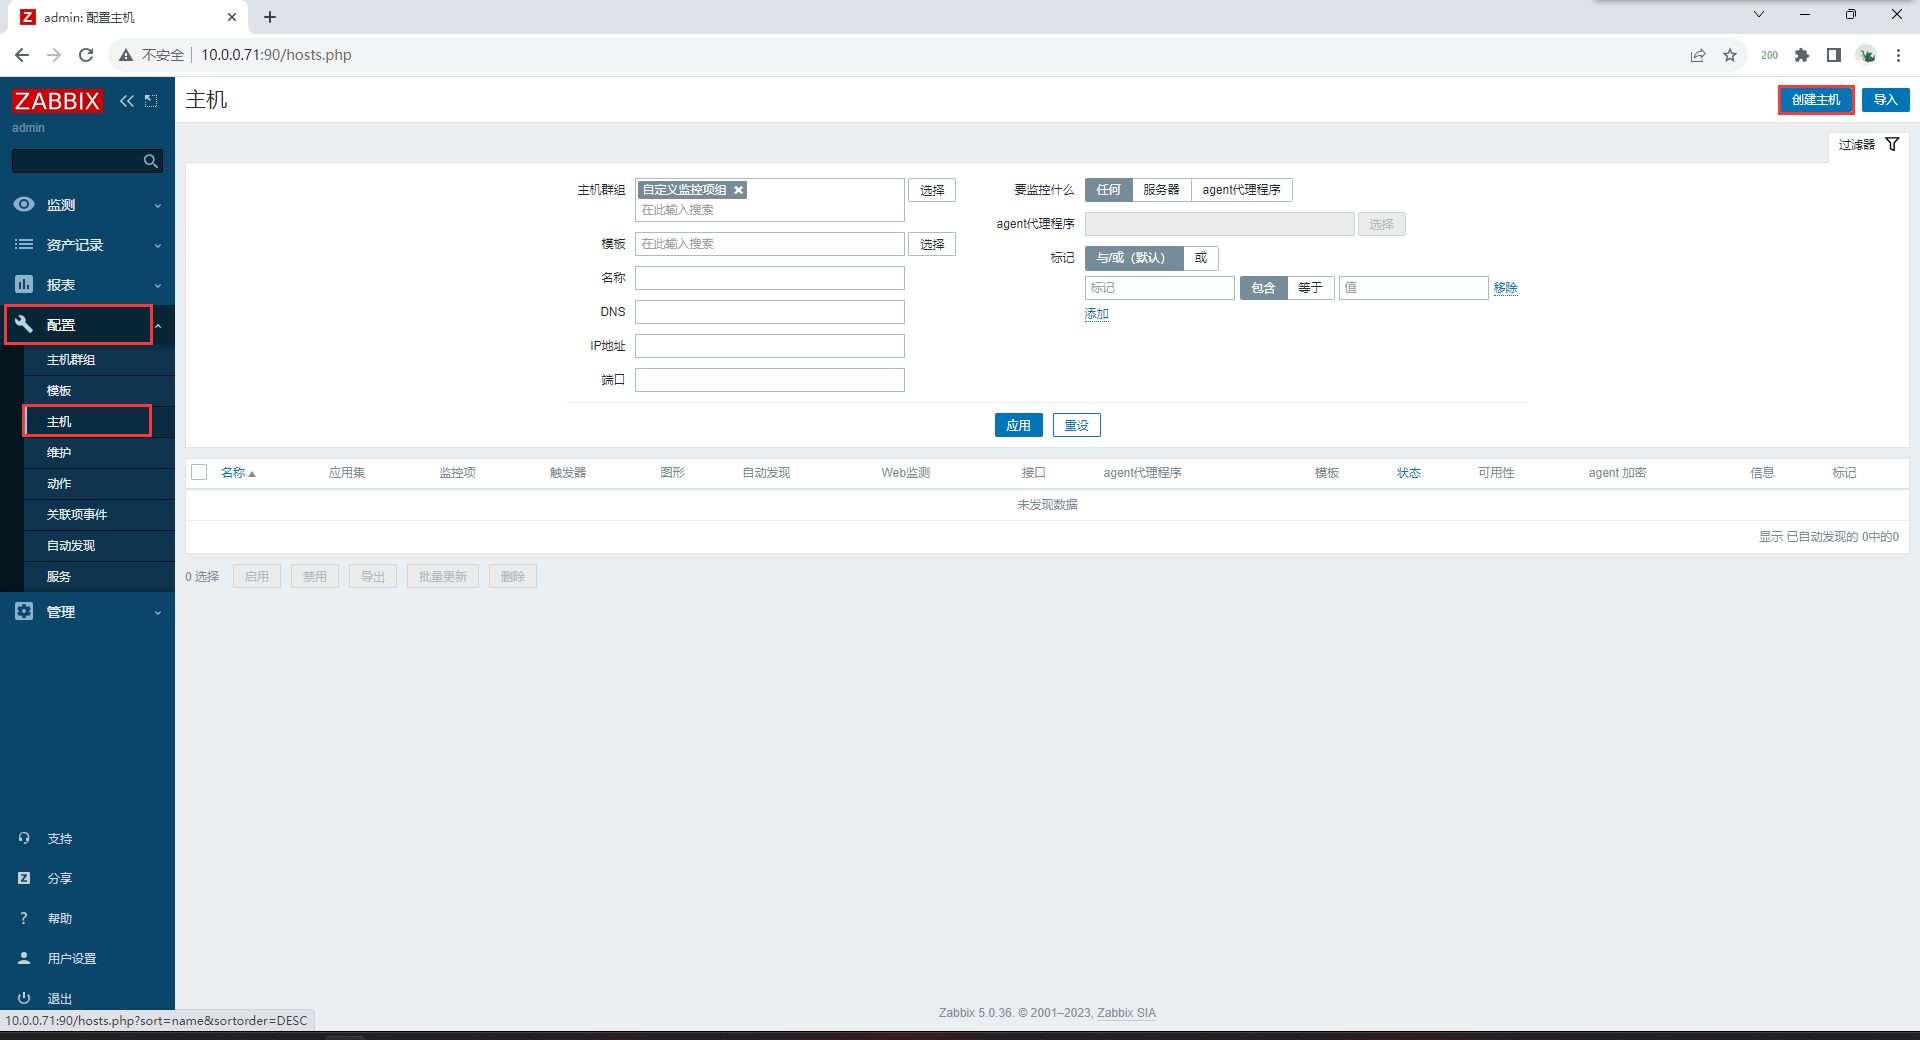
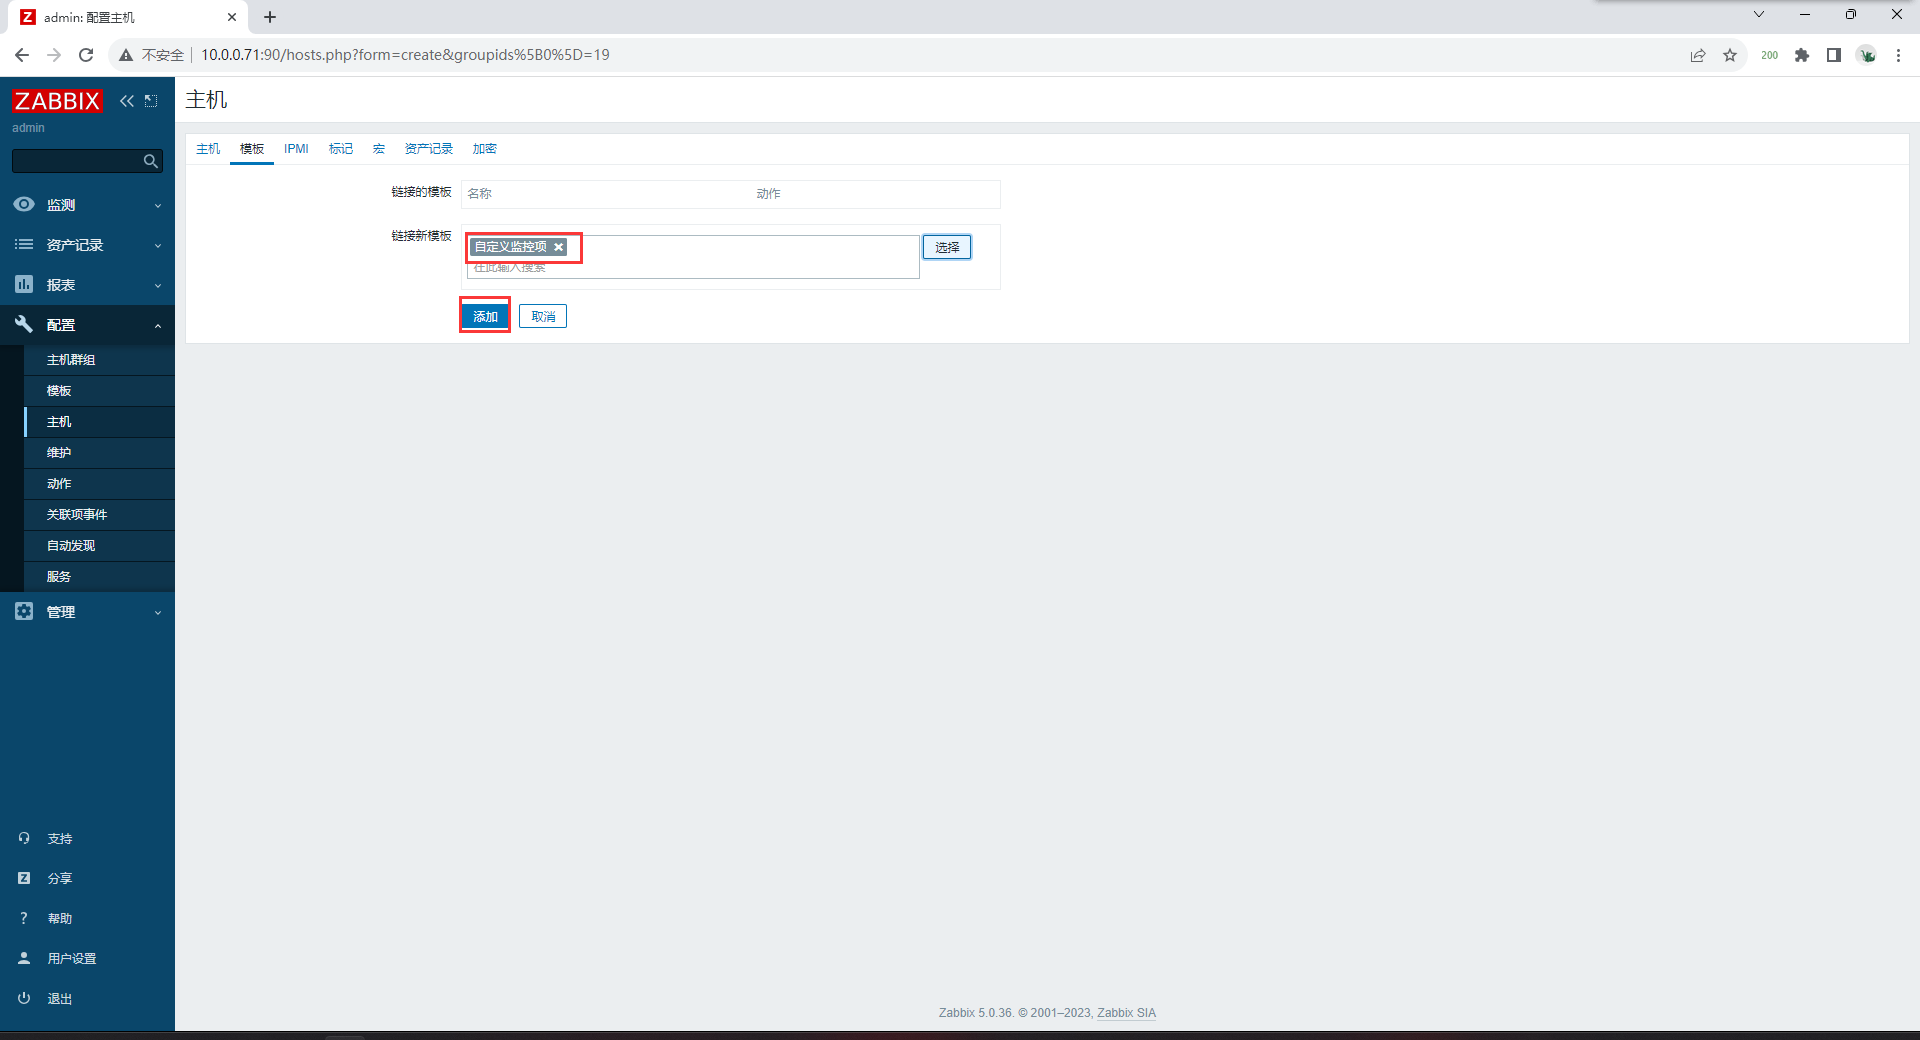
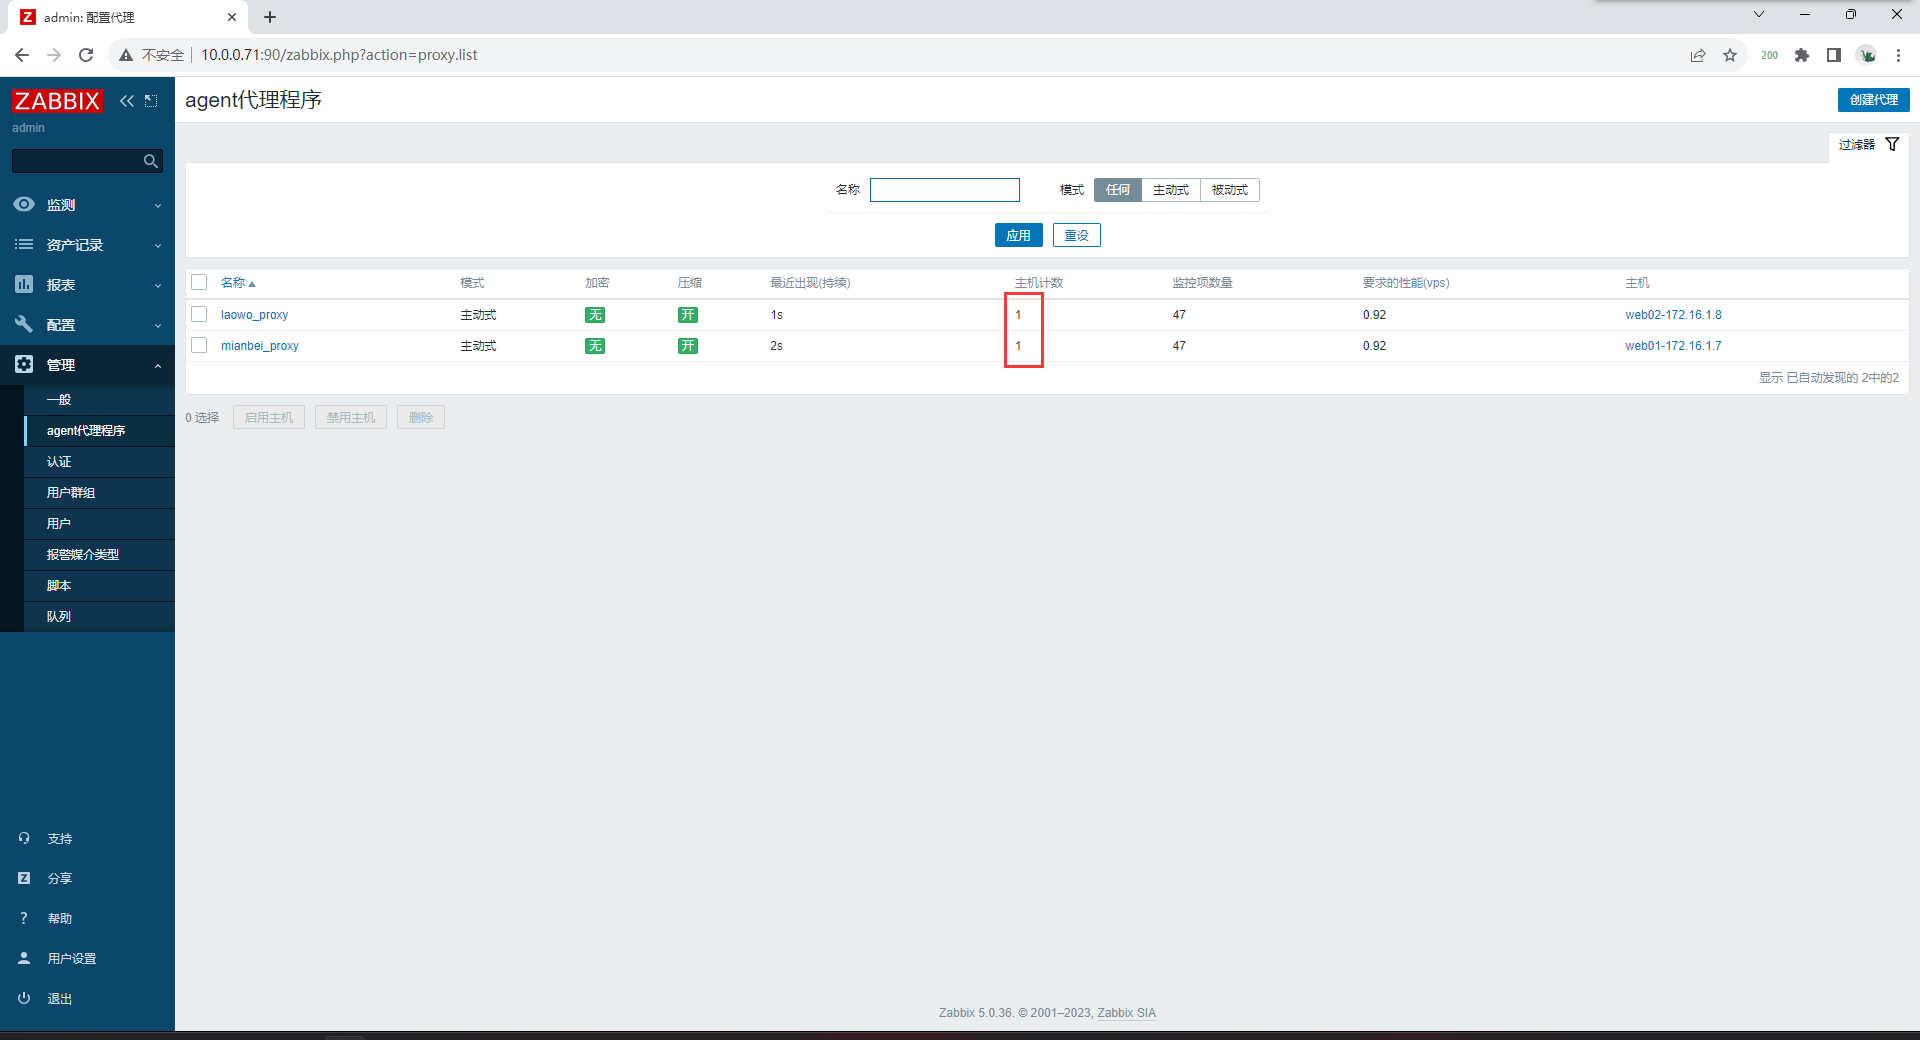
[root@web02 ~]# systemctl enable zabbix-agentweb页面添加代理程序
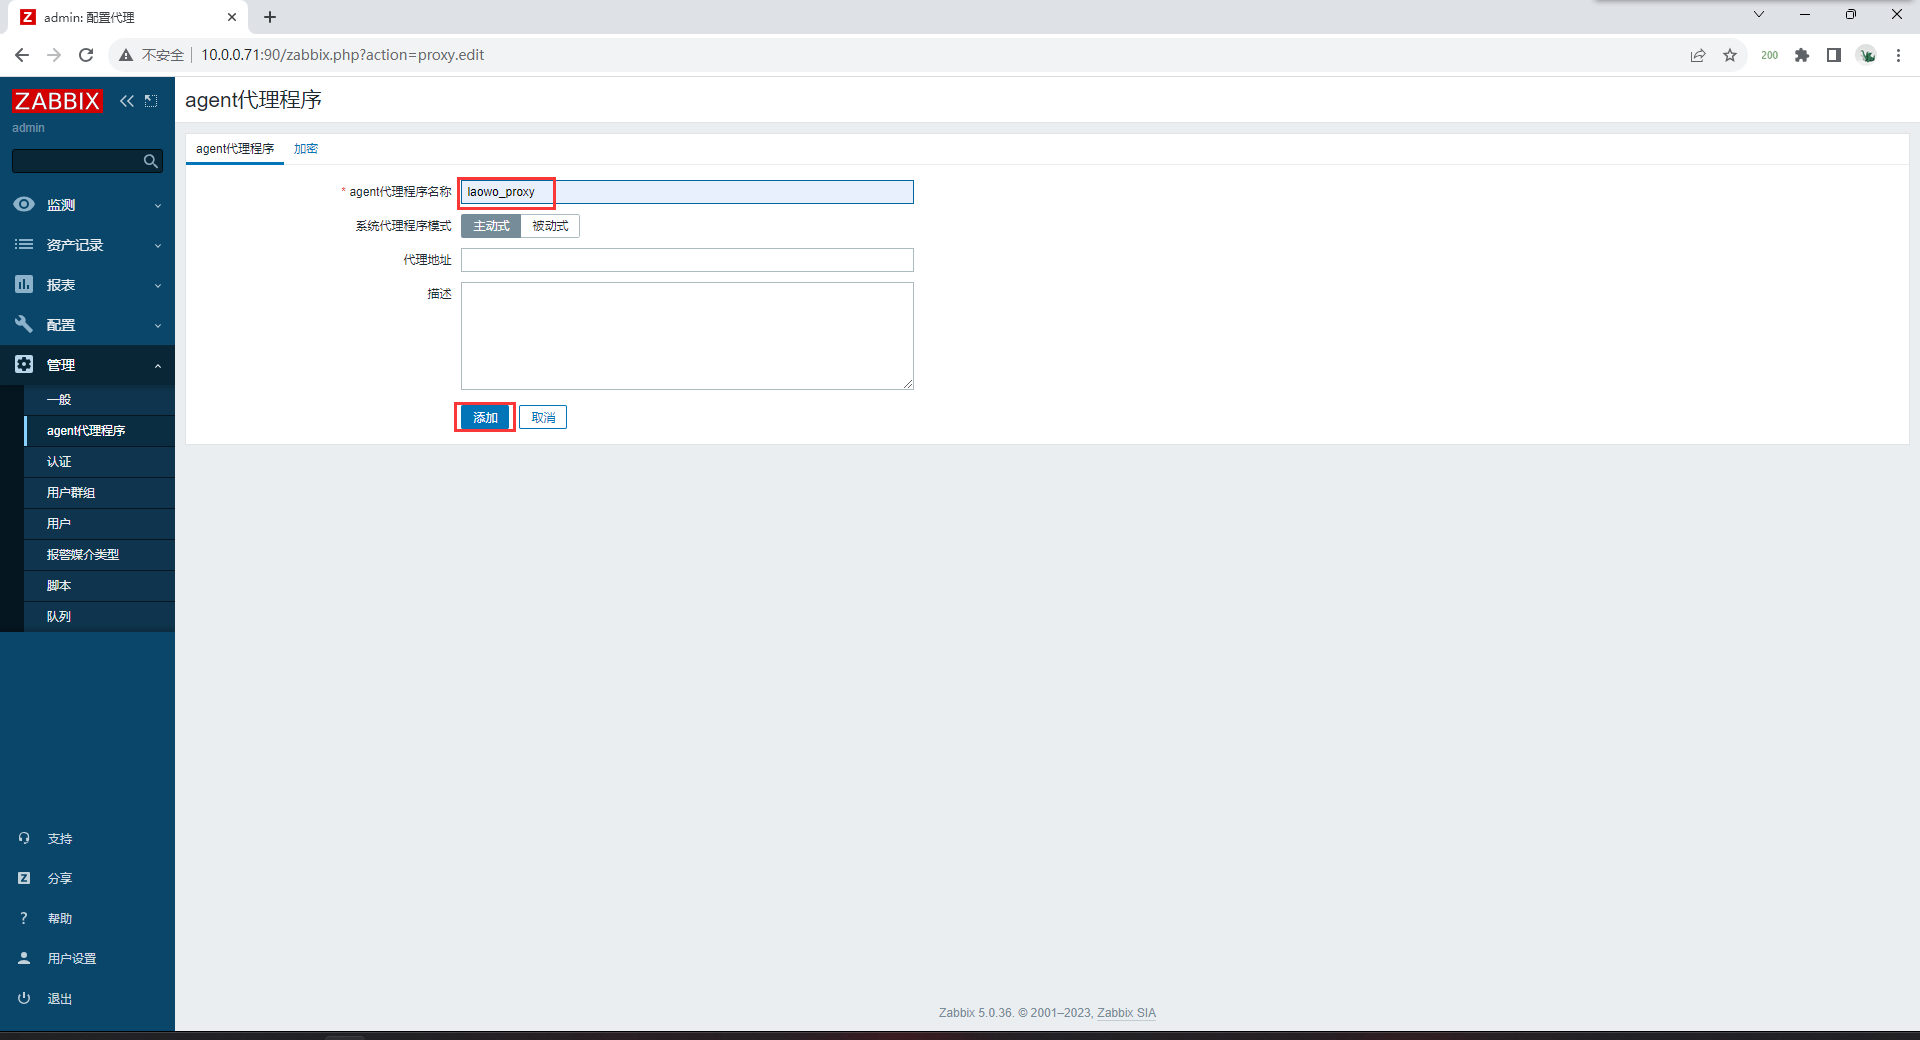

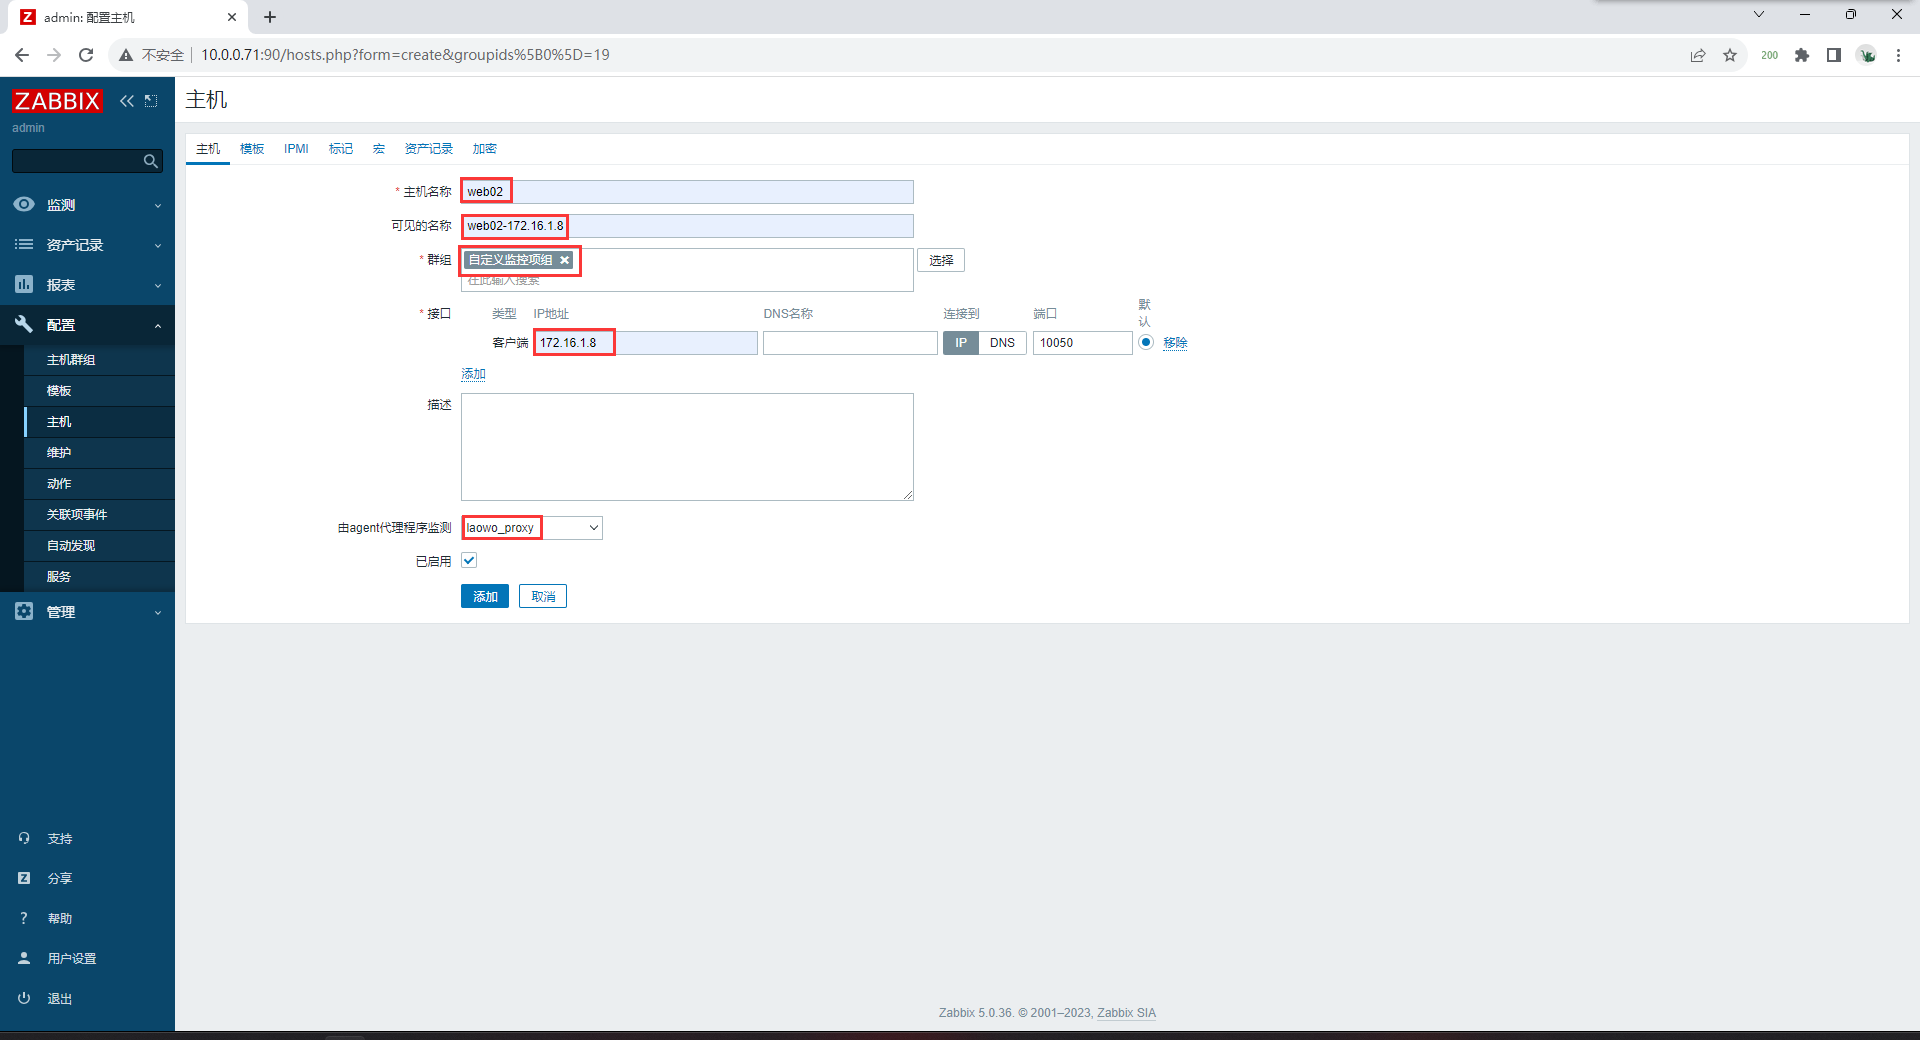


时间一定要同步不然会有问题
### 重启服务
##按顺序重启
zabbix-server → zabbix-proxy → zabbix-agent
[root@zabbix ~]# systemctl restart zabbix-server.service
[root@lb01 ~]# systemctl restart zabbix-proxy.service
[root@lb02 ~]# systemctl restart zabbix-proxy.service
[root@web01 ~]# systemctl restart zabbix-agent.service
[root@web02 ~]# systemctl restart zabbix-agent.service 
Zabbix性能调优
-
Zabbix属于写多读少的业务, 所以需要针对zabbix的MySQL进行拆分。MySQL一定要使用SSD固态盘
-
将Zabbix-Agent被动监控模式, 调整为主动监控模式。
-
使用zabbix-proxy分布式监控, 在大规模监控时用于缓解Zabbix-Server压力
-
去掉无用监控项, 增加监控项的取值间隔, 减少历史数据保存周期(由housekeeper进程定时清理)
-
针对于Zabbix-server进程调优, 谁忙就加大谁的进程数量, 具体取决实际情况, 不是越大越好
[root@web02 ~]# vim /etc/zabbix/zabbix_server.conf
StartPollers=20
StartPollersUnreachable=20- 针对于Zabbix-server缓存调优, 谁的剩余内存少, 就加大它的缓存值(zabbix cache usage图表)6)针对于Zabbix-server缓存调优, 谁的剩余内存少, 就加大它的缓存值(zabbix cache usage图表)
[root@web02 ~]# vim /etc/zabbix/zabbix_server.conf
CacheSize=8M
HistoryCacheSize=16M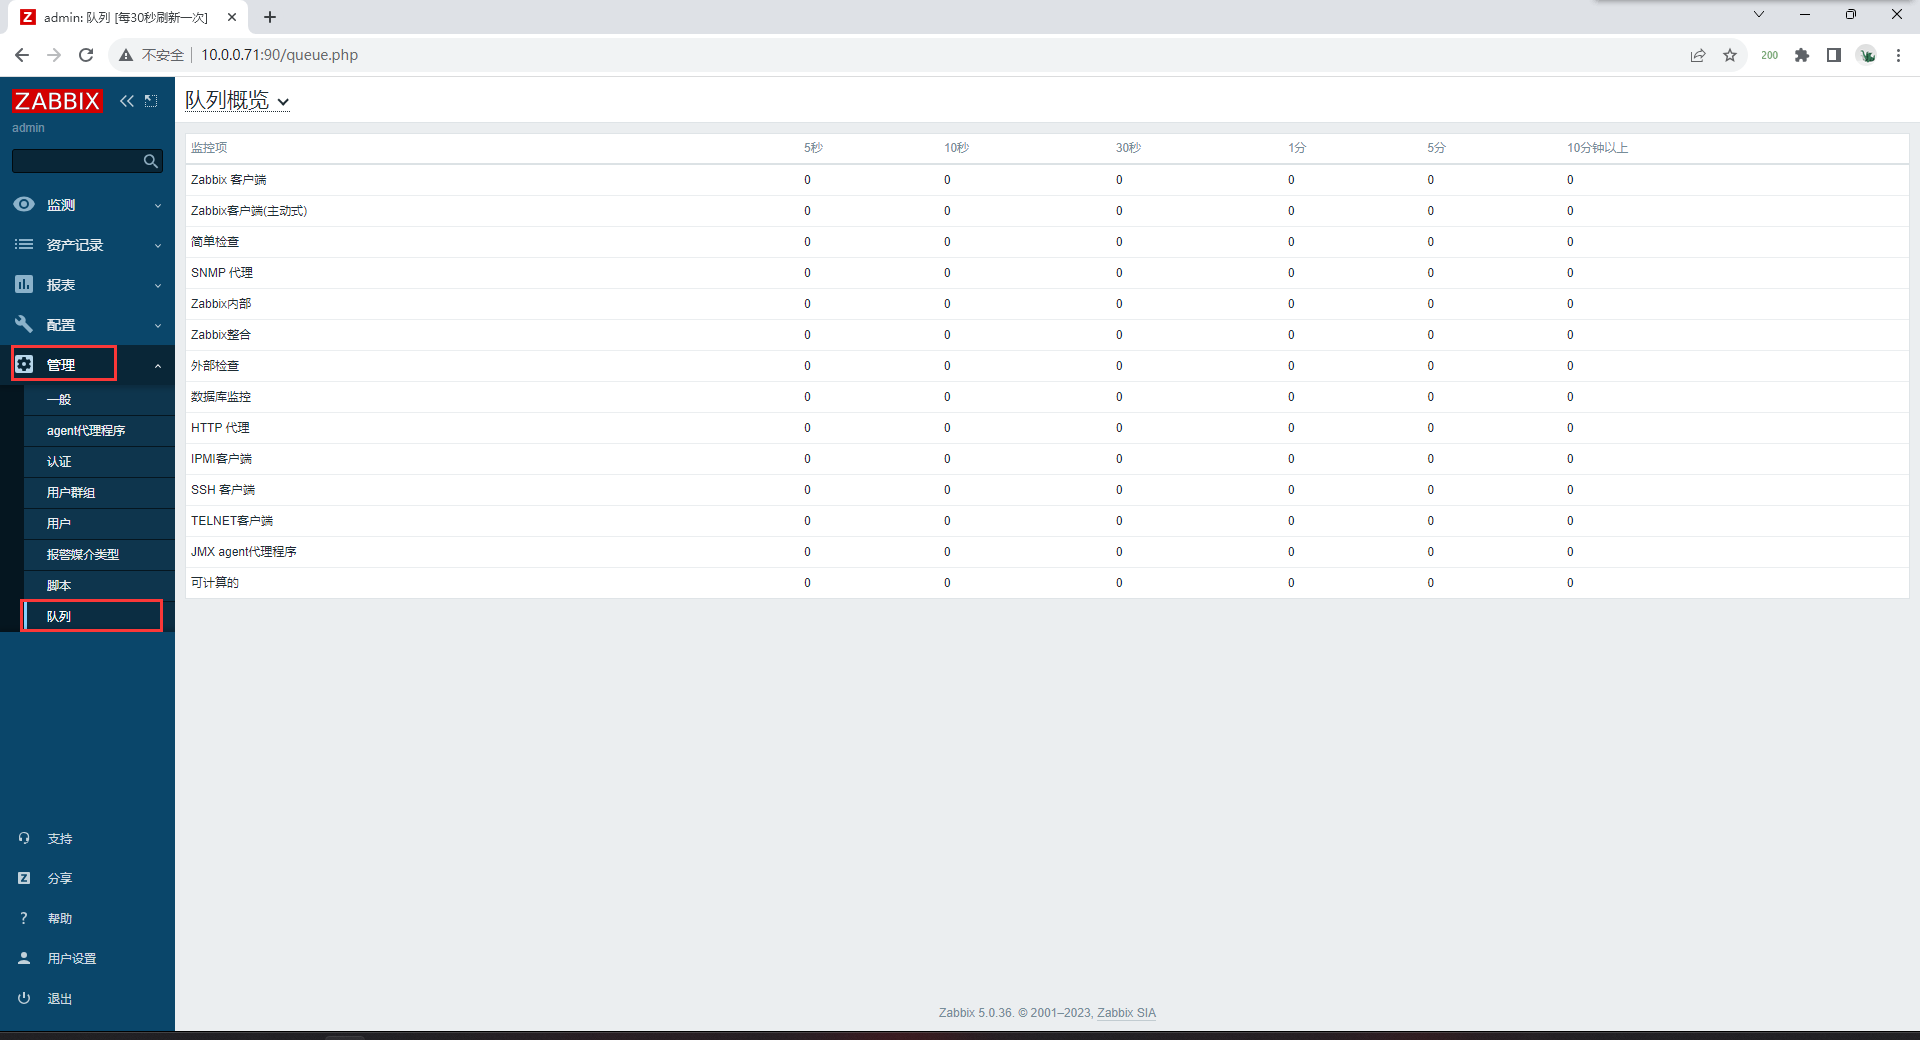
HistoryIndexCacheSize=4M- 关注管理->队列, 是否有被延迟执行的监控项
zabbix API
Zabbix API允许你以编程方式检索和修改Zabbix的配置,并提供对历史数据的访问。它广泛用于:
-
创建新的应用程序以使用Zabbix;
-
将Zabbix与第三方软件集成;
-
自动执行常规任务。
Zabbix API是基于Web的API,作为Web前端的一部分提供。它使用JSON-RPC 2.0协议,这意味着两点:
-
该API包含一组独立的方法;
-
客户端和API之间的请求和响应使用JSON格式进行编码。
有关协议和JSON的更多信息可以在 JSON-RPC 2.0 规范 和 JSON 格式主页中找到。
结构
Zabbix API由许多名义上分组的独立API方法组成。每个方法执行一个特定任务。例如,方法host.create 隶属于 host 这个API分组 ,用于创建新主机。历史上,API分组有时被称为“类”。
大多数API至少包含四种方法: get, create, update 和 delete ,分别是检索,创建,更新和删除数据,但是某些API提供一套完全不同的方法。
执行请求
设置前端后,您可以使用远程 HTTP 请求来调用 API。为此,您需要将 HTTP POST 请求发送到api_jsonrpc.php位于前端目录中的文件。例如,如果您的 Zabbix 前端安装在http://example.com/zabbix下,则调用该apiinfo.version方法的 HTTP 请求可能如下所示:
POST http://example.com/zabbix/api_jsonrpc.php HTTP/1.1
Content-Type: application/json-rpc
{
    "jsonrpc": "2.0",
    "method": "apiinfo.version",
    "id": 1,
    "auth": null,
    "params": {}
}请求的Content-Type标头必须设置为以下值之一:application/json-rpc、application/json或application/jsonrequest。
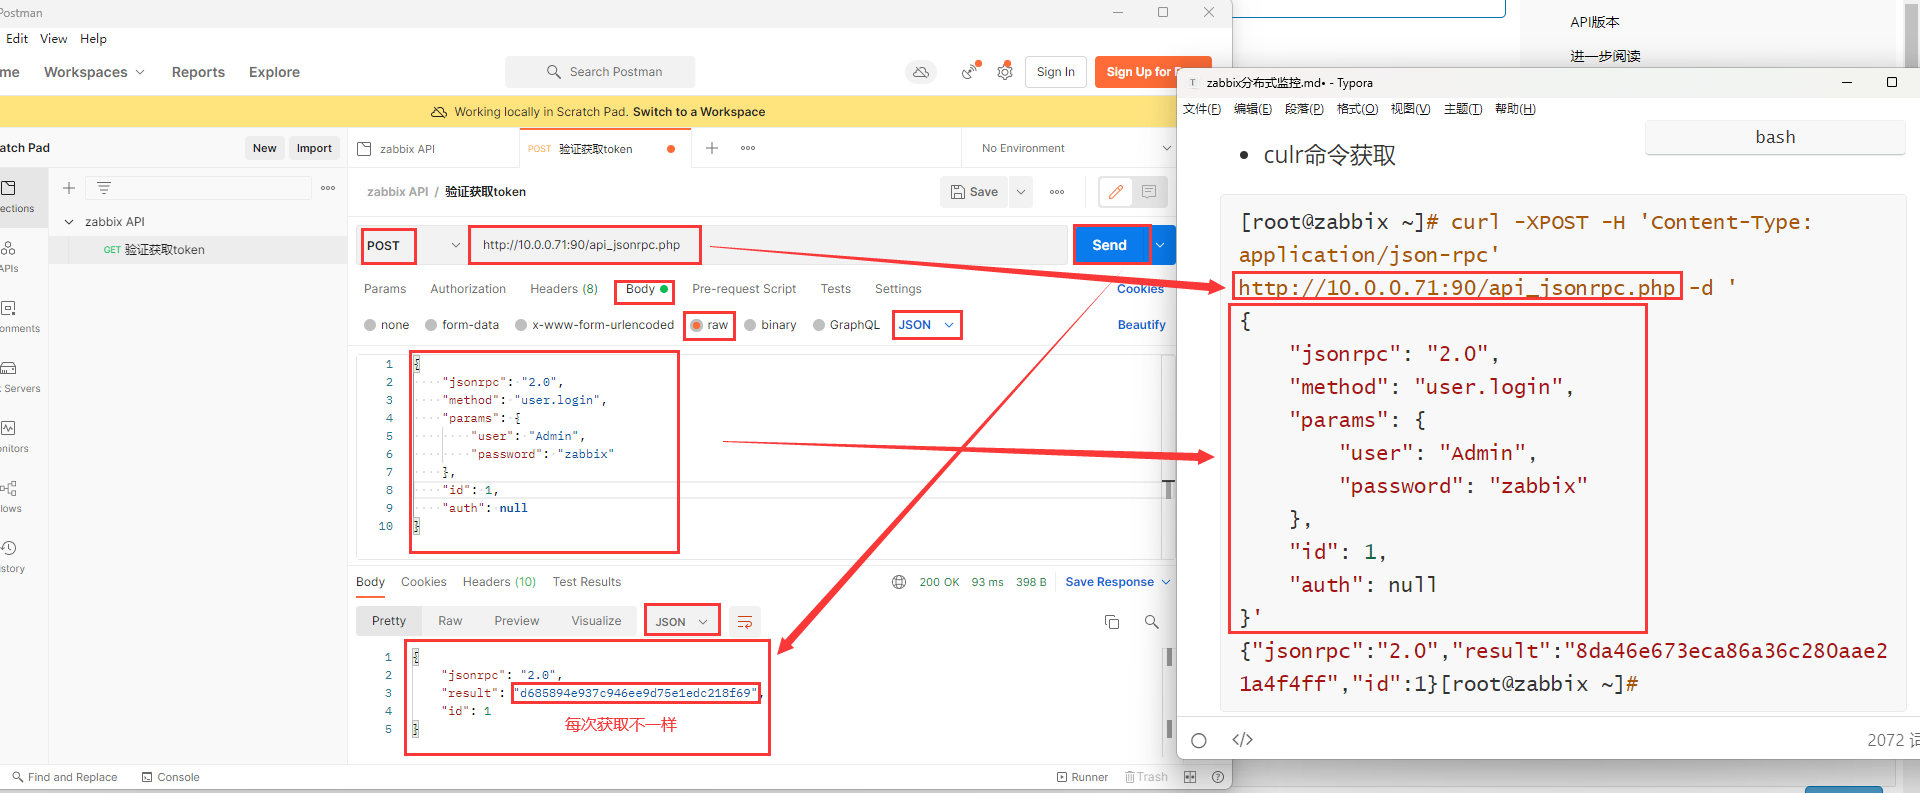
验证zabbix登录用户获取token
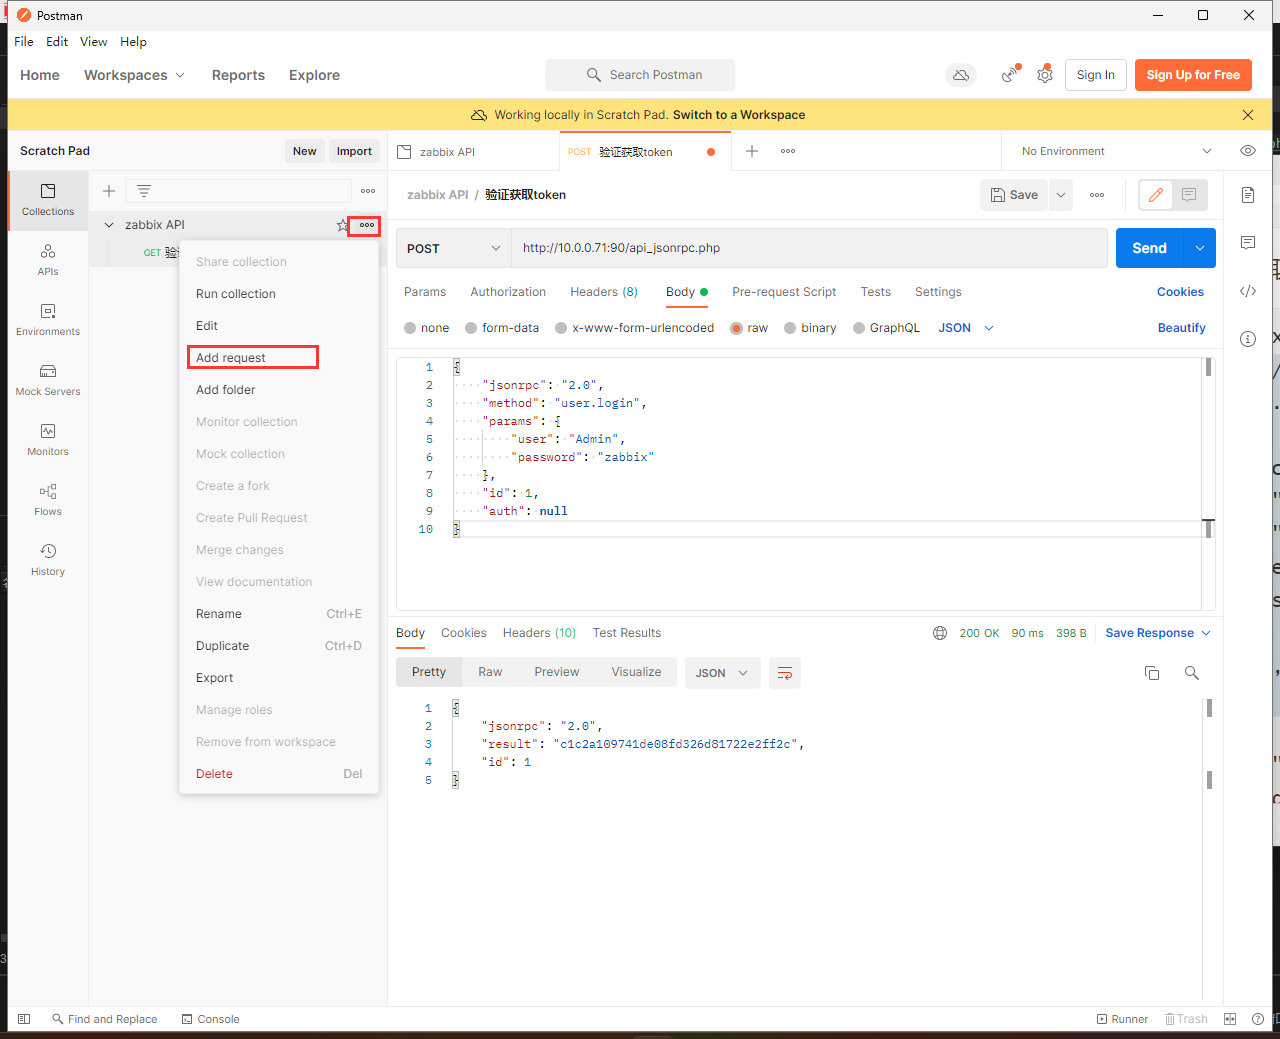
在访问 Zabbix 内部的任何数据之前,您需要登录并获取身份验证令牌。这可以使用user.login方法来完成。让我们假设您想以标准 Zabbix 管理员用户身份登录。那么你的 JSON 请求将如下所示:
{
           "jsonrpc": "2.0",
           "method": "user.login",
           "params": {
               "user": "Admin",
               "password": "zabbix"
           },
           "id": 1,
           "auth": null
}- culr命令获取
[root@zabbix ~]# curl -XPOST -H 'Content-Type: application/json-rpc' http://10.0.0.71:90/api_jsonrpc.php -d '
{
"jsonrpc": "2.0",
"method": "user.login",
"params": {
"user": "Admin",
"password": "zabbix"
},
"id": 1,
"auth": null
}'
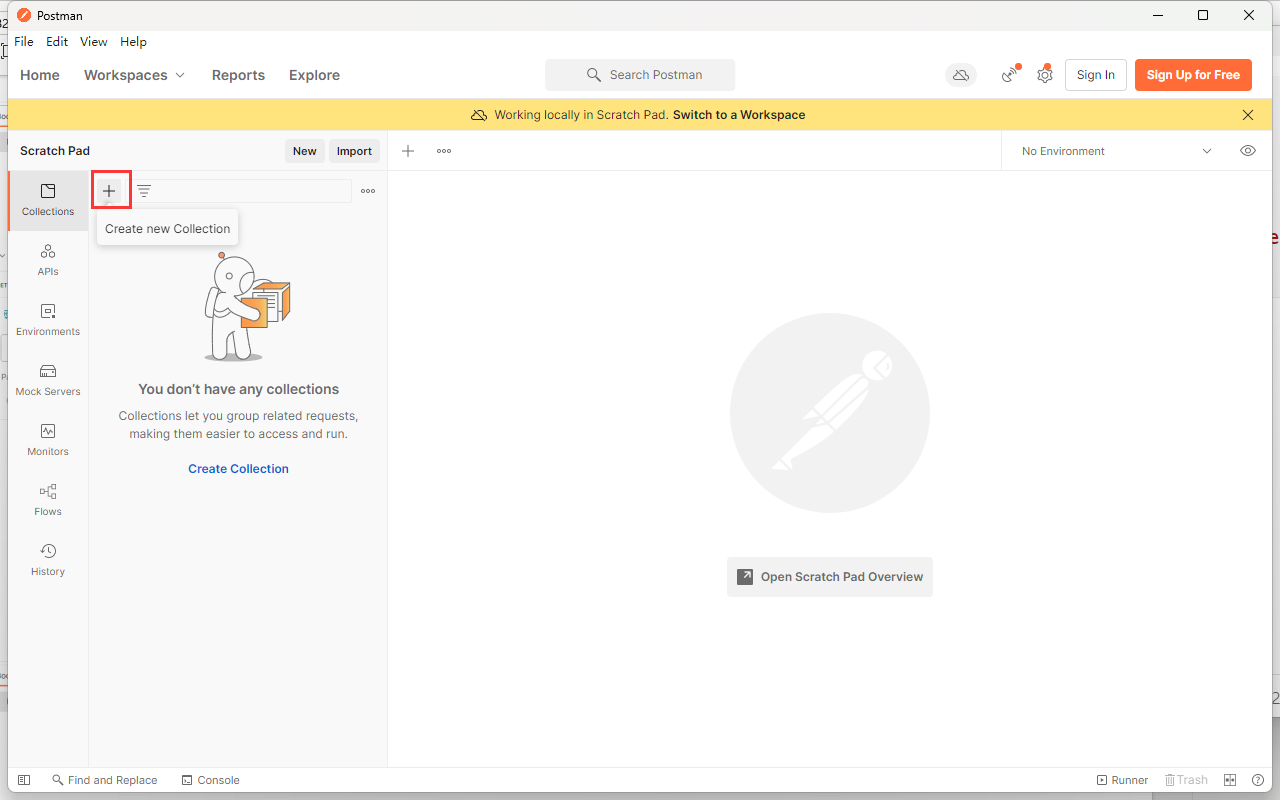
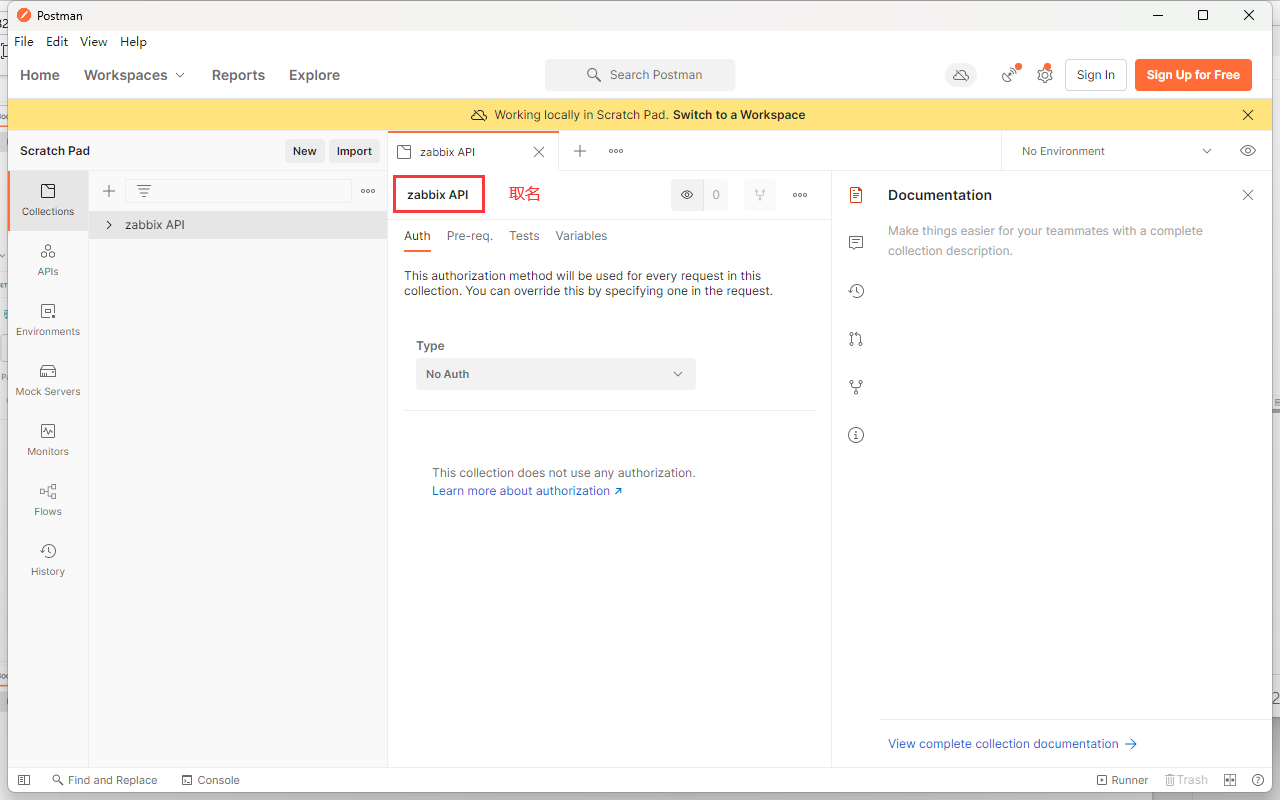
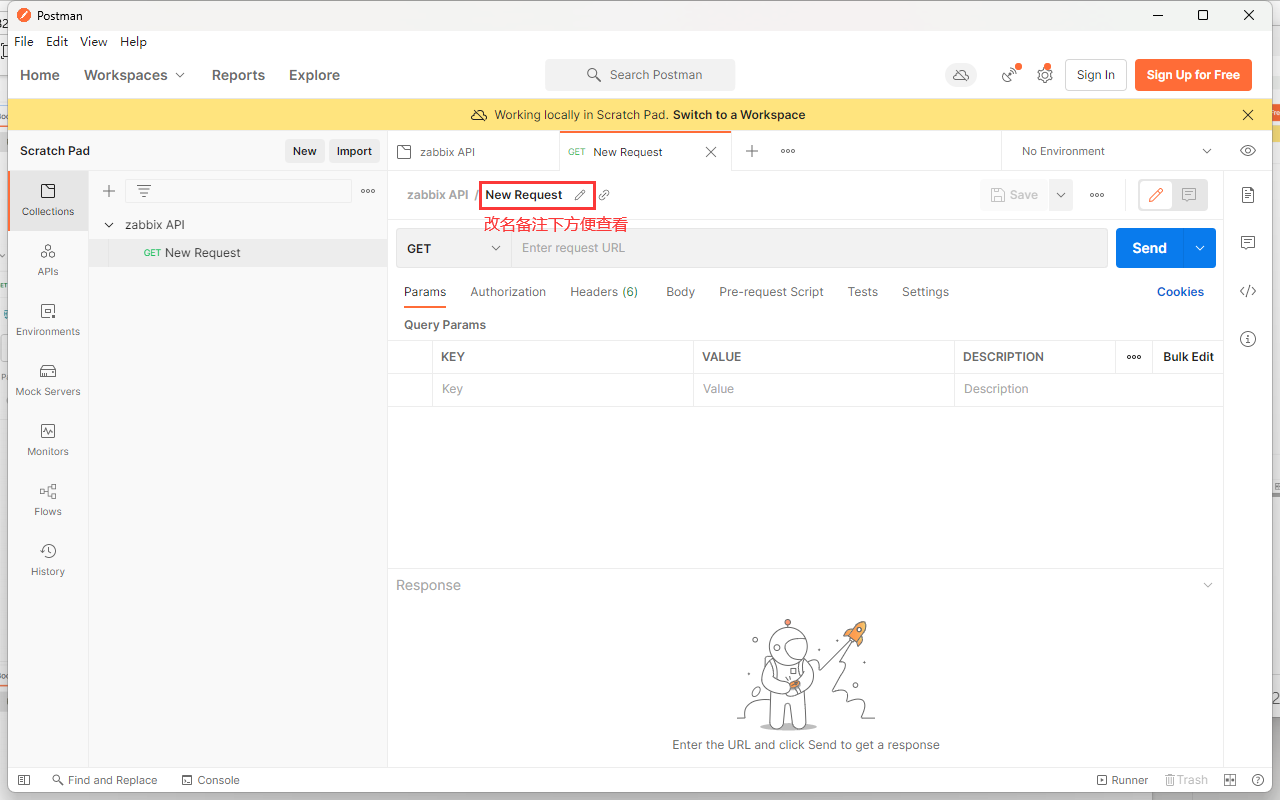
{"jsonrpc":"2.0","result":"8da46e673eca86a36c280aae21a4f4ff","id":1}- postman

让我们仔细看看请求对象。它具有以下属性:
jsonrpc- API使用的JSON-RPC协议的版本;Zabbix API 实现 JSON-RPC 2.0 版;method- 被调用的API方法;params- 将传递给 API 方法的参数;id- 请求的任意标识符;auth- 用户身份验证令牌;由于我们还没有,因此将其设置为null.
如果您正确提供了凭据,API 返回的响应将包含用户身份验证令牌:
{
"jsonrpc": "2.0",
"result": "d685894e937c946ee9d75e1edc218f69",
"id": 1
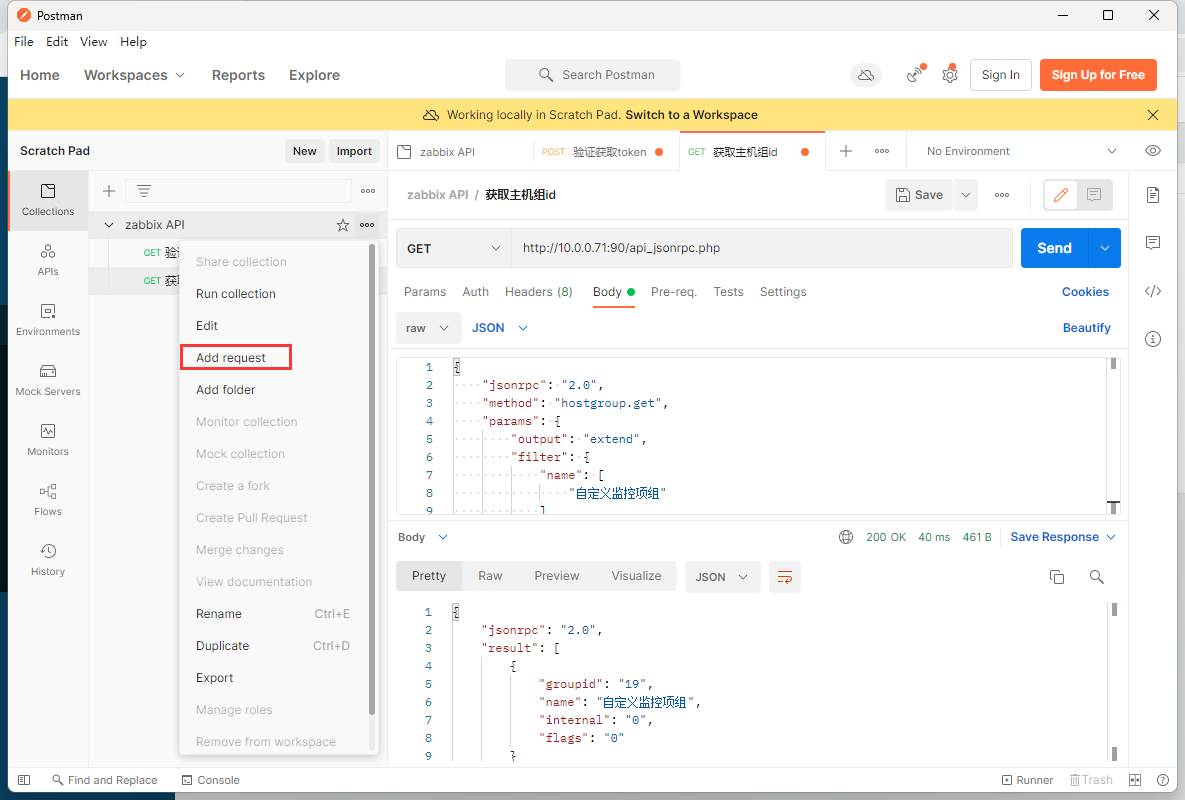
}获取主机组ID
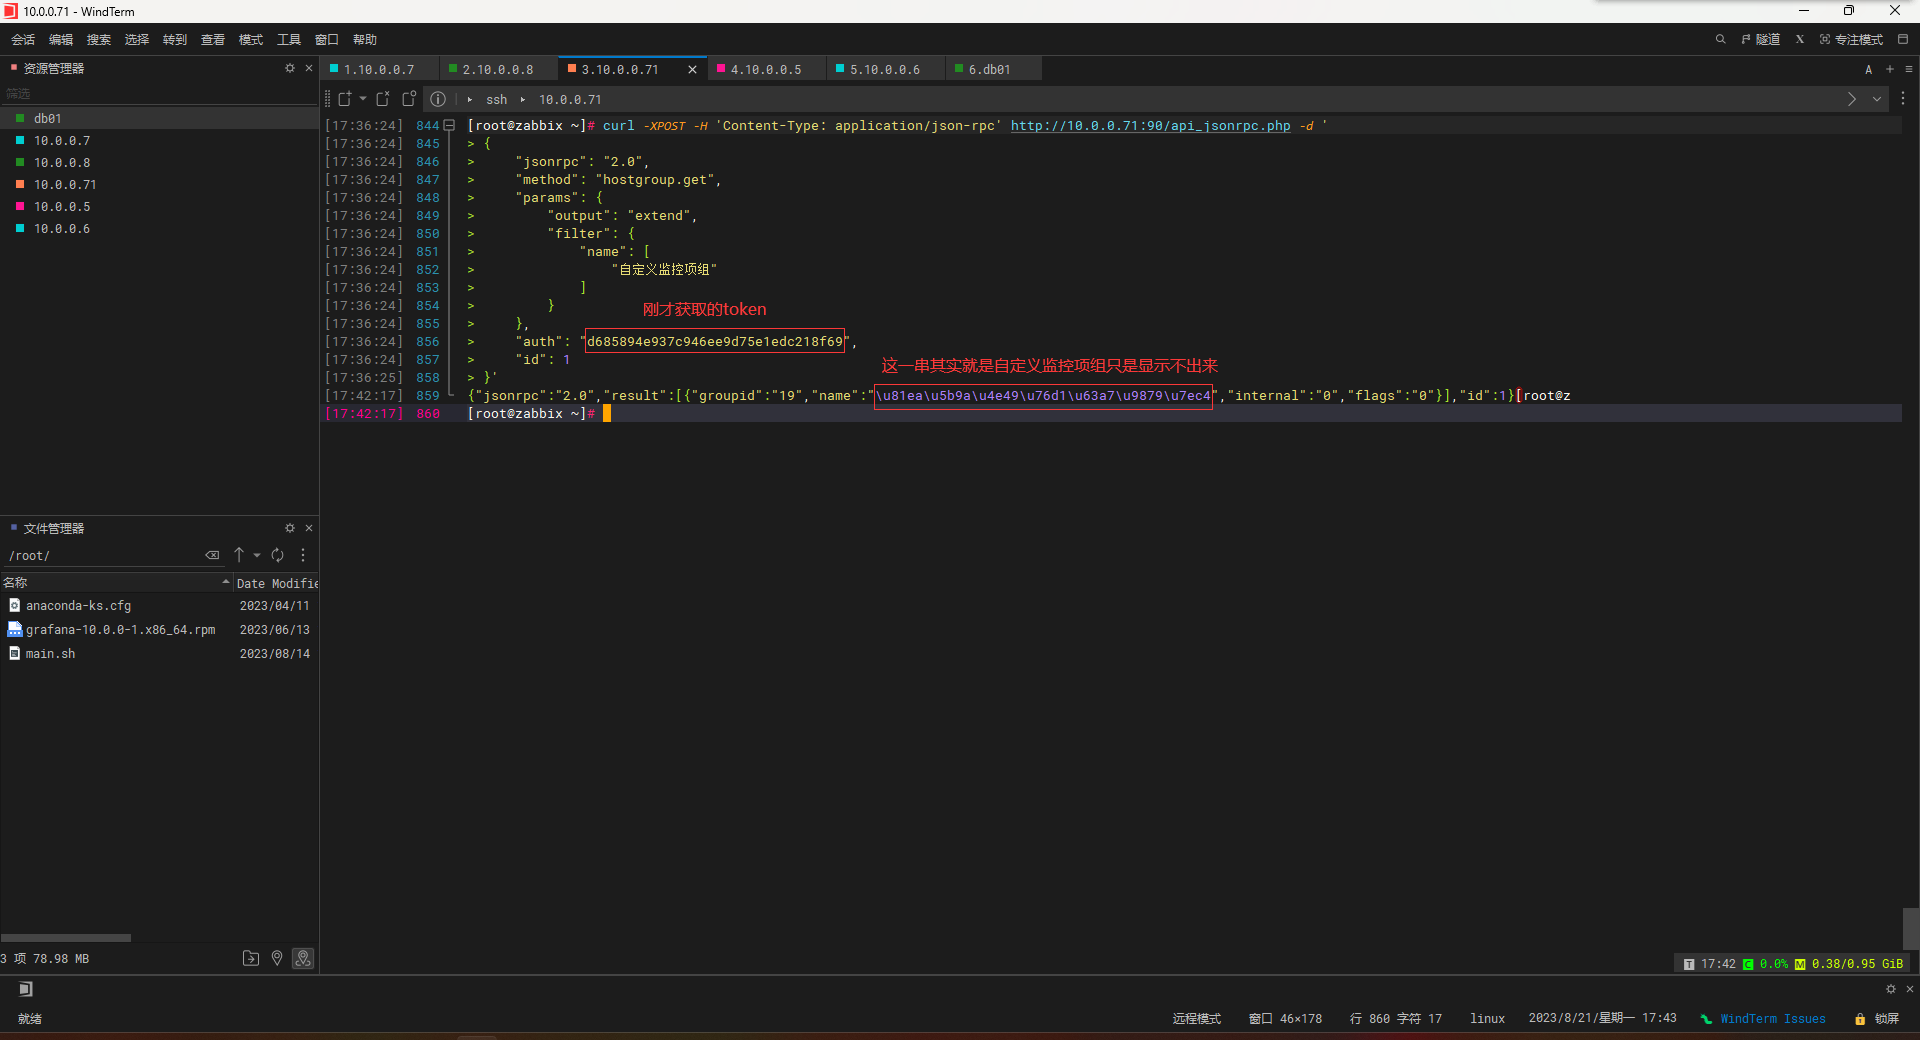
- curl命令获取
[root@zabbix ~]# curl -XPOST -H 'Content-Type: application/json-rpc' http://10.0.0.71:90/api_jsonrpc.php -d '
{
    "jsonrpc": "2.0",
    "method": "hostgroup.get",
    "params": {
        "output": "extend",
        "filter": {
            "name": [
                "自定义监控项组"
            ]
        }
    },
    "auth": "d685894e937c946ee9d75e1edc218f69",
    "id": 1
}'
{"jsonrpc":"2.0","result":[{"groupid":"19","name":"\u81ea\u5b9a\u4e49\u76d1\u63a7\u9879\u7ec4","internal":"0","flags":"0"}],"id":1}- postman

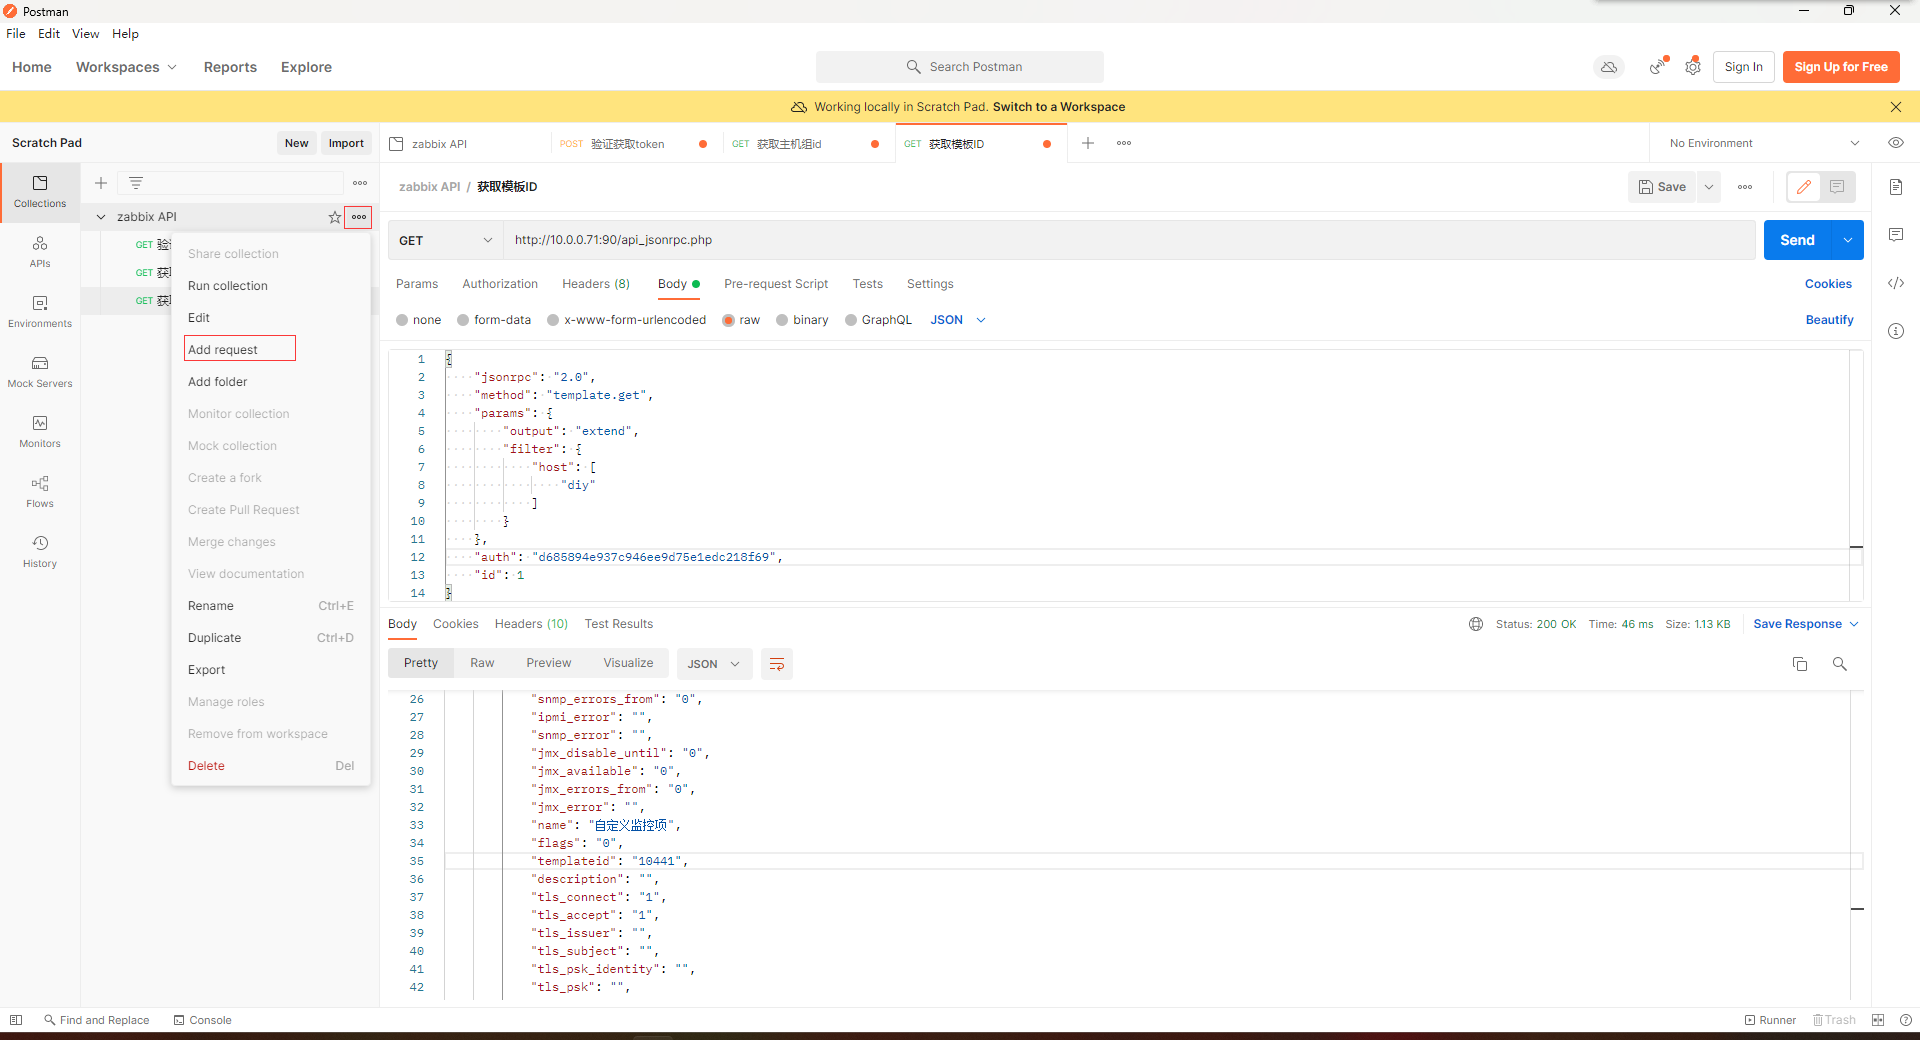
获取模板ID
- curl命令获取
[root@zabbix ~]# curl -XPOST -H 'Content-Type: application/json-rpc' http://10.0.0.71:90/api_jsonrpc.php -d '
{
    "jsonrpc": "2.0",
    "method": "template.get",
    "params": {
        "output": "extend",
        "filter": {
            "host": [
                "diy"
            ]
        }
    },
    "auth": "d685894e937c946ee9d75e1edc218f69",
    "id": 1
}'
{"jsonrpc":"2.0","result":[{"proxy_hostid":"0","host":"diy","status":"3","disable_until":"0","error":"","available":"0","errors_from":"0","lastaccess":"0","ipmi_authtype":"-1","ipmi_privilege":"2","ipmi_username":"","ipmi_password":"","ipmi_disable_until":"0","ipmi_available":"0","snmp_disable_until":"0","snmp_available":"0","maintenanceid":"0","maintenance_status":"0","maintenance_type":"0","maintenance_from":"0","ipmi_errors_from":"0","snmp_errors_from":"0","ipmi_error":"","snmp_error":"","jmx_disable_until":"0","jmx_available":"0","jmx_errors_from":"0","jmx_error":"","name":"\u81ea\u5b9a\u4e49\u76d1\u63a7\u9879","flags":"0","templateid":"10441","description":"","tls_connect":"1","tls_accept":"1","tls_issuer":"","tls_subject":"","tls_psk_identity":"","tls_psk":"","proxy_address":"","auto_compress":"1"}],"id":1}
[root@zabbix ~]# curl -XPOST -H 'Content-Type: application/json-rpc' http://10.0.0.71:90/api_jsonrpc.php -d '
{
"jsonrpc": "2.0",
"method": "template.get",
"params": {
"output": "extend",
"filter": {
"host": [
"diy"
]
}
},
"auth": "d685894e937c946ee9d75e1edc218f69",
"id": 1
}'
{"jsonrpc":"2.0","result":[{"proxy_hostid":"0","host":"diy","status":"3","disable_until":"0","error":"","available":"0","errors_from":"0","lastaccess":"0","ipmi_authtype":"-1","ipmi_privilege":"2","ipmi_username":"","ipmi_password":"","ipmi_disable_until":"0","ipmi_available":"0","snmp_disable_until":"0","snmp_available":"0","maintenanceid":"0","maintenance_status":"0","maintenance_type":"0","maintenance_from":"0","ipmi_errors_from":"0","snmp_errors_from":"0","ipmi_error":"","snmp_error":"","jmx_disable_until":"0","jmx_available":"0","jmx_errors_from":"0","jmx_error":"","name":"\u81ea\u5b9a\u4e49\u76d1\u63a7\u9879","flags":"0","templateid":"10441","description":"","tls_connect":"1","tls_accept":"1","tls_issuer":"","tls_subject":"","tls_psk_identity":"","tls_psk":"","proxy_address":"","auto_compress":"1"}],"id":1}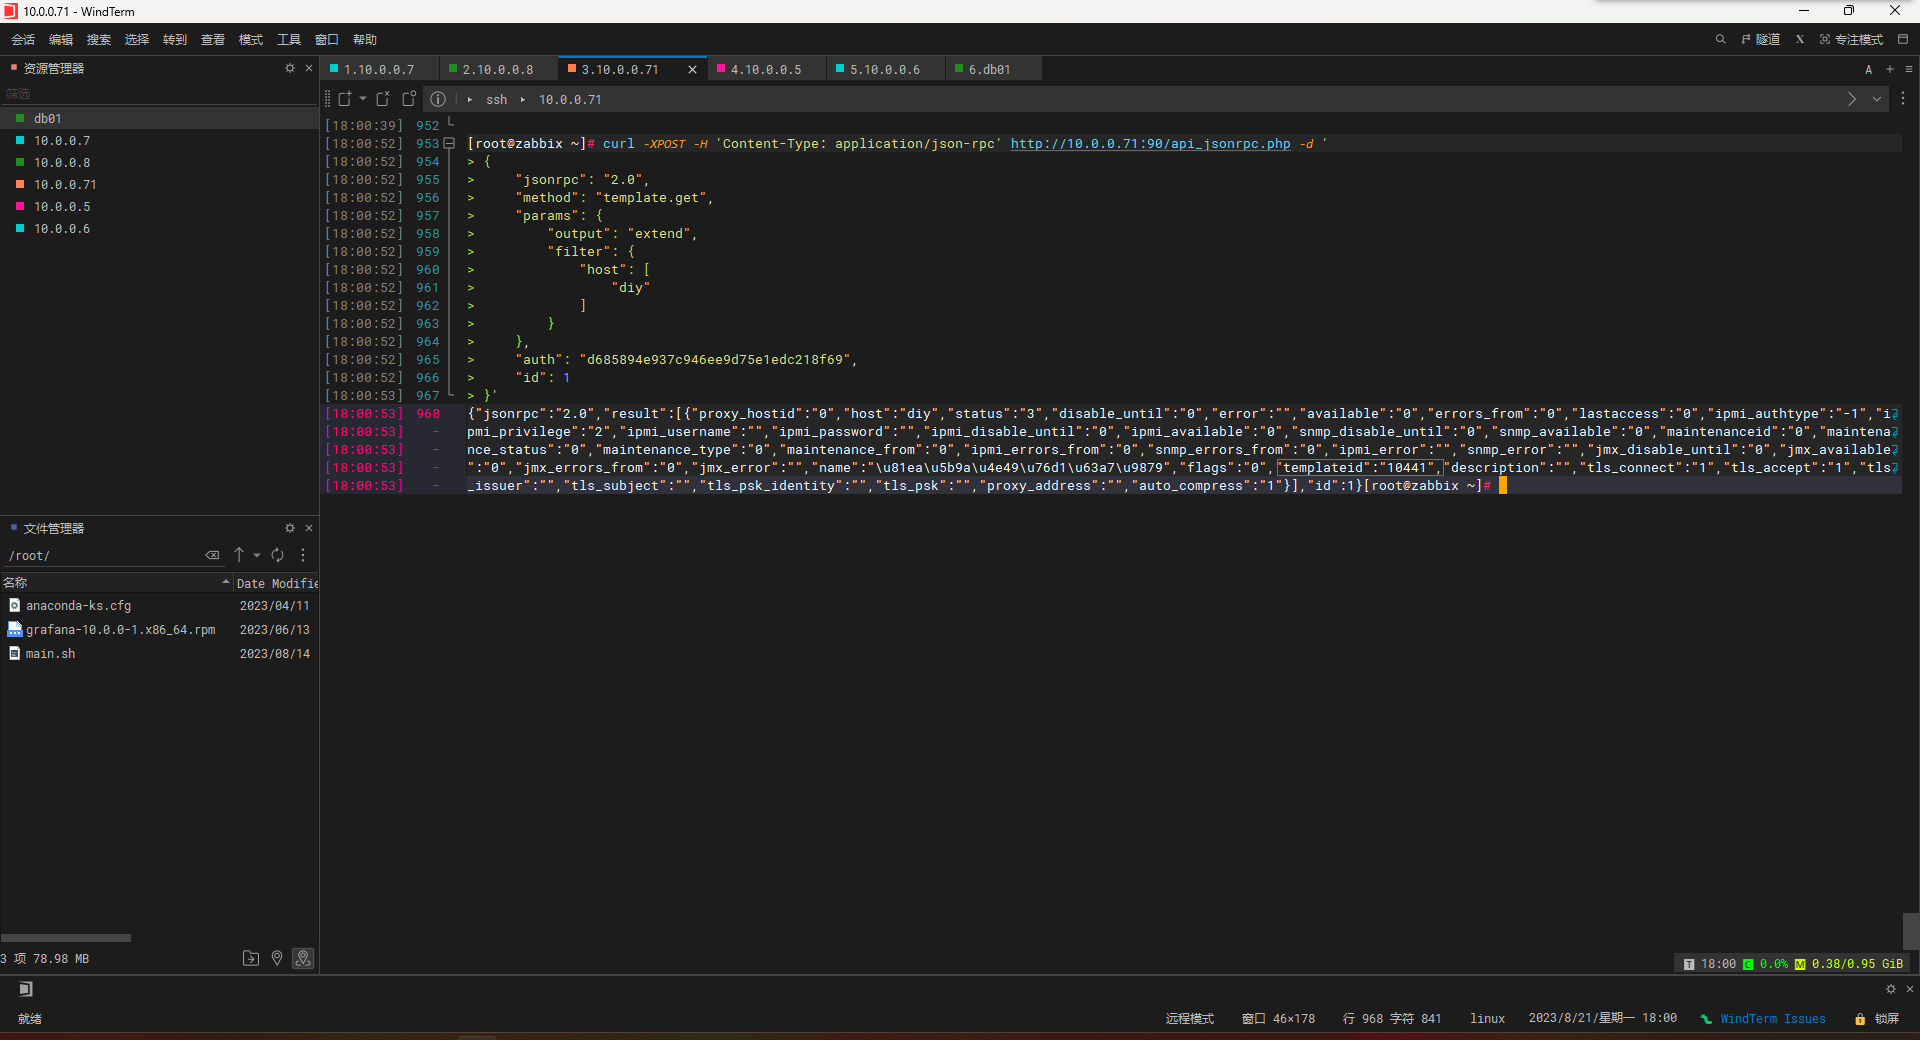
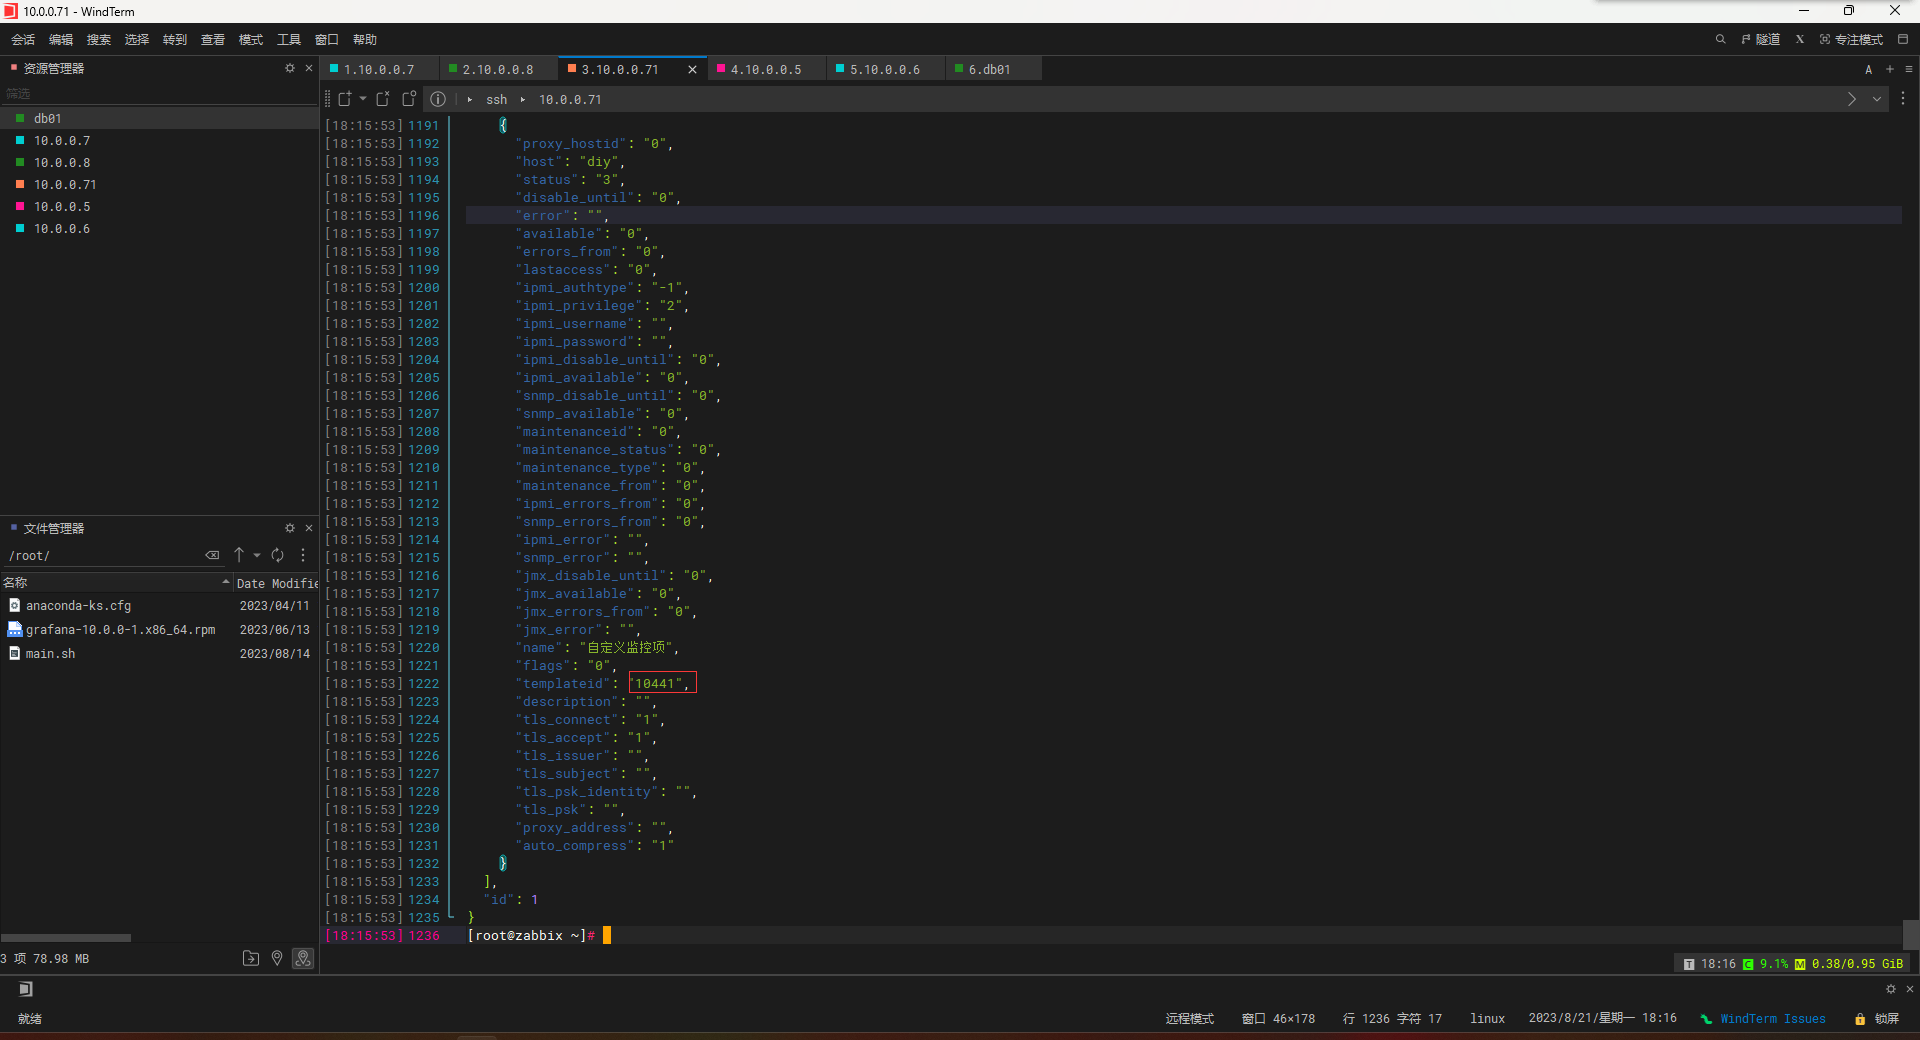
### 这样看着很乱给整清楚点
## 安装jq
[root@zabbix ~]# yum install -y jq

## 后面加|jq后再看
[root@zabbix ~]# curl -XPOST -H 'Content-Type: application/json-rpc' http://10.0.0.71:90/api_jsonrpc.php -d '
{
    "jsonrpc": "2.0",
    "method": "template.get",
    "params": {
        "output": "extend",
        "filter": {
            "host": [
                "diy"
            ]
        }
    },
    "auth": "d685894e937c946ee9d75e1edc218f69",
    "id": 1
}'|jq
  % Total    % Received % Xferd  Average Speed   Time    Time     Time  Current
                                 Dload  Upload   Total   Spent    Left  Speed
100  1079    0   824  100   255  13823   4278 --:--:-- --:--:-- --:--:-- 13966
{
  "jsonrpc": "2.0",
  "result": [
    {
      "proxy_hostid": "0",
      "host": "diy",
      "status": "3",
      "disable_until": "0",
      "error": "",
      "available": "0",
      "errors_from": "0",
      "lastaccess": "0",
      "ipmi_authtype": "-1",
      "ipmi_privilege": "2",
      "ipmi_username": "",
      "ipmi_password": "",
      "ipmi_disable_until": "0",
      "ipmi_available": "0",
      "snmp_disable_until": "0",
      "snmp_available": "0",
      "maintenanceid": "0",
      "maintenance_status": "0",
      "maintenance_type": "0",
      "maintenance_from": "0",
      "ipmi_errors_from": "0",
      "snmp_errors_from": "0",
      "ipmi_error": "",
      "snmp_error": "",
      "jmx_disable_until": "0",
      "jmx_available": "0",
      "jmx_errors_from": "0",
      "jmx_error": "",
      "name": "自定义监控项",
      "flags": "0",
      "templateid": "10441",
      "description": "",
      "tls_connect": "1",
      "tls_accept": "1",
      "tls_issuer": "",
      "tls_subject": "",
      "tls_psk_identity": "",
      "tls_psk": "",
      "proxy_address": "",
      "auto_compress": "1"
    }
  ],
  "id": 1
}
- postman

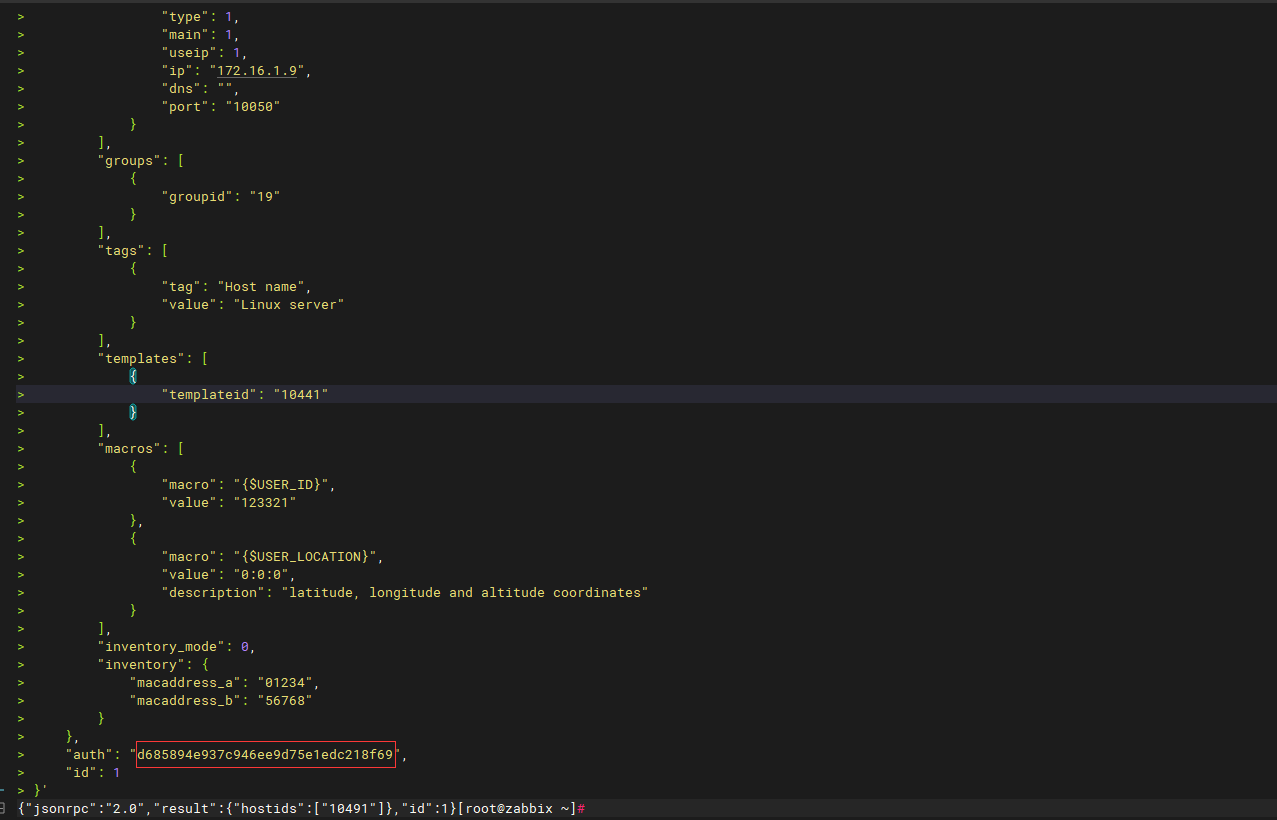
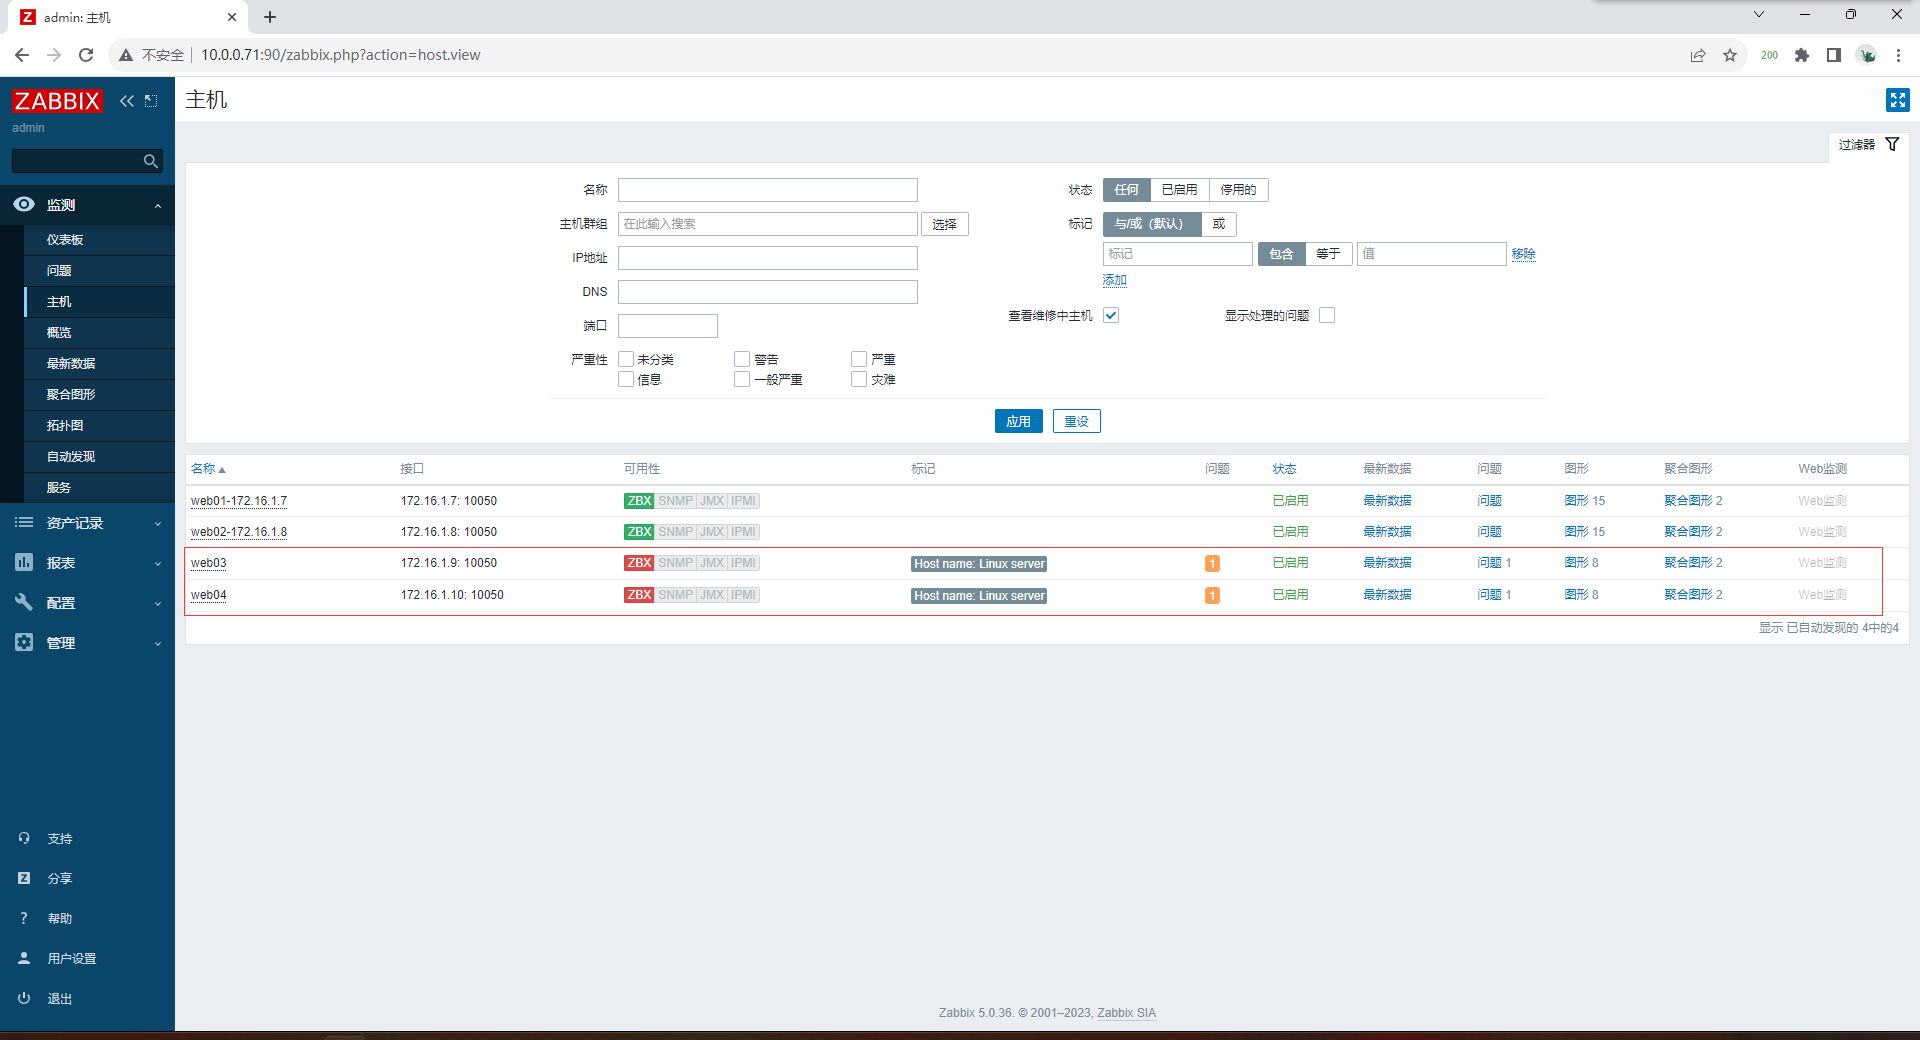
使用zabbix API创建主机
- curl命令获取
curl -XPOST -H 'Content-Type: application/json-rpc' http://10.0.0.71:90/api_jsonrpc.php -d '
{
    "jsonrpc": "2.0",
    "method": "host.create",
    "params": {
        "host": "web03",
        "interfaces": [
            {
                "type": 1,
                "main": 1,
                "useip": 1,
                "ip": "172.16.1.9",
                "dns": "",
                "port": "10050"
            }
        ],
        "groups": [
            {
                "groupid": "19"
            }
        ],
        "tags": [
            {
                "tag": "Host name",
                "value": "Linux server"
            }
        ],
        "templates": [
            {
                "templateid": "10441"
            }
        ],
        "macros": [
            {
                "macro": "{$USER_ID}",
                "value": "123321"
            },
            {
                "macro": "{$USER_LOCATION}",
                "value": "0:0:0",
                "description": "latitude, longitude and altitude coordinates"
            }
        ],
        "inventory_mode": 0,
        "inventory": {
            "macaddress_a": "01234",
            "macaddress_b": "56768"
        }
    },
    "auth": "d685894e937c946ee9d75e1edc218f69",
    "id": 1
}'
{"jsonrpc":"2.0","result":{"hostids":["10491"]},"id":1}
curl -XPOST -H 'Content-Type: application/json-rpc' http://10.0.0.71:90/api_jsonrpc.php -d '
{
"jsonrpc": "2.0",
"method": "host.create",
"params": {
"host": "web03",
"interfaces": [
{
"type": 1,
"main": 1,
"useip": 1,
"ip": "172.16.1.9",
"dns": "",
"port": "10050"
}
],
"groups": [
{
"groupid": "19"
}
],
"tags": [
{
"tag": "Host name",
"value": "Linux server"
}
],
"templates": [
{
"templateid": "10441"
}
],
"macros": [
{
"macro": "{$USER_ID}",
"value": "123321"
},
{
"macro": "{$USER_LOCATION}",
"value": "0:0:0",
"description": "latitude, longitude and altitude coordinates"
}
],
"inventory_mode": 0,
"inventory": {
"macaddress_a": "01234",
"macaddress_b": "56768"
}
},
"auth": "d685894e937c946ee9d75e1edc218f69",
"id": 1
}'
{"jsonrpc":"2.0","result":{"hostids":["10491"]},"id":1}
- postman


Comments | NOTHING