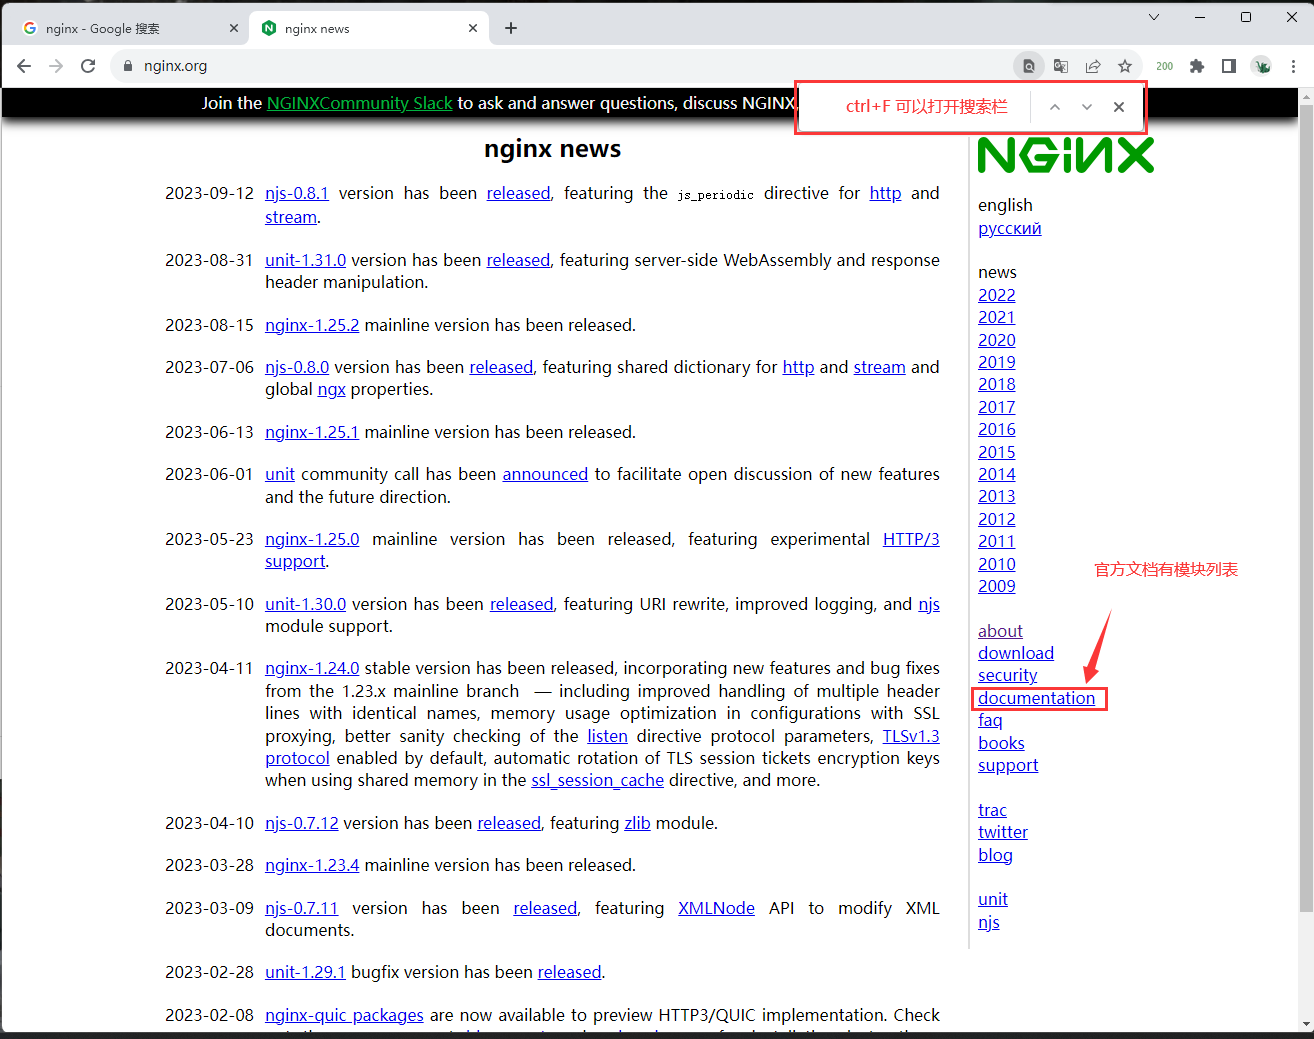
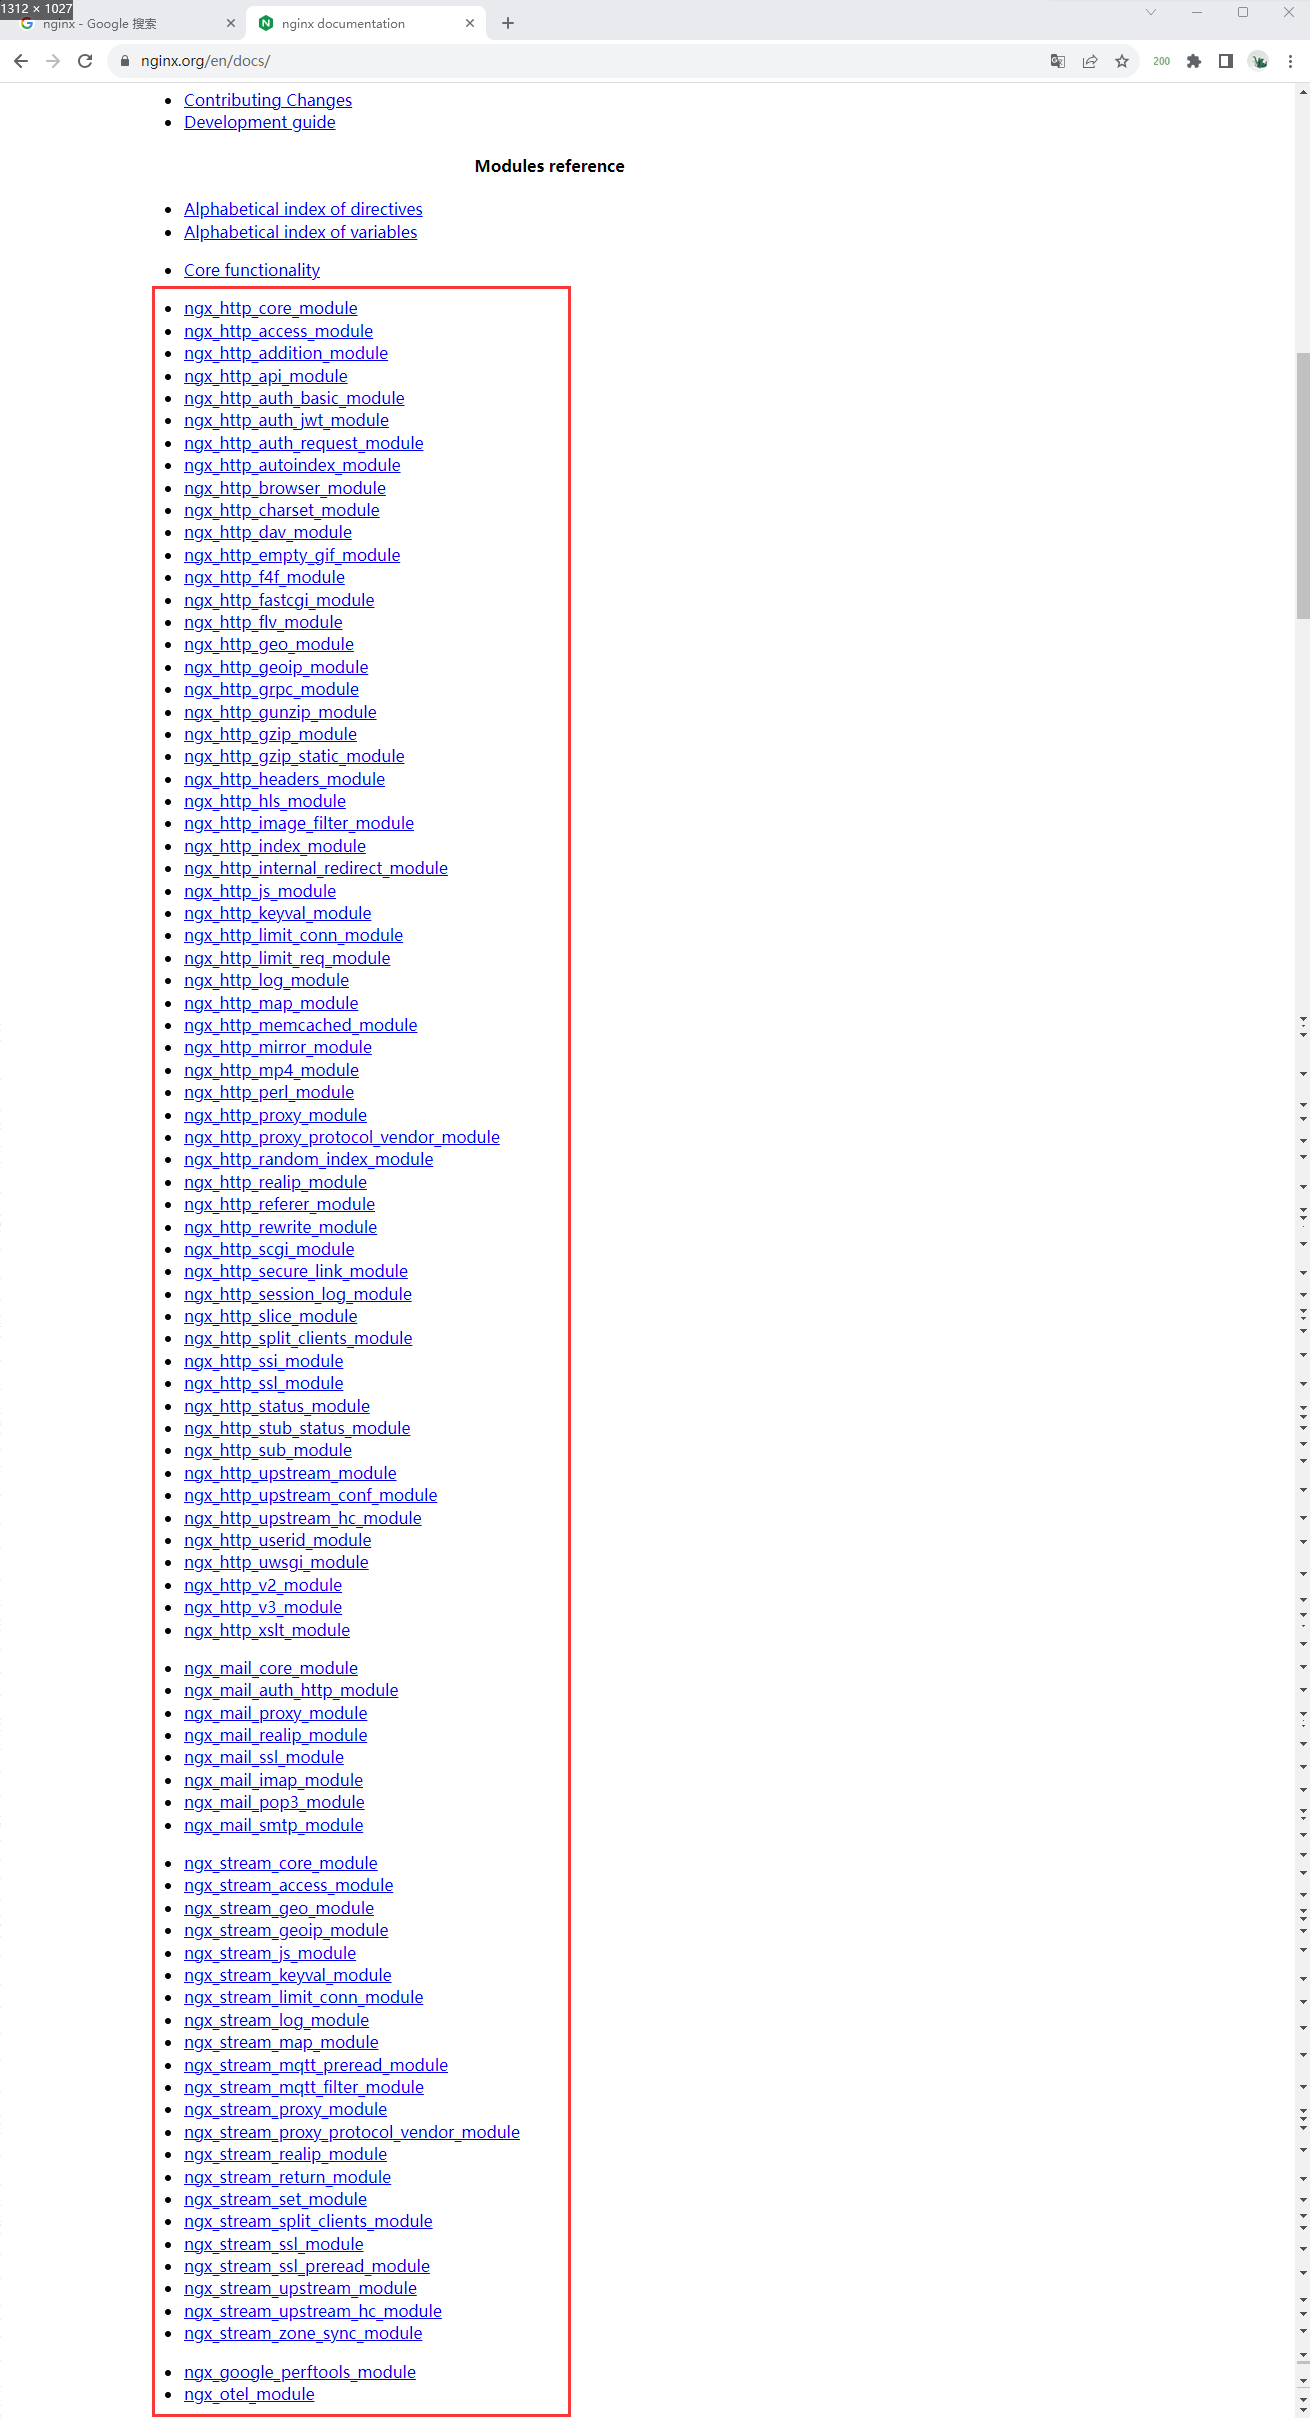
Nginx常用模块
查找模块的方法
Nginx目录索引模块
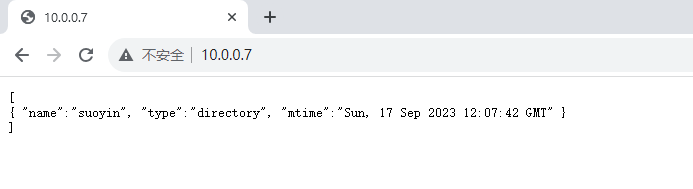
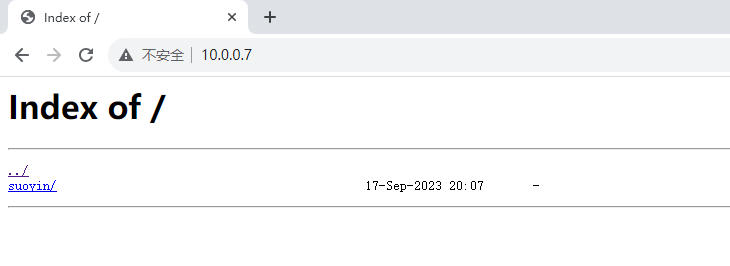
ngx_http_autoindex_module 模块处理以斜杠字符(’/’)结尾的请求,并生成目录列表。
ngx_http_index_module 模块找不到索引文件时,通常会将请求传递给 ngx_http_autoindex_module 模块。
Syntax: autoindex on | off;     # 语法
Default: autoindex off;         # 默认状态
Context: http, server, location # 可以写的层级

[root@web01 ~]# cat /etc/nginx/conf.d/autoindex.conf
server{
    ## 监听端口
    listen 80;
    ## 域名(ip,localhost,_,域名)
    server_name _;

    ## uri
    location /{
        ## 站点目录(代码存放目录)
        root /code;
        ## 目录索引模块 开启;
        autoindex on;
        ## 显示带单位的大小
        autoindex_exact_size off;
        ## 目录索引页面显示格式(默认html)
        autoindex_format json;
        ## 显示本地时间
        autoindex_localtime on;
    }
}

## 创建索引目录及索引目录下的目录
[root@web01 ~]# mkdir -p /code/suoyin

## 启动nginx
[root@web01 ~]# systemctl start nginx

## 访问- json格式
- html格式(修改autoindex_format html;)
[root@web01 ~]# cat /etc/nginx/conf.d/autoindex.conf
server{
    listen 80;
    server_name _;

    location /{
                root /code;
                autoindex on;
                autoindex_exact_size off;
                autoindex_format html;
                autoindex_localtime on;
        }
}
Nginx访问状态模块
Syntax: stub_status;
Default: —
Context: server, location
[root@web01 ~]# cat /etc/nginx/conf.d/autoindex.conf
server{
listen 80;
server_name _;
location /{
root /code;
autoindex on;
autoindex_exact_size off;
autoindex_format html;
autoindex_localtime on;
}
location /hg{
stub_status;
}
}
## 重启nginx
[root@web01 ~]# systemctl restart nginx
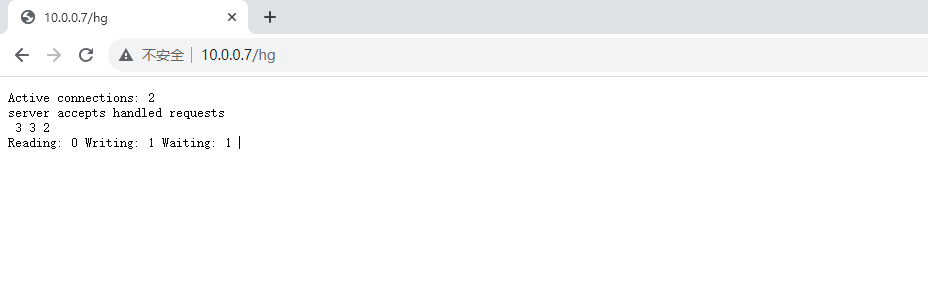
## 访问10.0.0.7/hg
Syntax: stub_status;
Default: —
Context: server, location
[root@web01 ~]# cat /etc/nginx/conf.d/autoindex.conf
server{
listen 80;
server_name _;
location /{
root /code;
autoindex on;
autoindex_exact_size off;
autoindex_format html;
autoindex_localtime on;
}
location /hg{
stub_status;
}
}
## 重启nginx
[root@web01 ~]# systemctl restart nginx
## 访问10.0.0.7/hg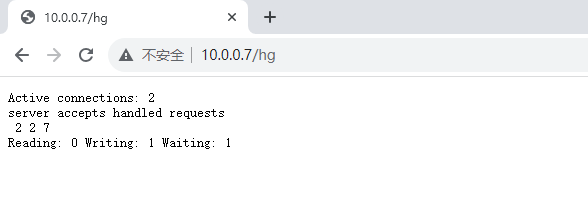
Nginx访问控制模块
基于用户密码(auth_basic)
## 安装htpasswd命令
[root@web01 conf.d]# yum install -y httpd

## 创建存放认证文件的目录
[root@web01 ~]# mkdir /etc/nginx/auth

## 创建认证文件
-b:允许命令行中输入密码
-c:创建一个新文件,将用户名和密码保存到指定文件中
[root@web01 ~]# htpasswd -b -c /etc/nginx/auth/hg_auth hg 123
Adding password for user hg

## 查看认证文件内容
[root@web01 ~]# cat /etc/nginx/auth/hg_auth
hg:$apr1$TTsCzn6H$cfaHVbt5pwyb2Zu47h9Cf0

## 修改nginx配置文件,添加认证
[root@web01 ~]# cat /etc/nginx/conf.d/autoindex.conf
server{
    listen 80;
    server_name _;
    auth_basic "注释";
    auth_basic_user_file /etc/nginx/auth/hg_auth;

    location /{
                root /code;
                autoindex on;
                autoindex_exact_size off;
                autoindex_format html;
                autoindex_localtime on;
        }
    location /hg{
                stub_status;
        }
}

## 重启
[root@web01 ~]# systemctl restart nginx

## 访问
## 安装htpasswd命令
[root@web01 conf.d]# yum install -y httpd
## 创建存放认证文件的目录
[root@web01 ~]# mkdir /etc/nginx/auth
## 创建认证文件
-b:允许命令行中输入密码
-c:创建一个新文件,将用户名和密码保存到指定文件中
[root@web01 ~]# htpasswd -b -c /etc/nginx/auth/hg_auth hg 123
Adding password for user hg
## 查看认证文件内容
[root@web01 ~]# cat /etc/nginx/auth/hg_auth
hg:$apr1$TTsCzn6H$cfaHVbt5pwyb2Zu47h9Cf0
## 修改nginx配置文件,添加认证
[root@web01 ~]# cat /etc/nginx/conf.d/autoindex.conf
server{
listen 80;
server_name _;
auth_basic "注释";
auth_basic_user_file /etc/nginx/auth/hg_auth;
location /{
root /code;
autoindex on;
autoindex_exact_size off;
autoindex_format html;
autoindex_localtime on;
}
location /hg{
stub_status;
}
}
## 重启
[root@web01 ~]# systemctl restart nginx
## 访问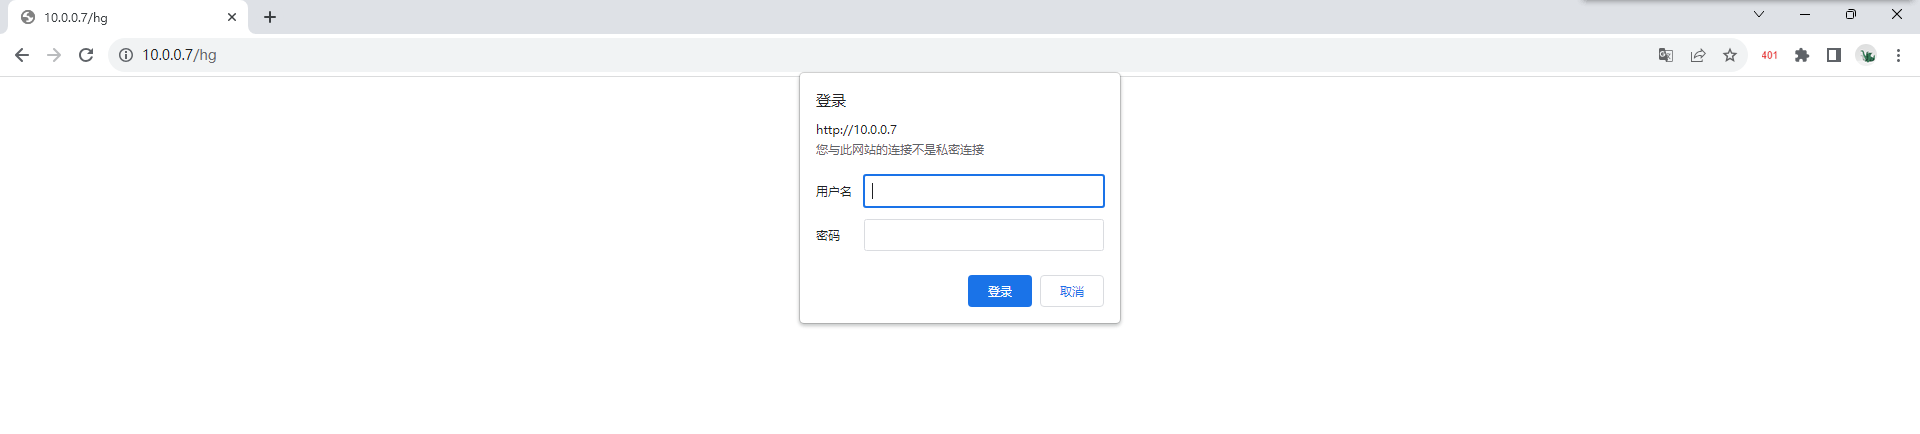
登录

# 添加用户的方法: 不-C 就是不创建新文件 直接追加内容
[root@web01 ~]# htpasswd -b /etc/nginx/auth/hg_auth yiduan 666
Adding password for user yiduan
[root@web01 ~]# cat /etc/nginx/auth/hg_auth
hg:$apr1$TTsCzn6H$cfaHVbt5pwyb2Zu47h9Cf0
yiduan:$apr1$xmbygJyG$M2JfV/yV3Z2LML74WdDw90
基于IP访问控制(access)
## 修改配置文件
[root@web01 ~]# cat /etc/nginx/conf.d/autoindex.conf
server{
    listen 80;
    server_name _;
    auth_basic 'hg';
    auth_basic_user_file /etc/nginx/auth/hg_auth;

    location /{
                root /code;
                index index.html;
        }
    location /hg{
                stub_status;
        }
}

## 10.0.0.8访问
[root@web02 ~]# curl http://hg:123@10.0.0.7
123

## 禁止10.0.0.8访问
[root@web01 ~]# cat /etc/nginx/conf.d/autoindex.conf
server{
    listen 80;
    server_name _;
    auth_basic 'hg';
    auth_basic_user_file /etc/nginx/auth/hg_auth;

    location /{
                root /code;
                index index.html;
                deny 10.0.0.8;
        }
    location /hg{
                stub_status;
        }
}

## 10.0.0.8访问查看
[root@web02 ~]# curl http://hg:123@10.0.0.7
<html>
<head><title>403 Forbidden</title></head>
<body>
<center><h1>403 Forbidden</h1></center>
<hr><center>nginx/1.24.0</center>
</body>
</html>

## 注意:默认nginx就是 allow all; 如果只允许某一个IP需要配合deny all使用,deny all;要放在最下面
例:只允许10.0.0.8访问
server{
    listen 80;
    server_name _;
    auth_basic 'hg';
    auth_basic_user_file /etc/nginx/auth/hg_auth;

    location /{
                root /code;
                index index.html;
                allow 10.0.0.8;
                deny all;
        }
    location /hg{
                stub_status;
        }
}

另一台web连接有密码认证服务器的方法:  curl http://用户名:密码@访问服务器ip
访问频率限制
连接频率限制(limit_conn)
http{
    limit_conn_zone $remote_addr zone=内存空间名字:10m;
    # 在系统里起一个名字你自定义 内存为10M的空间存放访问你网站的IP
    server {
        limit_conn 内存空间名字 1;
    }
}

conn_zone:内存空间的名字
1:最大连接次数
请求频率限制(limit_req)
# http标签段定义请求限制, rate限制速率,限制一秒钟最多一个IP请求

http {
    limit_req_zone $binary_remote_addr zone=req_zone:10m rate=1r/s;

    server {
        listen 80;
        server_name www.wodeyumengouwo.com;
        # 1r/s只接收一个请求,其余请求拒绝处理并返回错误码给客户端
        limit_req zone=req_zone;

        # 请求超过1r/s,剩下的将被延迟处理,请求数超过burst定义的数量, 多余的请求返回503
        limit_req zone=req_zone burst=3 nodelay; # burst=3:自定义请求数 nodelay:不延迟处理
        location /{
            root /code;
            index index.html;
        }
    }
}

## 请求频率限制错误页面优化 指定返回的状态码 和 出现各状态码跳转的目录
[root@web01 test]# [root@web01 ~]# cat /etc/nginx/conf.d/autoindex.conf
limit_req_zone $binary_remote_addr zone=req_zone:10m rate=1r/s;
server{
    listen 80;
    server_name _;
    auth_basic 'hg';
    auth_basic_user_file /etc/nginx/auth/hg_auth;
    limit_req zone=req_zone burst=3 nodelay;
        limit_req_status 555;      # 指定返回的错误状态码(400 - 599之间)
        error_page 555 /555.html;  # 指定出现555状态码跳转的目录
    location /{
                root /code;
                autoindex on;
                autoindex_exact_size off;
                autoindex_format html;
                autoindex_localtime on;
        }
    location /hg{
                stub_status;
        }
}
location优先级
匹配符
匹配规则
优先级
=
精确匹配
1
^~
以某个字符串开头
2
~
区分大小写的正则匹配
3
~*
不区分大小写的正则匹配
4
!~
区分大小写不匹配的正则
5
!~*
不区分大小写不匹配的正则
6
/
通用匹配,任何请求都会匹配到
7
应用场景
# 优先级最高符号=
location =/
# 通用匹配,任何请求都会匹配到
location / {
...
}
# 严格区分大小写,匹配以.php结尾的都走这个location
location ~ \.php$ {
...
}
# 严格区分大小写,匹配以.jsp结尾的都走这个location
location ~ \.jsp$ {
...
}
# 不区分大小写匹配,只要用户访问.jpg,gif,png,js,css 都走这条location
location ~* .*\.(jpg|gif|png|js|css)$ {
...
}
location ~* \.(jpg|gif|png|js|css)$ {
...
}
# 不区分大小写匹配
location ~* "\.(sql|bak|tgz|tar.gz|.git)$" {
...
}
Nginx实现web架构
企业中网站架构
企业常用架构:
LNMP:Linux Nginx MySQL PHP
LAMP:Linux Apache MySQL PHP
LNMT:Linux Nginx MySQL Tomcat
LAMT:Linux Apache MySQL Tomcat

Nginx
Apache
运行前端:html css js

PHP:运行php代码
Tomcat:运行Java代码
部署wordpress
部署PHP
# 1.卸载Linux自带的旧版本php
[root@web01 ~]# yum remove php-mysql-5.4 php php-fpm php-common

# 2.添加php第三方源
[root@nginx ~]# vim /etc/yum.repos.d/php.repo
[php-webtatic]
name = PHP Repository
baseurl = http://us-east.repo.webtatic.com/yum/el7/x86_64/
gpgcheck = 0

# 3.安装php
[root@web01 ~]# yum -y install php71w php71w-cli php71w-common php71w-devel php71w-embedded php71w-gd php71w-mcrypt php71w-mbstring php71w-pdo php71w-xml php71w-fpm php71w-mysqlnd php71w-opcache php71w-pecl-memcached php71w-pecl-redis php71w-pecl-mongodb

## 也可以直接下载打好的包
wget https://download.wodeyumengouwo.com/nginx/nginx_php.tgz
tar xf nginx_php.tgz
yum localinstall -y *.rpm

# 4.创建用户
[root@web01 ~]# groupadd www -g 666
[root@web01 ~]# useradd www -u 666 -g 666 -s /sbin/nologin -M

# 5.修改nginx运行用户
[root@web01 ~]# vim /etc/nginx/nginx.conf
user www;

# php-fpm作用:用来管理php程序运行
## php相关配置文件
/etc/php-fpm.conf        # php管理进程配置文件
/etc/php.ini             # php程序配置文件
/etc/php-fpm.d/www.conf  # php管理进程的子配置文件

# 6.修改php的配置文件 启动用户 和端口
[root@web01 ~]# vim /etc/php-fpm.d/www.conf
[www]
user = www
group = www

## 找到 listen = 127.0.0.1:9000注释掉 然后在下写入创建php.sock安全套接字文件并指定该文件的属主和属组
;listen = 127.0.0.1:9000
listen = /opt/php.sock
listen.owner = www
listen.group = www
## 完成安全套接字文件的创建以后 就可以在下面直接将指定9000端口 换成安全套接字文件 本地连接会更快
### 完整php配置文件
[www]
user = www
group = www
;listen = 0.0.0.0:9000
listen = /opt/php.sock
listen.owner = www
listen.group = www
listen.allowed_clients = 127.0.0.1
pm = dynamic
pm.max_children = 50
pm.start_servers = 5
pm.min_spare_servers = 5
pm.max_spare_servers = 35
slowlog = /var/log/php-fpm/www-slow.log
php_admin_value[error_log] = /var/log/php-fpm/www-error.log
php_admin_flag[log_errors] = on
php_value[session.save_handler] = files
php_value[session.save_path] = /var/lib/php/session
php_value[soap.wsdl_cache_dir] = /var/lib/php/wsdlcache

# 7.启动php并加入开机自启
[root@web01 ~]# systemctl start php-fpm
[root@web01 ~]# systemctl enable php-fpm

# 8.检查php进程和端口
[root@web01 ~]# ps -ef|grep php
root       6755      1  0 21:18 ?        00:00:00 php-fpm: master process (/etc/php-fpm.conf)
apache     6756   6755  0 21:18 ?        00:00:00 php-fpm: pool www
apache     6757   6755  0 21:18 ?        00:00:00 php-fpm: pool www
apache     6758   6755  0 21:18 ?        00:00:00 php-fpm: pool www
apache     6759   6755  0 21:18 ?        00:00:00 php-fpm: pool www
apache     6760   6755  0 21:18 ?        00:00:00 php-fpm: pool www
root       6832    902  0 21:19 pts/0    00:00:00 grep --color=auto php

[root@web01 ~]# netstat -lntup
tcp        0      0 127.0.0.1:9000          0.0.0.0:*               LISTEN      6755/php-fpm: maste
配置nginx连接php
[root@web01 ~]# vim /etc/nginx/conf.d/wp.conf
server{
        listen 80;
        server_name www.gouwo.com;

        location /{
                    root /blog;
                index index.php index.html;
        }

        location ~ \.php$ {
                root /blog;
                fastcgi_pass 127.0.0.1:9000;
                #fastcgi_pass unix:/opt/php.sock;
                fastcgi_param SCRIPT_FILENAME $document_root$fastcgi_script_name;
                include /etc/nginx/fastcgi_params;

        }
}

# 2 重新加载nginx
[root@web01 conf.d]# systemctl reload nginx

# 3.创建站点目录
[root@web01 conf.d]# mkdir /blog

# 4.测试nginx连接php(编写php info代码)
[root@web01 conf.d]# vim /blog/info.php
<?php
        phpinfo();
?>

# 5.windows域名解析
## 修改配置文件
[root@web01 ~]# cat /etc/nginx/conf.d/autoindex.conf
server{
listen 80;
server_name _;
auth_basic 'hg';
auth_basic_user_file /etc/nginx/auth/hg_auth;
location /{
root /code;
index index.html;
}
location /hg{
stub_status;
}
}
## 10.0.0.8访问
[root@web02 ~]# curl http://hg:123@10.0.0.7
123
## 禁止10.0.0.8访问
[root@web01 ~]# cat /etc/nginx/conf.d/autoindex.conf
server{
listen 80;
server_name _;
auth_basic 'hg';
auth_basic_user_file /etc/nginx/auth/hg_auth;
location /{
root /code;
index index.html;
deny 10.0.0.8;
}
location /hg{
stub_status;
}
}
## 10.0.0.8访问查看
[root@web02 ~]# curl http://hg:123@10.0.0.7
<html>
<head><title>403 Forbidden</title></head>
<body>
<center><h1>403 Forbidden</h1></center>
<hr><center>nginx/1.24.0</center>
</body>
</html>
## 注意:默认nginx就是 allow all; 如果只允许某一个IP需要配合deny all使用,deny all;要放在最下面
例:只允许10.0.0.8访问
server{
listen 80;
server_name _;
auth_basic 'hg';
auth_basic_user_file /etc/nginx/auth/hg_auth;
location /{
root /code;
index index.html;
allow 10.0.0.8;
deny all;
}
location /hg{
stub_status;
}
}
另一台web连接有密码认证服务器的方法: curl http://用户名:密码@访问服务器ip连接频率限制(limit_conn)
http{
limit_conn_zone $remote_addr zone=内存空间名字:10m;
# 在系统里起一个名字你自定义 内存为10M的空间存放访问你网站的IP
server {
limit_conn 内存空间名字 1;
}
}
conn_zone:内存空间的名字
1:最大连接次数
请求频率限制(limit_req)
# http标签段定义请求限制, rate限制速率,限制一秒钟最多一个IP请求
http {
limit_req_zone $binary_remote_addr zone=req_zone:10m rate=1r/s;
server {
listen 80;
server_name www.wodeyumengouwo.com;
# 1r/s只接收一个请求,其余请求拒绝处理并返回错误码给客户端
limit_req zone=req_zone;
# 请求超过1r/s,剩下的将被延迟处理,请求数超过burst定义的数量, 多余的请求返回503
limit_req zone=req_zone burst=3 nodelay; # burst=3:自定义请求数 nodelay:不延迟处理
location /{
root /code;
index index.html;
}
}
}
## 请求频率限制错误页面优化 指定返回的状态码 和 出现各状态码跳转的目录
[root@web01 test]# [root@web01 ~]# cat /etc/nginx/conf.d/autoindex.conf
limit_req_zone $binary_remote_addr zone=req_zone:10m rate=1r/s;
server{
listen 80;
server_name _;
auth_basic 'hg';
auth_basic_user_file /etc/nginx/auth/hg_auth;
limit_req zone=req_zone burst=3 nodelay;
limit_req_status 555; # 指定返回的错误状态码(400 - 599之间)
error_page 555 /555.html; # 指定出现555状态码跳转的目录
location /{
root /code;
autoindex on;
autoindex_exact_size off;
autoindex_format html;
autoindex_localtime on;
}
location /hg{
stub_status;
}
}
location优先级
匹配符
匹配规则
优先级
=
精确匹配
1
^~
以某个字符串开头
2
~
区分大小写的正则匹配
3
~*
不区分大小写的正则匹配
4
!~
区分大小写不匹配的正则
5
!~*
不区分大小写不匹配的正则
6
/
通用匹配,任何请求都会匹配到
7
应用场景
# 优先级最高符号=
location =/
# 通用匹配,任何请求都会匹配到
location / {
...
}
# 严格区分大小写,匹配以.php结尾的都走这个location
location ~ \.php$ {
...
}
# 严格区分大小写,匹配以.jsp结尾的都走这个location
location ~ \.jsp$ {
...
}
# 不区分大小写匹配,只要用户访问.jpg,gif,png,js,css 都走这条location
location ~* .*\.(jpg|gif|png|js|css)$ {
...
}
location ~* \.(jpg|gif|png|js|css)$ {
...
}
# 不区分大小写匹配
location ~* "\.(sql|bak|tgz|tar.gz|.git)$" {
...
}
Nginx实现web架构
企业中网站架构
企业常用架构:
LNMP:Linux Nginx MySQL PHP
LAMP:Linux Apache MySQL PHP
LNMT:Linux Nginx MySQL Tomcat
LAMT:Linux Apache MySQL Tomcat
Nginx
Apache
运行前端:html css js
PHP:运行php代码
Tomcat:运行Java代码
部署wordpress
部署PHP
# 1.卸载Linux自带的旧版本php
[root@web01 ~]# yum remove php-mysql-5.4 php php-fpm php-common
# 2.添加php第三方源
[root@nginx ~]# vim /etc/yum.repos.d/php.repo
[php-webtatic]
name = PHP Repository
baseurl = http://us-east.repo.webtatic.com/yum/el7/x86_64/
gpgcheck = 0
# 3.安装php
[root@web01 ~]# yum -y install php71w php71w-cli php71w-common php71w-devel php71w-embedded php71w-gd php71w-mcrypt php71w-mbstring php71w-pdo php71w-xml php71w-fpm php71w-mysqlnd php71w-opcache php71w-pecl-memcached php71w-pecl-redis php71w-pecl-mongodb
## 也可以直接下载打好的包
wget https://download.wodeyumengouwo.com/nginx/nginx_php.tgz
tar xf nginx_php.tgz
yum localinstall -y *.rpm
# 4.创建用户
[root@web01 ~]# groupadd www -g 666
[root@web01 ~]# useradd www -u 666 -g 666 -s /sbin/nologin -M
# 5.修改nginx运行用户
[root@web01 ~]# vim /etc/nginx/nginx.conf
user www;
# php-fpm作用:用来管理php程序运行
## php相关配置文件
/etc/php-fpm.conf # php管理进程配置文件
/etc/php.ini # php程序配置文件
/etc/php-fpm.d/www.conf # php管理进程的子配置文件
# 6.修改php的配置文件 启动用户 和端口
[root@web01 ~]# vim /etc/php-fpm.d/www.conf
[www]
user = www
group = www
## 找到 listen = 127.0.0.1:9000注释掉 然后在下写入创建php.sock安全套接字文件并指定该文件的属主和属组
;listen = 127.0.0.1:9000
listen = /opt/php.sock
listen.owner = www
listen.group = www
## 完成安全套接字文件的创建以后 就可以在下面直接将指定9000端口 换成安全套接字文件 本地连接会更快
### 完整php配置文件
[www]
user = www
group = www
;listen = 0.0.0.0:9000
listen = /opt/php.sock
listen.owner = www
listen.group = www
listen.allowed_clients = 127.0.0.1
pm = dynamic
pm.max_children = 50
pm.start_servers = 5
pm.min_spare_servers = 5
pm.max_spare_servers = 35
slowlog = /var/log/php-fpm/www-slow.log
php_admin_value[error_log] = /var/log/php-fpm/www-error.log
php_admin_flag[log_errors] = on
php_value[session.save_handler] = files
php_value[session.save_path] = /var/lib/php/session
php_value[soap.wsdl_cache_dir] = /var/lib/php/wsdlcache
# 7.启动php并加入开机自启
[root@web01 ~]# systemctl start php-fpm
[root@web01 ~]# systemctl enable php-fpm
# 8.检查php进程和端口
[root@web01 ~]# ps -ef|grep php
root 6755 1 0 21:18 ? 00:00:00 php-fpm: master process (/etc/php-fpm.conf)
apache 6756 6755 0 21:18 ? 00:00:00 php-fpm: pool www
apache 6757 6755 0 21:18 ? 00:00:00 php-fpm: pool www
apache 6758 6755 0 21:18 ? 00:00:00 php-fpm: pool www
apache 6759 6755 0 21:18 ? 00:00:00 php-fpm: pool www
apache 6760 6755 0 21:18 ? 00:00:00 php-fpm: pool www
root 6832 902 0 21:19 pts/0 00:00:00 grep --color=auto php
[root@web01 ~]# netstat -lntup
tcp 0 0 127.0.0.1:9000 0.0.0.0:* LISTEN 6755/php-fpm: maste
配置nginx连接php
[root@web01 ~]# vim /etc/nginx/conf.d/wp.conf
server{
listen 80;
server_name www.gouwo.com;
location /{
root /blog;
index index.php index.html;
}
location ~ \.php$ {
root /blog;
fastcgi_pass 127.0.0.1:9000;
#fastcgi_pass unix:/opt/php.sock;
fastcgi_param SCRIPT_FILENAME $document_root$fastcgi_script_name;
include /etc/nginx/fastcgi_params;
}
}
# 2 重新加载nginx
[root@web01 conf.d]# systemctl reload nginx
# 3.创建站点目录
[root@web01 conf.d]# mkdir /blog
# 4.测试nginx连接php(编写php info代码)
[root@web01 conf.d]# vim /blog/info.php
<?php
phpinfo();
?>
# 5.windows域名解析
http{
limit_conn_zone $remote_addr zone=内存空间名字:10m;
# 在系统里起一个名字你自定义 内存为10M的空间存放访问你网站的IP
server {
limit_conn 内存空间名字 1;
}
}
conn_zone:内存空间的名字
1:最大连接次数# http标签段定义请求限制, rate限制速率,限制一秒钟最多一个IP请求
http {
limit_req_zone $binary_remote_addr zone=req_zone:10m rate=1r/s;
server {
listen 80;
server_name www.wodeyumengouwo.com;
# 1r/s只接收一个请求,其余请求拒绝处理并返回错误码给客户端
limit_req zone=req_zone;
# 请求超过1r/s,剩下的将被延迟处理,请求数超过burst定义的数量, 多余的请求返回503
limit_req zone=req_zone burst=3 nodelay; # burst=3:自定义请求数 nodelay:不延迟处理
location /{
root /code;
index index.html;
}
}
}
## 请求频率限制错误页面优化 指定返回的状态码 和 出现各状态码跳转的目录
[root@web01 test]# [root@web01 ~]# cat /etc/nginx/conf.d/autoindex.conf
limit_req_zone $binary_remote_addr zone=req_zone:10m rate=1r/s;
server{
listen 80;
server_name _;
auth_basic 'hg';
auth_basic_user_file /etc/nginx/auth/hg_auth;
limit_req zone=req_zone burst=3 nodelay;
limit_req_status 555; # 指定返回的错误状态码(400 - 599之间)
error_page 555 /555.html; # 指定出现555状态码跳转的目录
location /{
root /code;
autoindex on;
autoindex_exact_size off;
autoindex_format html;
autoindex_localtime on;
}
location /hg{
stub_status;
}
}location优先级
匹配符
匹配规则
优先级
=
精确匹配
1
^~
以某个字符串开头
2
~
区分大小写的正则匹配
3
~*
不区分大小写的正则匹配
4
!~
区分大小写不匹配的正则
5
!~*
不区分大小写不匹配的正则
6
/
通用匹配,任何请求都会匹配到
7
应用场景
# 优先级最高符号=
location =/
# 通用匹配,任何请求都会匹配到
location / {
...
}
# 严格区分大小写,匹配以.php结尾的都走这个location
location ~ \.php$ {
...
}
# 严格区分大小写,匹配以.jsp结尾的都走这个location
location ~ \.jsp$ {
...
}
# 不区分大小写匹配,只要用户访问.jpg,gif,png,js,css 都走这条location
location ~* .*\.(jpg|gif|png|js|css)$ {
...
}
location ~* \.(jpg|gif|png|js|css)$ {
...
}
# 不区分大小写匹配
location ~* "\.(sql|bak|tgz|tar.gz|.git)$" {
...
}
Nginx实现web架构
企业中网站架构
企业常用架构:
LNMP:Linux Nginx MySQL PHP
LAMP:Linux Apache MySQL PHP
LNMT:Linux Nginx MySQL Tomcat
LAMT:Linux Apache MySQL Tomcat
Nginx
Apache
运行前端:html css js
PHP:运行php代码
Tomcat:运行Java代码
部署wordpress
部署PHP
# 1.卸载Linux自带的旧版本php
[root@web01 ~]# yum remove php-mysql-5.4 php php-fpm php-common
# 2.添加php第三方源
[root@nginx ~]# vim /etc/yum.repos.d/php.repo
[php-webtatic]
name = PHP Repository
baseurl = http://us-east.repo.webtatic.com/yum/el7/x86_64/
gpgcheck = 0
# 3.安装php
[root@web01 ~]# yum -y install php71w php71w-cli php71w-common php71w-devel php71w-embedded php71w-gd php71w-mcrypt php71w-mbstring php71w-pdo php71w-xml php71w-fpm php71w-mysqlnd php71w-opcache php71w-pecl-memcached php71w-pecl-redis php71w-pecl-mongodb
## 也可以直接下载打好的包
wget https://download.wodeyumengouwo.com/nginx/nginx_php.tgz
tar xf nginx_php.tgz
yum localinstall -y *.rpm
# 4.创建用户
[root@web01 ~]# groupadd www -g 666
[root@web01 ~]# useradd www -u 666 -g 666 -s /sbin/nologin -M
# 5.修改nginx运行用户
[root@web01 ~]# vim /etc/nginx/nginx.conf
user www;
# php-fpm作用:用来管理php程序运行
## php相关配置文件
/etc/php-fpm.conf # php管理进程配置文件
/etc/php.ini # php程序配置文件
/etc/php-fpm.d/www.conf # php管理进程的子配置文件
# 6.修改php的配置文件 启动用户 和端口
[root@web01 ~]# vim /etc/php-fpm.d/www.conf
[www]
user = www
group = www
## 找到 listen = 127.0.0.1:9000注释掉 然后在下写入创建php.sock安全套接字文件并指定该文件的属主和属组
;listen = 127.0.0.1:9000
listen = /opt/php.sock
listen.owner = www
listen.group = www
## 完成安全套接字文件的创建以后 就可以在下面直接将指定9000端口 换成安全套接字文件 本地连接会更快
### 完整php配置文件
[www]
user = www
group = www
;listen = 0.0.0.0:9000
listen = /opt/php.sock
listen.owner = www
listen.group = www
listen.allowed_clients = 127.0.0.1
pm = dynamic
pm.max_children = 50
pm.start_servers = 5
pm.min_spare_servers = 5
pm.max_spare_servers = 35
slowlog = /var/log/php-fpm/www-slow.log
php_admin_value[error_log] = /var/log/php-fpm/www-error.log
php_admin_flag[log_errors] = on
php_value[session.save_handler] = files
php_value[session.save_path] = /var/lib/php/session
php_value[soap.wsdl_cache_dir] = /var/lib/php/wsdlcache
# 7.启动php并加入开机自启
[root@web01 ~]# systemctl start php-fpm
[root@web01 ~]# systemctl enable php-fpm
# 8.检查php进程和端口
[root@web01 ~]# ps -ef|grep php
root 6755 1 0 21:18 ? 00:00:00 php-fpm: master process (/etc/php-fpm.conf)
apache 6756 6755 0 21:18 ? 00:00:00 php-fpm: pool www
apache 6757 6755 0 21:18 ? 00:00:00 php-fpm: pool www
apache 6758 6755 0 21:18 ? 00:00:00 php-fpm: pool www
apache 6759 6755 0 21:18 ? 00:00:00 php-fpm: pool www
apache 6760 6755 0 21:18 ? 00:00:00 php-fpm: pool www
root 6832 902 0 21:19 pts/0 00:00:00 grep --color=auto php
[root@web01 ~]# netstat -lntup
tcp 0 0 127.0.0.1:9000 0.0.0.0:* LISTEN 6755/php-fpm: maste
配置nginx连接php
[root@web01 ~]# vim /etc/nginx/conf.d/wp.conf
server{
listen 80;
server_name www.gouwo.com;
location /{
root /blog;
index index.php index.html;
}
location ~ \.php$ {
root /blog;
fastcgi_pass 127.0.0.1:9000;
#fastcgi_pass unix:/opt/php.sock;
fastcgi_param SCRIPT_FILENAME $document_root$fastcgi_script_name;
include /etc/nginx/fastcgi_params;
}
}
# 2 重新加载nginx
[root@web01 conf.d]# systemctl reload nginx
# 3.创建站点目录
[root@web01 conf.d]# mkdir /blog
# 4.测试nginx连接php(编写php info代码)
[root@web01 conf.d]# vim /blog/info.php
<?php
phpinfo();
?>
# 5.windows域名解析
| 匹配符 | 匹配规则 | 优先级 |
|---|---|---|
| = | 精确匹配 | 1 |
| ^~ | 以某个字符串开头 | 2 |
| ~ | 区分大小写的正则匹配 | 3 |
| ~* | 不区分大小写的正则匹配 | 4 |
| !~ | 区分大小写不匹配的正则 | 5 |
| !~* | 不区分大小写不匹配的正则 | 6 |
| / | 通用匹配,任何请求都会匹配到 | 7 |
# 优先级最高符号=
location =/
# 通用匹配,任何请求都会匹配到
location / {
...
}
# 严格区分大小写,匹配以.php结尾的都走这个location
location ~ \.php$ {
...
}
# 严格区分大小写,匹配以.jsp结尾的都走这个location
location ~ \.jsp$ {
...
}
# 不区分大小写匹配,只要用户访问.jpg,gif,png,js,css 都走这条location
location ~* .*\.(jpg|gif|png|js|css)$ {
...
}
location ~* \.(jpg|gif|png|js|css)$ {
...
}
# 不区分大小写匹配
location ~* "\.(sql|bak|tgz|tar.gz|.git)$" {
...
}Nginx实现web架构
企业中网站架构
企业常用架构:
LNMP:Linux Nginx MySQL PHP
LAMP:Linux Apache MySQL PHP
LNMT:Linux Nginx MySQL Tomcat
LAMT:Linux Apache MySQL Tomcat
Nginx
Apache
运行前端:html css js
PHP:运行php代码
Tomcat:运行Java代码
部署wordpress
部署PHP
# 1.卸载Linux自带的旧版本php
[root@web01 ~]# yum remove php-mysql-5.4 php php-fpm php-common
# 2.添加php第三方源
[root@nginx ~]# vim /etc/yum.repos.d/php.repo
[php-webtatic]
name = PHP Repository
baseurl = http://us-east.repo.webtatic.com/yum/el7/x86_64/
gpgcheck = 0
# 3.安装php
[root@web01 ~]# yum -y install php71w php71w-cli php71w-common php71w-devel php71w-embedded php71w-gd php71w-mcrypt php71w-mbstring php71w-pdo php71w-xml php71w-fpm php71w-mysqlnd php71w-opcache php71w-pecl-memcached php71w-pecl-redis php71w-pecl-mongodb
## 也可以直接下载打好的包
wget https://download.wodeyumengouwo.com/nginx/nginx_php.tgz
tar xf nginx_php.tgz
yum localinstall -y *.rpm
# 4.创建用户
[root@web01 ~]# groupadd www -g 666
[root@web01 ~]# useradd www -u 666 -g 666 -s /sbin/nologin -M
# 5.修改nginx运行用户
[root@web01 ~]# vim /etc/nginx/nginx.conf
user www;
# php-fpm作用:用来管理php程序运行
## php相关配置文件
/etc/php-fpm.conf # php管理进程配置文件
/etc/php.ini # php程序配置文件
/etc/php-fpm.d/www.conf # php管理进程的子配置文件
# 6.修改php的配置文件 启动用户 和端口
[root@web01 ~]# vim /etc/php-fpm.d/www.conf
[www]
user = www
group = www
## 找到 listen = 127.0.0.1:9000注释掉 然后在下写入创建php.sock安全套接字文件并指定该文件的属主和属组
;listen = 127.0.0.1:9000
listen = /opt/php.sock
listen.owner = www
listen.group = www
## 完成安全套接字文件的创建以后 就可以在下面直接将指定9000端口 换成安全套接字文件 本地连接会更快
### 完整php配置文件
[www]
user = www
group = www
;listen = 0.0.0.0:9000
listen = /opt/php.sock
listen.owner = www
listen.group = www
listen.allowed_clients = 127.0.0.1
pm = dynamic
pm.max_children = 50
pm.start_servers = 5
pm.min_spare_servers = 5
pm.max_spare_servers = 35
slowlog = /var/log/php-fpm/www-slow.log
php_admin_value[error_log] = /var/log/php-fpm/www-error.log
php_admin_flag[log_errors] = on
php_value[session.save_handler] = files
php_value[session.save_path] = /var/lib/php/session
php_value[soap.wsdl_cache_dir] = /var/lib/php/wsdlcache
# 7.启动php并加入开机自启
[root@web01 ~]# systemctl start php-fpm
[root@web01 ~]# systemctl enable php-fpm
# 8.检查php进程和端口
[root@web01 ~]# ps -ef|grep php
root 6755 1 0 21:18 ? 00:00:00 php-fpm: master process (/etc/php-fpm.conf)
apache 6756 6755 0 21:18 ? 00:00:00 php-fpm: pool www
apache 6757 6755 0 21:18 ? 00:00:00 php-fpm: pool www
apache 6758 6755 0 21:18 ? 00:00:00 php-fpm: pool www
apache 6759 6755 0 21:18 ? 00:00:00 php-fpm: pool www
apache 6760 6755 0 21:18 ? 00:00:00 php-fpm: pool www
root 6832 902 0 21:19 pts/0 00:00:00 grep --color=auto php
[root@web01 ~]# netstat -lntup
tcp 0 0 127.0.0.1:9000 0.0.0.0:* LISTEN 6755/php-fpm: maste
配置nginx连接php
[root@web01 ~]# vim /etc/nginx/conf.d/wp.conf
server{
listen 80;
server_name www.gouwo.com;
location /{
root /blog;
index index.php index.html;
}
location ~ \.php$ {
root /blog;
fastcgi_pass 127.0.0.1:9000;
#fastcgi_pass unix:/opt/php.sock;
fastcgi_param SCRIPT_FILENAME $document_root$fastcgi_script_name;
include /etc/nginx/fastcgi_params;
}
}
# 2 重新加载nginx
[root@web01 conf.d]# systemctl reload nginx
# 3.创建站点目录
[root@web01 conf.d]# mkdir /blog
# 4.测试nginx连接php(编写php info代码)
[root@web01 conf.d]# vim /blog/info.php
<?php
phpinfo();
?>
# 5.windows域名解析
企业常用架构:
LNMP:Linux Nginx MySQL PHP
LAMP:Linux Apache MySQL PHP
LNMT:Linux Nginx MySQL Tomcat
LAMT:Linux Apache MySQL Tomcat
Nginx
Apache
运行前端:html css js
PHP:运行php代码
Tomcat:运行Java代码# 1.卸载Linux自带的旧版本php
[root@web01 ~]# yum remove php-mysql-5.4 php php-fpm php-common
# 2.添加php第三方源
[root@nginx ~]# vim /etc/yum.repos.d/php.repo
[php-webtatic]
name = PHP Repository
baseurl = http://us-east.repo.webtatic.com/yum/el7/x86_64/
gpgcheck = 0
# 3.安装php
[root@web01 ~]# yum -y install php71w php71w-cli php71w-common php71w-devel php71w-embedded php71w-gd php71w-mcrypt php71w-mbstring php71w-pdo php71w-xml php71w-fpm php71w-mysqlnd php71w-opcache php71w-pecl-memcached php71w-pecl-redis php71w-pecl-mongodb
## 也可以直接下载打好的包
wget https://download.wodeyumengouwo.com/nginx/nginx_php.tgz
tar xf nginx_php.tgz
yum localinstall -y *.rpm
# 4.创建用户
[root@web01 ~]# groupadd www -g 666
[root@web01 ~]# useradd www -u 666 -g 666 -s /sbin/nologin -M
# 5.修改nginx运行用户
[root@web01 ~]# vim /etc/nginx/nginx.conf
user www;
# php-fpm作用:用来管理php程序运行
## php相关配置文件
/etc/php-fpm.conf # php管理进程配置文件
/etc/php.ini # php程序配置文件
/etc/php-fpm.d/www.conf # php管理进程的子配置文件
# 6.修改php的配置文件 启动用户 和端口
[root@web01 ~]# vim /etc/php-fpm.d/www.conf
[www]
user = www
group = www
## 找到 listen = 127.0.0.1:9000注释掉 然后在下写入创建php.sock安全套接字文件并指定该文件的属主和属组
;listen = 127.0.0.1:9000
listen = /opt/php.sock
listen.owner = www
listen.group = www
## 完成安全套接字文件的创建以后 就可以在下面直接将指定9000端口 换成安全套接字文件 本地连接会更快
### 完整php配置文件
[www]
user = www
group = www
;listen = 0.0.0.0:9000
listen = /opt/php.sock
listen.owner = www
listen.group = www
listen.allowed_clients = 127.0.0.1
pm = dynamic
pm.max_children = 50
pm.start_servers = 5
pm.min_spare_servers = 5
pm.max_spare_servers = 35
slowlog = /var/log/php-fpm/www-slow.log
php_admin_value[error_log] = /var/log/php-fpm/www-error.log
php_admin_flag[log_errors] = on
php_value[session.save_handler] = files
php_value[session.save_path] = /var/lib/php/session
php_value[soap.wsdl_cache_dir] = /var/lib/php/wsdlcache
# 7.启动php并加入开机自启
[root@web01 ~]# systemctl start php-fpm
[root@web01 ~]# systemctl enable php-fpm
# 8.检查php进程和端口
[root@web01 ~]# ps -ef|grep php
root 6755 1 0 21:18 ? 00:00:00 php-fpm: master process (/etc/php-fpm.conf)
apache 6756 6755 0 21:18 ? 00:00:00 php-fpm: pool www
apache 6757 6755 0 21:18 ? 00:00:00 php-fpm: pool www
apache 6758 6755 0 21:18 ? 00:00:00 php-fpm: pool www
apache 6759 6755 0 21:18 ? 00:00:00 php-fpm: pool www
apache 6760 6755 0 21:18 ? 00:00:00 php-fpm: pool www
root 6832 902 0 21:19 pts/0 00:00:00 grep --color=auto php
[root@web01 ~]# netstat -lntup
tcp 0 0 127.0.0.1:9000 0.0.0.0:* LISTEN 6755/php-fpm: maste 配置nginx连接php
[root@web01 ~]# vim /etc/nginx/conf.d/wp.conf
server{
listen 80;
server_name www.gouwo.com;
location /{
root /blog;
index index.php index.html;
}
location ~ \.php$ {
root /blog;
fastcgi_pass 127.0.0.1:9000;
#fastcgi_pass unix:/opt/php.sock;
fastcgi_param SCRIPT_FILENAME $document_root$fastcgi_script_name;
include /etc/nginx/fastcgi_params;
}
}
# 2 重新加载nginx
[root@web01 conf.d]# systemctl reload nginx
# 3.创建站点目录
[root@web01 conf.d]# mkdir /blog
# 4.测试nginx连接php(编写php info代码)
[root@web01 conf.d]# vim /blog/info.php
<?php
phpinfo();
?>
# 5.windows域名解析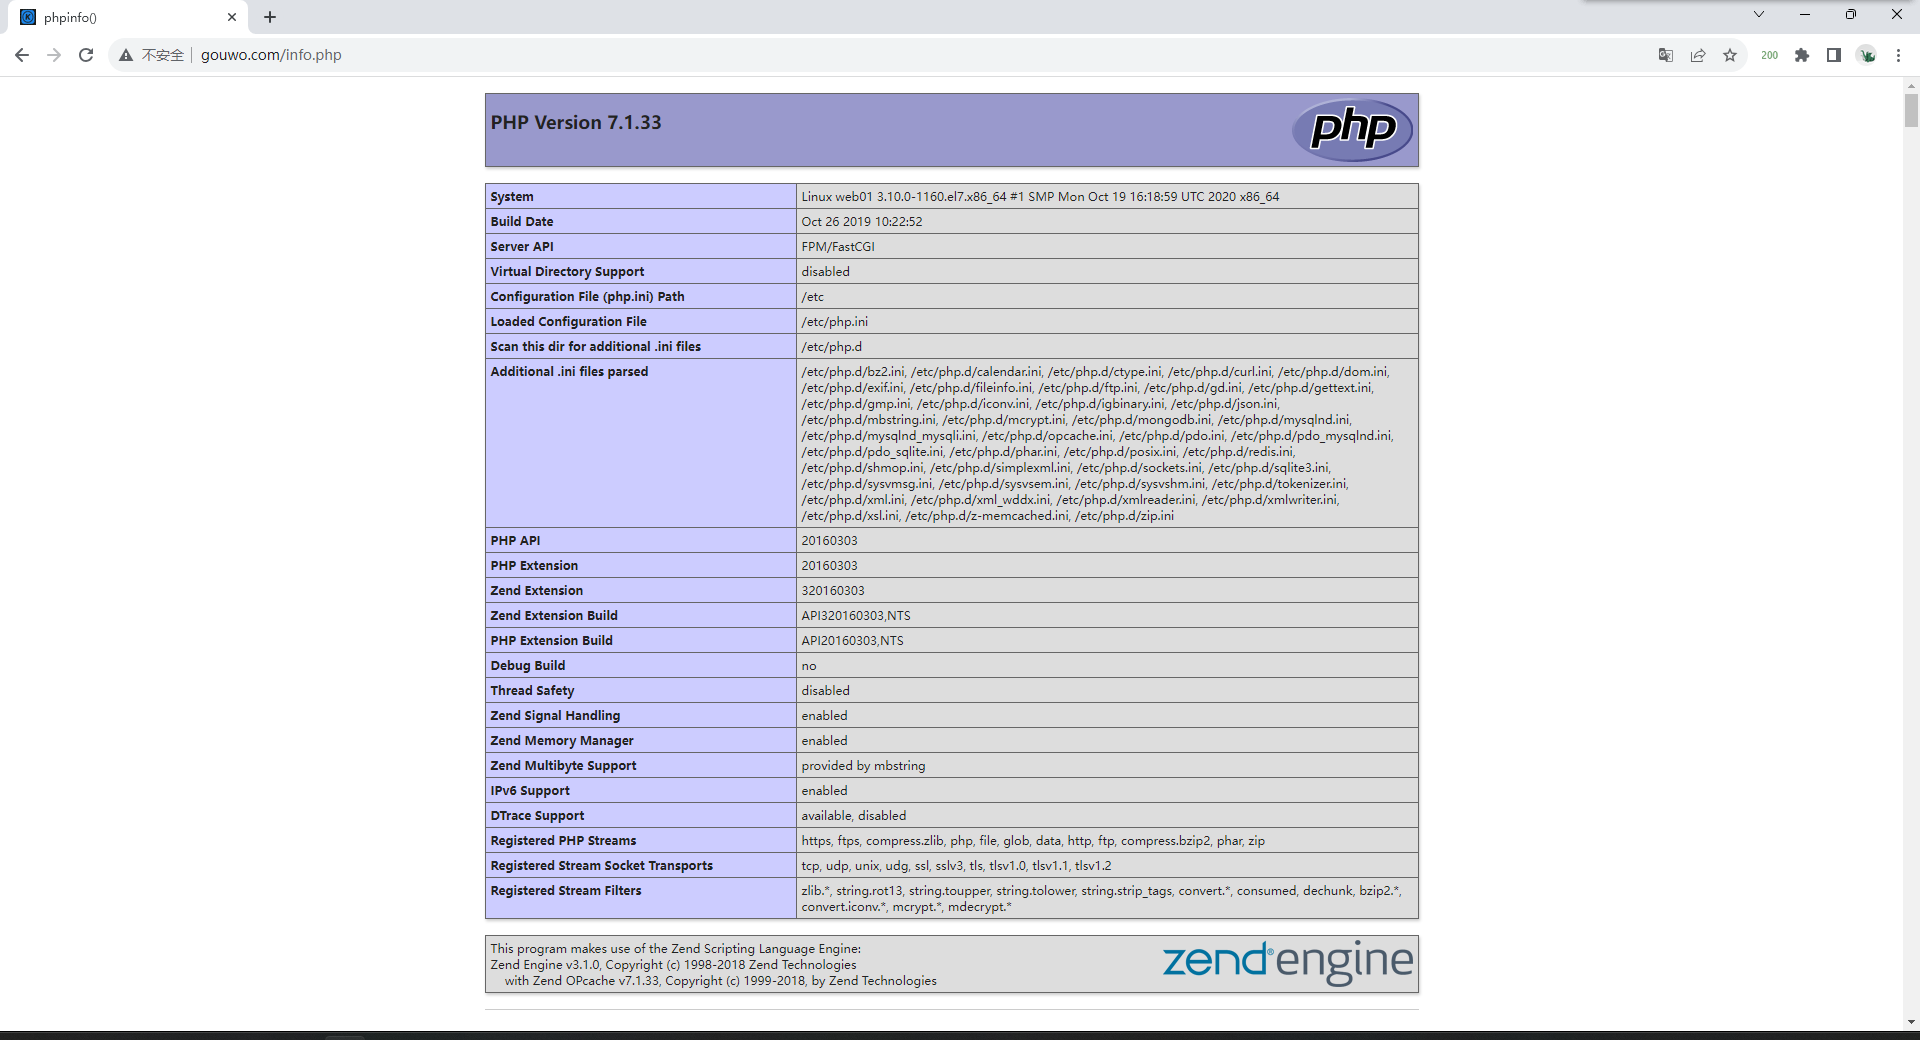
## 下载wordpress
老版本:https://download.wodeyumengouwo.com/nginx/wordpress-5.0.3-zh_CN.tar.gz
[root@web01 blog]# wget https://cn.wordpress.org/latest-zh_CN.tar.gz
## 解压
[root@web01 blog]# tar xf latest-zh_CN.tar.gz
## 授权
[root@web01 blog]# chown -R www.www /blog/
## 修改nginx配置文件
[root@web01 blog]# cat /etc/nginx/conf.d/autoindex.conf
server{
listen 80;
server_name www.gouwo.com;
root /blog/wordpress;
location /{
index index.php index.html;
}
location ~ \.php$ {
fastcgi_pass 127.0.0.1:9000;
fastcgi_param SCRIPT_FILENAME $document_root$fastcgi_script_name;
include /etc/nginx/fastcgi_params;
}
}
## 重启nginx
[root@web01 blog]# systemctl restart nginx
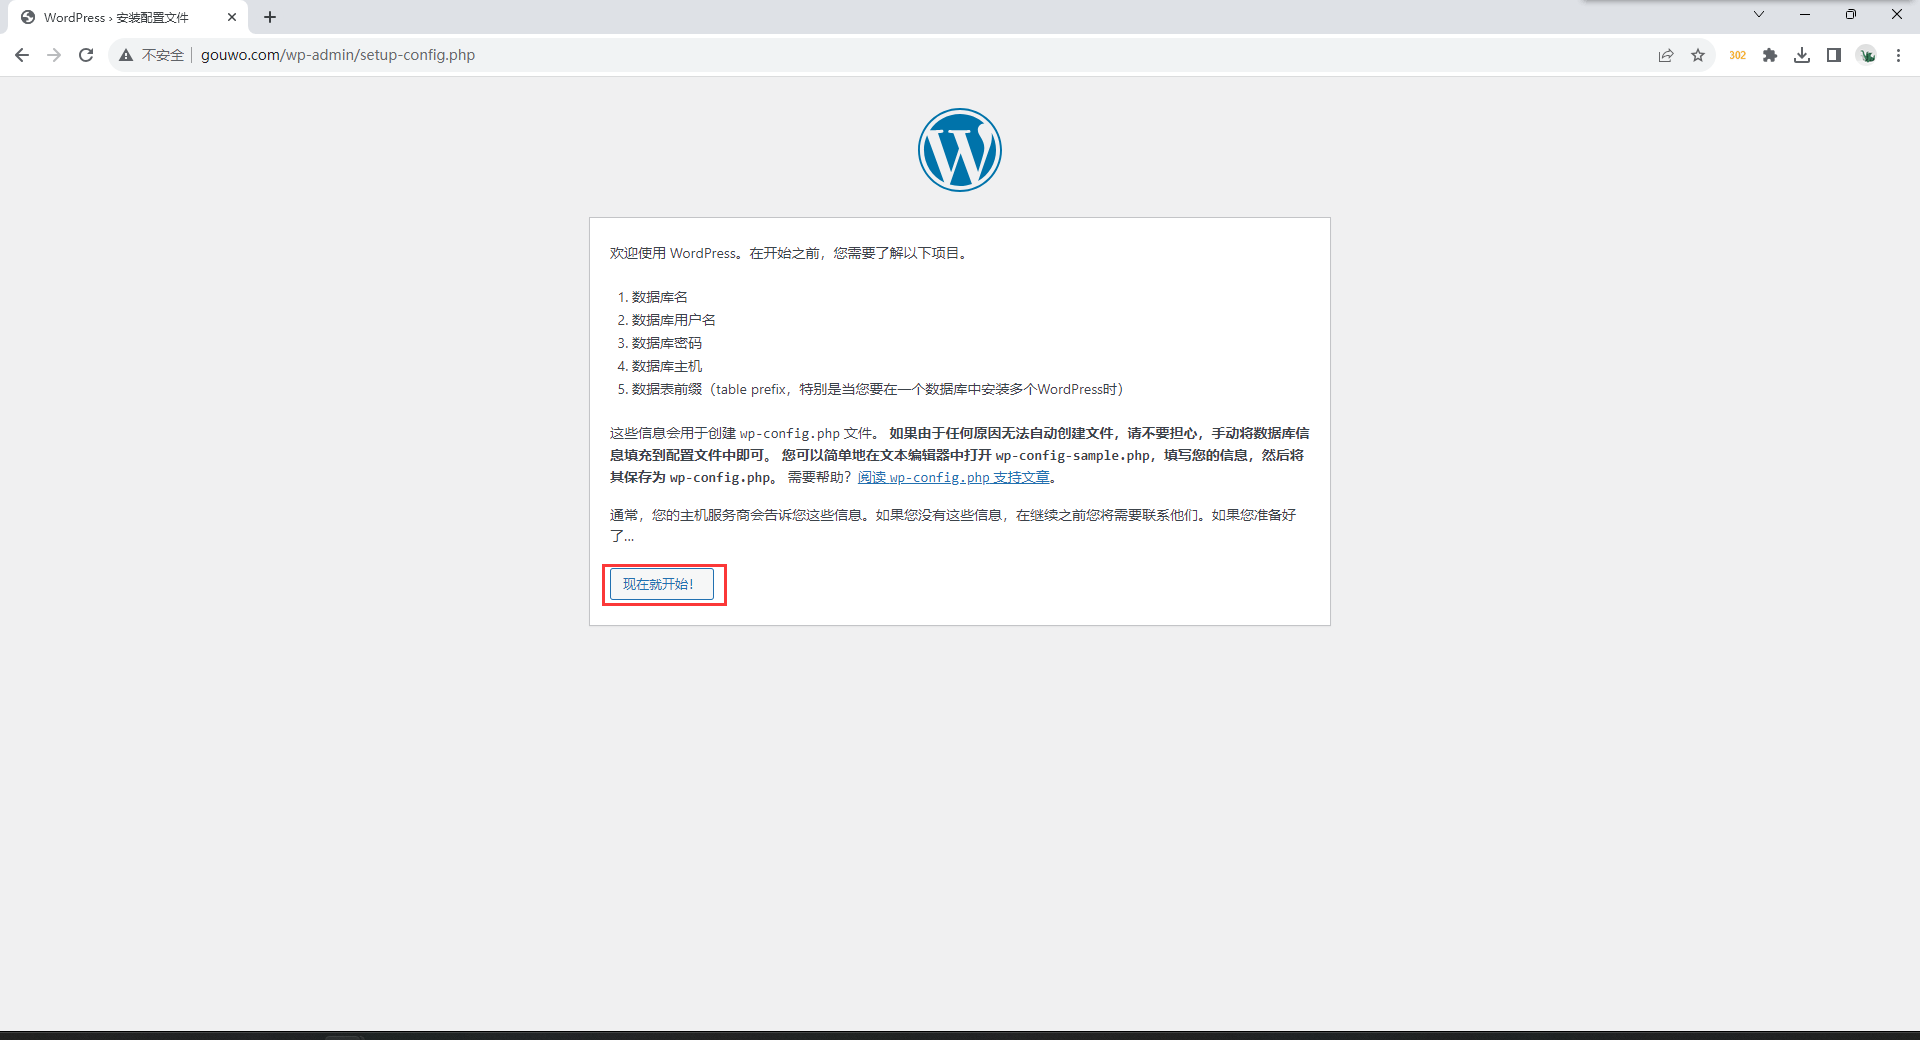
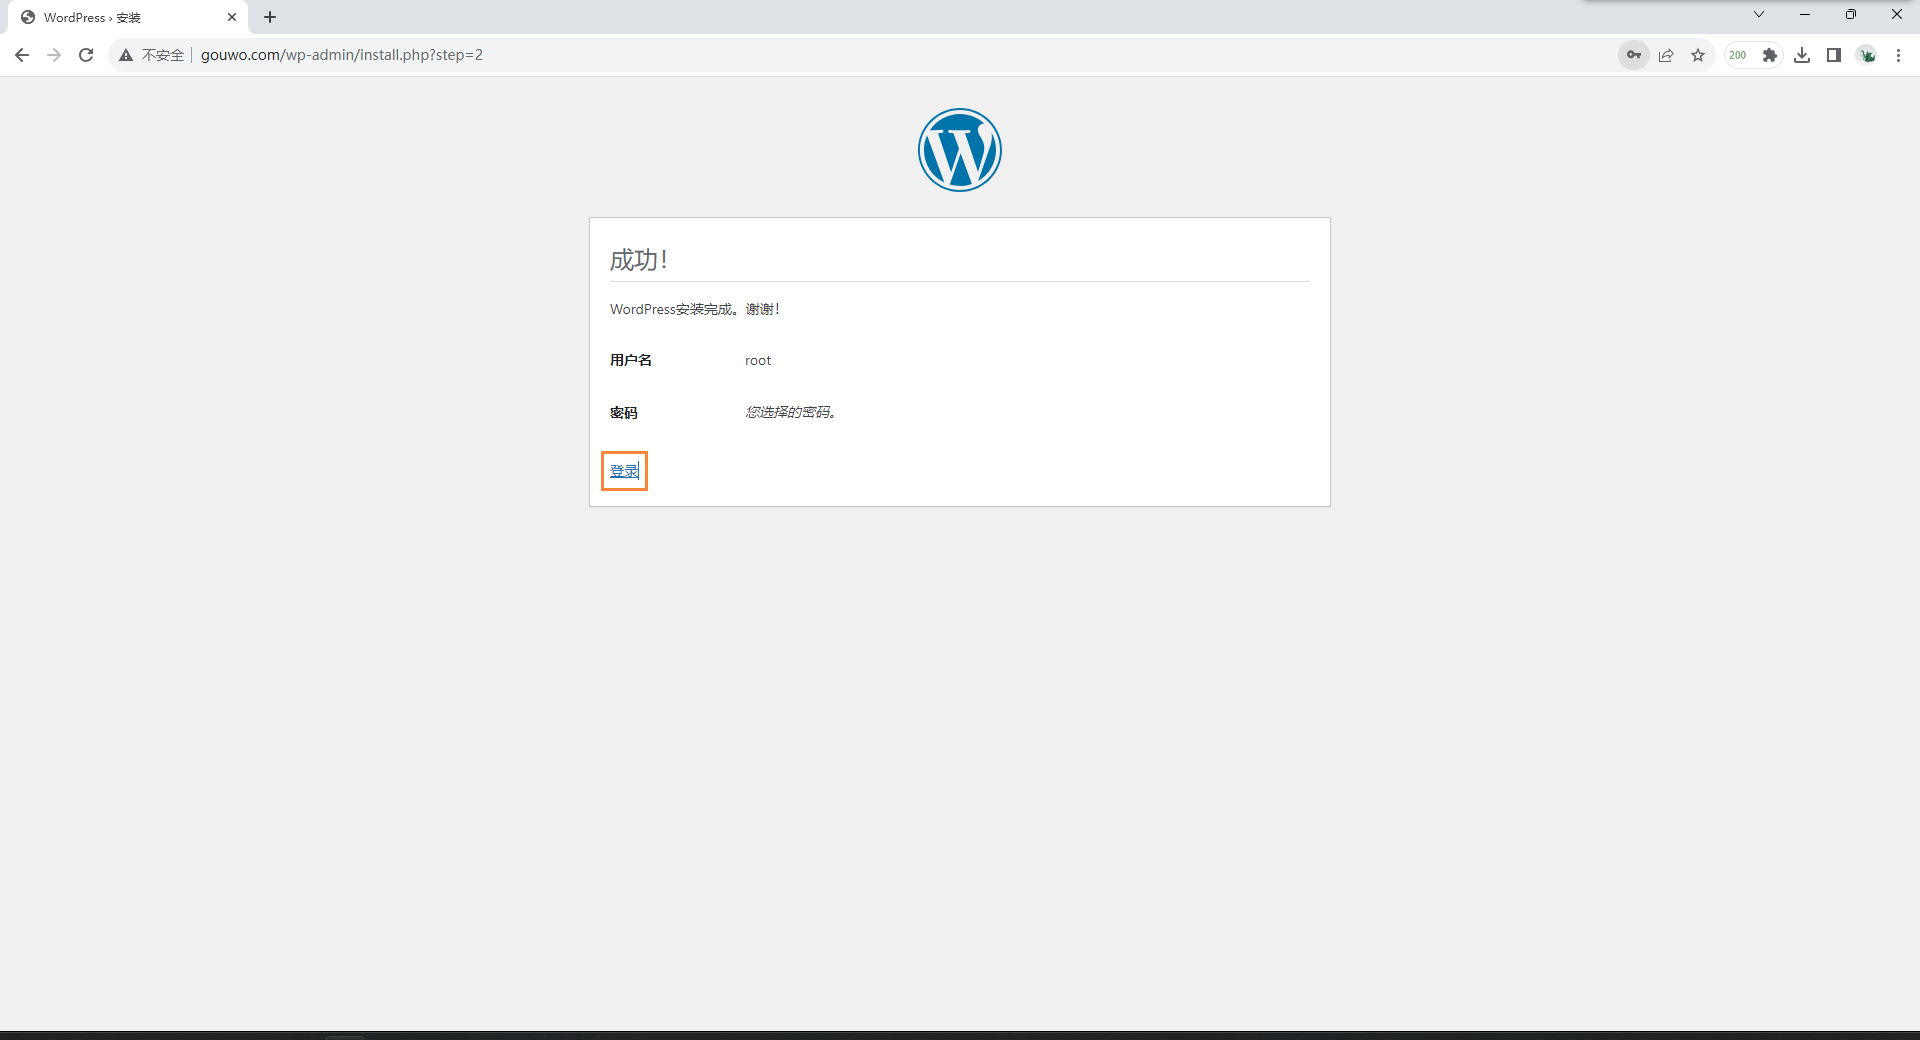
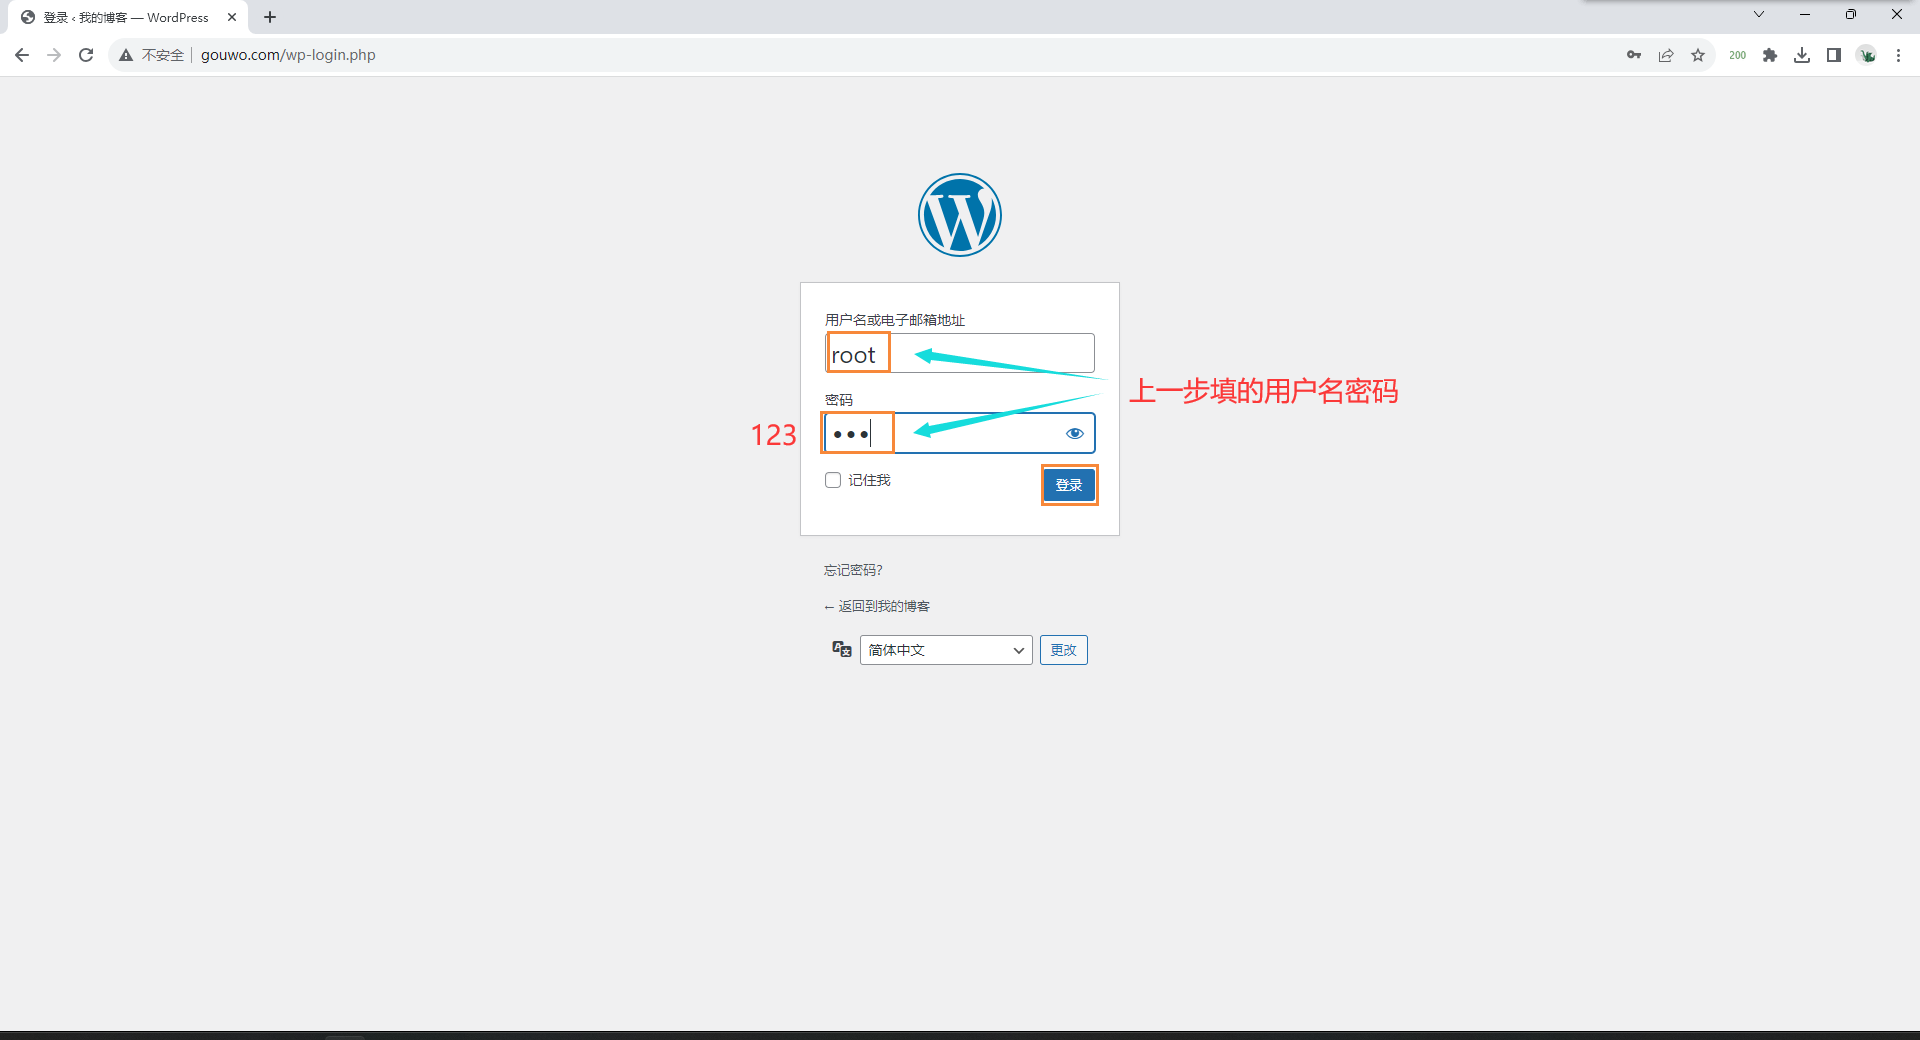
## 访问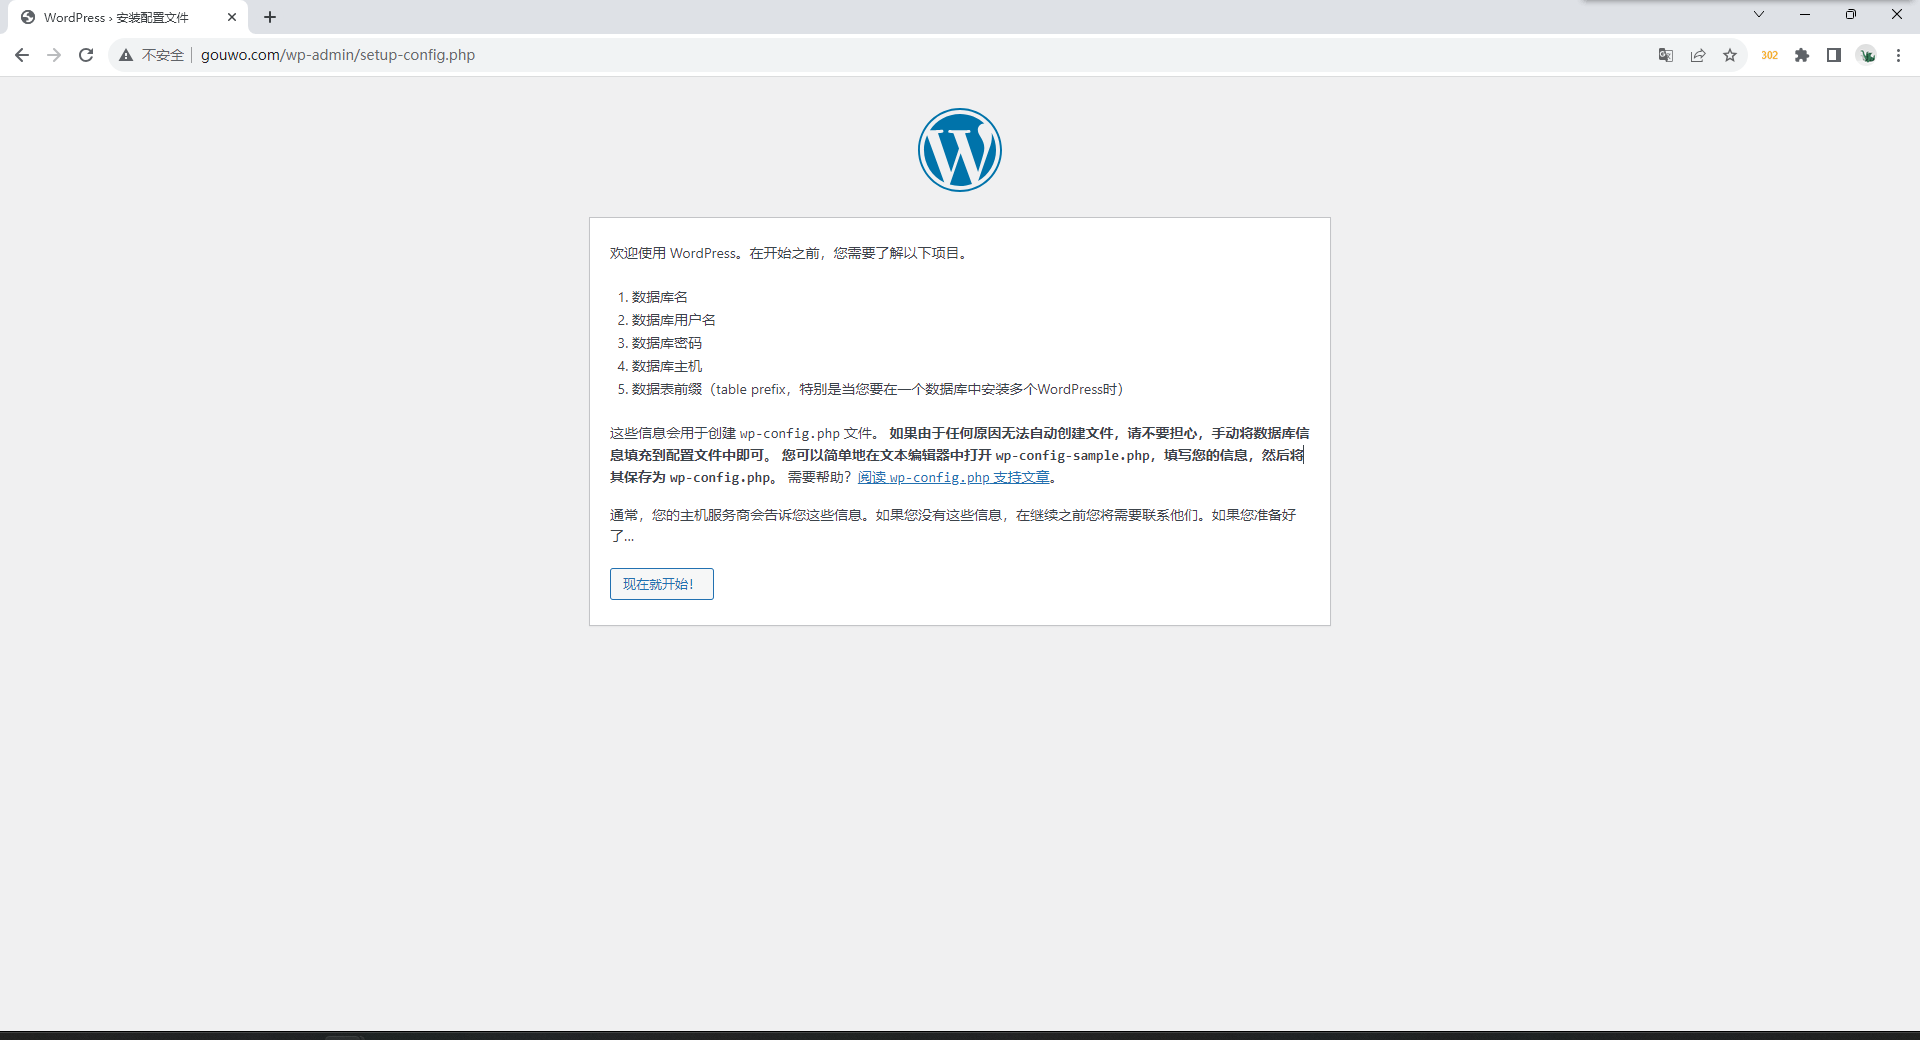
安装数据库
## 数据库是C/S结构
## 默认端口:3306
# 1.安装mariadb
[root@web01 ~]# yum install -y mariadb-server
# 2.启动数据库并加入开机自启
[root@web01 ~]# systemctl start mariadb
[root@web01 ~]# systemctl enable mariadb
# 3.给MySQL超级管理员用户root设置密码
[root@web01 ~]# mysqladmin -uroot -p password '123'
Enter password: # 回车
# 4.登录数据库
[root@web01 ~]# mysql -uroot -p123
Welcome to the MariaDB monitor. Commands end with ; or \g.
Your MariaDB connection id is 5
Server version: 5.5.68-MariaDB MariaDB Server
Copyright (c) 2000, 2018, Oracle, MariaDB Corporation Ab and others.
Type 'help;' or '\h' for help. Type '\c' to clear the current input statement.
MariaDB [(none)]>
# 5.查看所有库
MariaDB [(none)]> show databases;
+--------------------+
| Database |
+--------------------+
| information_schema |
| mysql |
| performance_schema |
| test |
+--------------------+
4 rows in set (0.00 sec)
# 6.创建wordpress的库
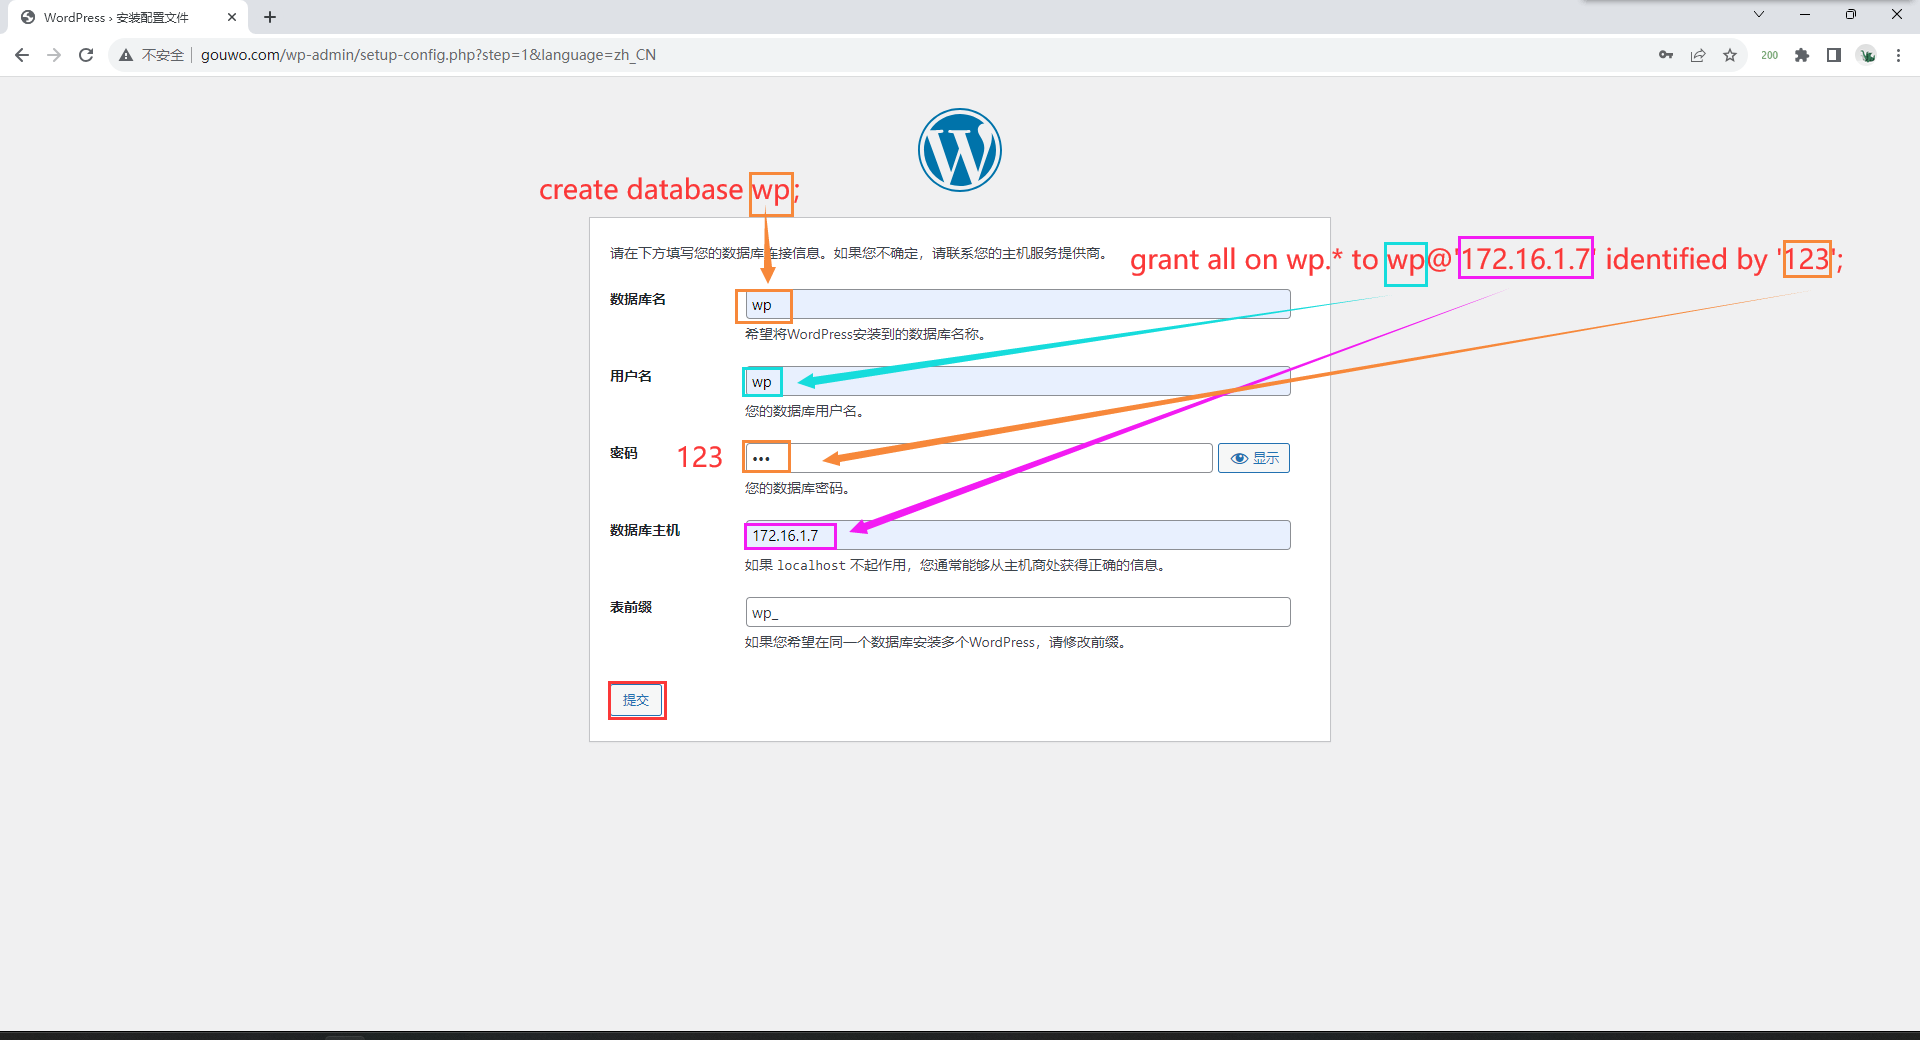
create database 库名字;
MariaDB [mysql]> create database wp;
# 7.创建用户
grant all on 所有库.所有表 to 用户名@'主机IP' identified by '密码';
MariaDB [(none)]> grant all on wp.* to wp@'172.16.1.7' identified by '123';
# 8.查看用户
MariaDB [(none)]> show databases;
+--------------------+
| Database |
+--------------------+
| information_schema |
| mysql |
| performance_schema |
| test |
| wp |
+--------------------+
5 rows in set (0.00 sec)
## 退出数据库方法
MariaDB [(none)]> exit
MariaDB [(none)]> quit
MariaDB [(none)]> \q
Ctrl+C
## MySQL相关库和用户
数据库名字:wp
连接用户名:wp
连接密码:123
连接IP:172.16.1.7
# 9.测试php是否可以跟MySQL建立连接
[root@web01 ~]# vim /blog/cs.php
<?php
$servername = "172.16.1.7";
$username = "wp";
$password = "123";
// 创建连接
$conn = mysqli_connect($servername, $username, $password);
// 检测连接
if (!$conn) {
die("Connection failed: " . mysqli_connect_error());
}
echo "宝贝,php可以连接MySQL...";
?>
<img style='width:100%;height:100%;'
src=https://wodeyumengouwo.com/picture/php_mysql.png>
## 修改nginx配置文件
[root@web01 ~]# vim /etc/nginx/conf.d/wp.conf
server{
listen 80;
server_name www.gouwo.com;
location /{
root /blog;
index index.php index.html;
}
location ~ \.php$ {
root /blog;
fastcgi_pass 127.0.0.1:9000;
#fastcgi_pass unix:/opt/php.sock;
fastcgi_param SCRIPT_FILENAME $document_root$fastcgi_script_name;
include /etc/nginx/fastcgi_params;
}
}
## 重启nginx
[root@web01 ~]# systemctl restart nginx
## 浏览器访问:http://www.gouwo.com/cs.php 看看是否连接成功
## 数据库是C/S结构
## 默认端口:3306
# 1.安装mariadb
[root@web01 ~]# yum install -y mariadb-server
# 2.启动数据库并加入开机自启
[root@web01 ~]# systemctl start mariadb
[root@web01 ~]# systemctl enable mariadb
# 3.给MySQL超级管理员用户root设置密码
[root@web01 ~]# mysqladmin -uroot -p password '123'
Enter password: # 回车
# 4.登录数据库
[root@web01 ~]# mysql -uroot -p123
Welcome to the MariaDB monitor. Commands end with ; or \g.
Your MariaDB connection id is 5
Server version: 5.5.68-MariaDB MariaDB Server
Copyright (c) 2000, 2018, Oracle, MariaDB Corporation Ab and others.
Type 'help;' or '\h' for help. Type '\c' to clear the current input statement.
MariaDB [(none)]>
# 5.查看所有库
MariaDB [(none)]> show databases;
+--------------------+
| Database |
+--------------------+
| information_schema |
| mysql |
| performance_schema |
| test |
+--------------------+
4 rows in set (0.00 sec)
# 6.创建wordpress的库
create database 库名字;
MariaDB [mysql]> create database wp;
# 7.创建用户
grant all on 所有库.所有表 to 用户名@'主机IP' identified by '密码';
MariaDB [(none)]> grant all on wp.* to wp@'172.16.1.7' identified by '123';
# 8.查看用户
MariaDB [(none)]> show databases;
+--------------------+
| Database |
+--------------------+
| information_schema |
| mysql |
| performance_schema |
| test |
| wp |
+--------------------+
5 rows in set (0.00 sec)
## 退出数据库方法
MariaDB [(none)]> exit
MariaDB [(none)]> quit
MariaDB [(none)]> \q
Ctrl+C
## MySQL相关库和用户
数据库名字:wp
连接用户名:wp
连接密码:123
连接IP:172.16.1.7
# 9.测试php是否可以跟MySQL建立连接
[root@web01 ~]# vim /blog/cs.php
<?php
$servername = "172.16.1.7";
$username = "wp";
$password = "123";
// 创建连接
$conn = mysqli_connect($servername, $username, $password);
// 检测连接
if (!$conn) {
die("Connection failed: " . mysqli_connect_error());
}
echo "宝贝,php可以连接MySQL...";
?>
<img style='width:100%;height:100%;'
src=https://wodeyumengouwo.com/picture/php_mysql.png>
## 修改nginx配置文件
[root@web01 ~]# vim /etc/nginx/conf.d/wp.conf
server{
listen 80;
server_name www.gouwo.com;
location /{
root /blog;
index index.php index.html;
}
location ~ \.php$ {
root /blog;
fastcgi_pass 127.0.0.1:9000;
#fastcgi_pass unix:/opt/php.sock;
fastcgi_param SCRIPT_FILENAME $document_root$fastcgi_script_name;
include /etc/nginx/fastcgi_params;
}
}
## 重启nginx
[root@web01 ~]# systemctl restart nginx
## 浏览器访问:http://www.gouwo.com/cs.php 看看是否连接成功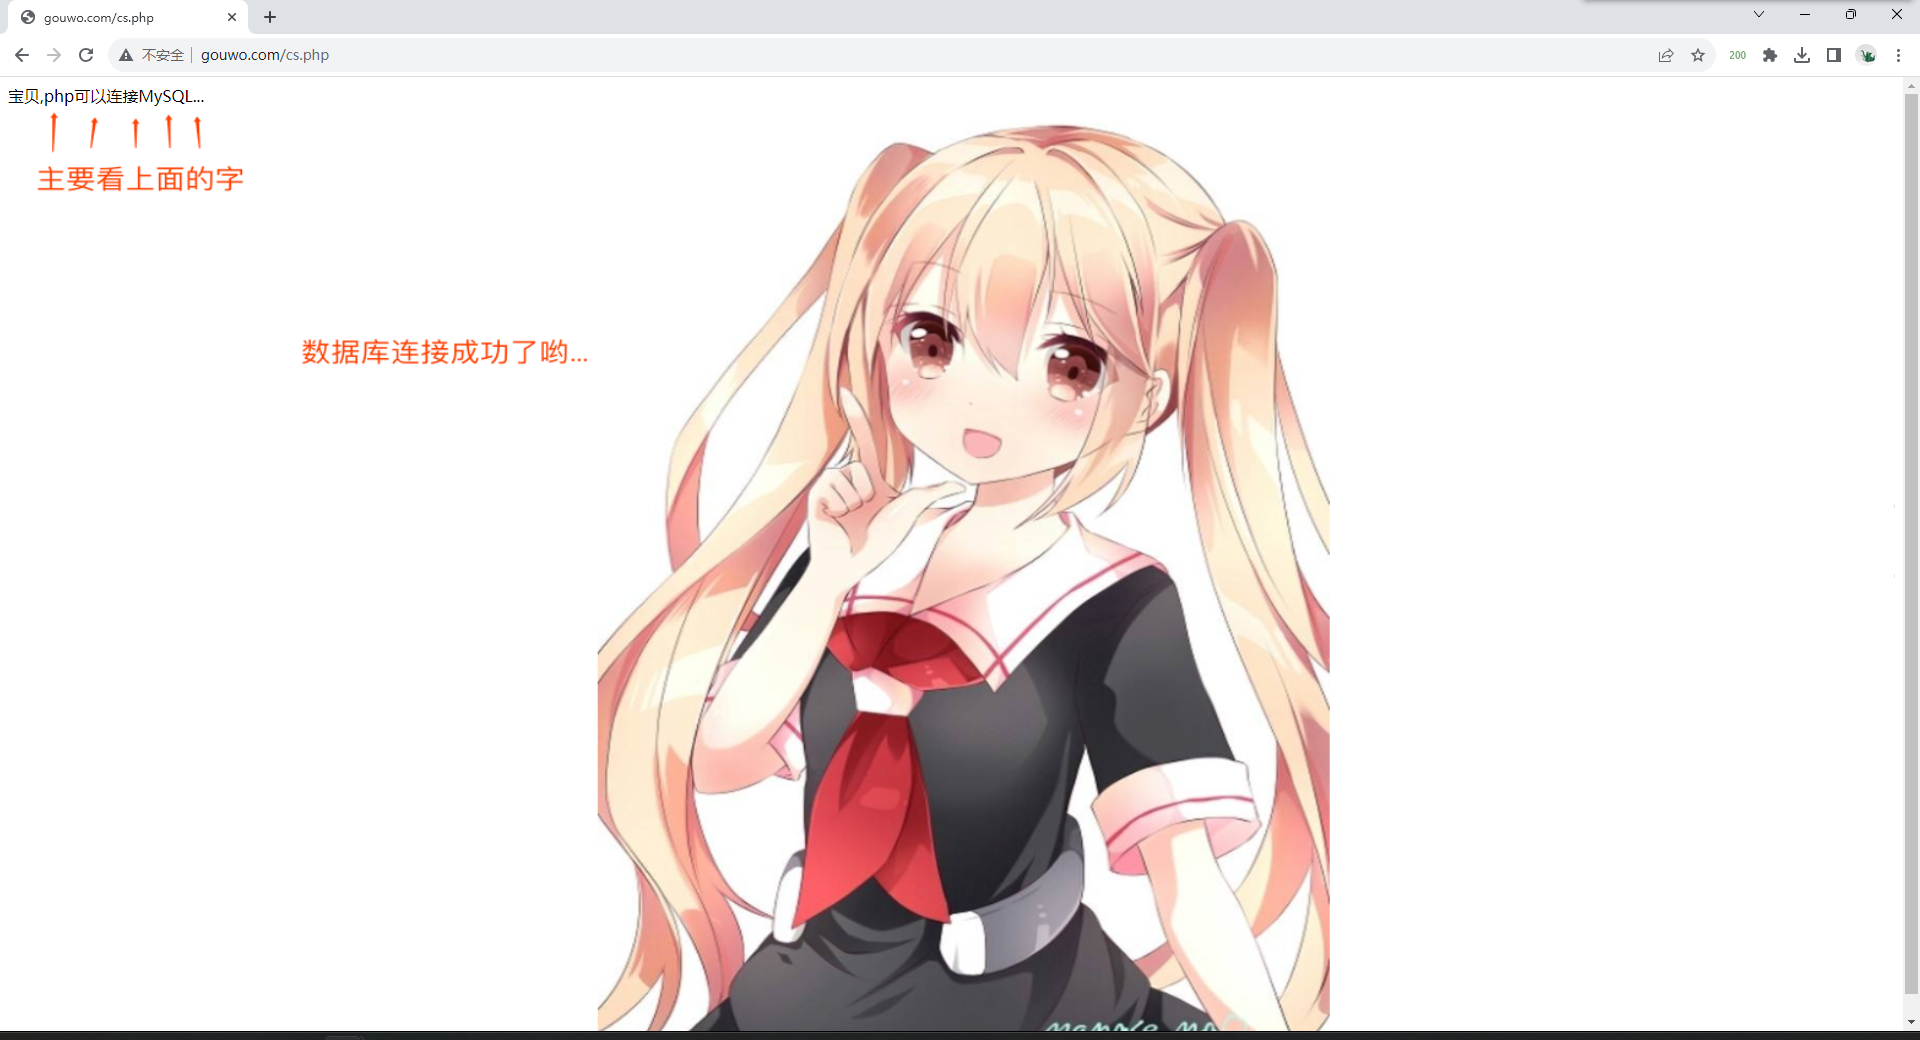
## 连接成功后修改nginx配置文件
[root@web01 ~]# vim /etc/nginx/conf.d/wp.conf
server{
        listen 80;
        server_name www.gouwo.com;
        root /blog/wordpress;

        location /{
                index index.php index.html;
        }

        location ~ \.php$ {
                fastcgi_pass 127.0.0.1:9000;
                fastcgi_param SCRIPT_FILENAME $document_root$fastcgi_script_name;
                include /etc/nginx/fastcgi_params;

        }
}

## 重启nginx
[root@web01 ~]# systemctl restart nginx

## 访问http://www.gouwo.com